Ever wondered how to keep your nails stylish yet practical for a camping trip? I’ve been there. You want something that screams “nature” but also stands up to the rough and tumble of the great outdoors. Dive into this guide for nature-inspired nail art ideas, durable polishes, and quick DIY designs that are perfect for summer camping nails.
From trendy nail shapes to long-lasting gel designs, this article covers it all. Discover whimsical camping nail art inspirations and practical tips for maintaining your nails during outdoor adventures. Plus, explore waterproof and chip-resistant products that ensure your nails stay fab no matter where your summer adventures take you. Ready to elevate your camping nails game? Let’s get started!
Ever wondered how to keep your nails stylish yet practical for a camping trip? I’ve been there. You want something that screams “nature” but also stands up to the rough and tumble of the great outdoors. Here’s the lowdown on nature-inspired nail art ideas that are perfect for your next camping adventure.
### Why Nature-Inspired Nail Art?
Nature-inspired nail art isn’t just about looking good; it’s about blending in with your surroundings and capturing the essence of the great outdoors. Think of it as an extension of your camping gear â functional, yet fabulous.
### Top Nature-Inspired Nail Art Ideas
– **Forest Green and Earthy Browns**: These colours are not only trendy but also practical. They hide dirt and chips better than lighter shades.
– **Forest Green**: Symbolises growth and harmony. Perfect for those long hikes.
– **Earthy Browns**: Represent stability and reliability. Ideal for setting up camp.
– **Floral Patterns**: Who doesn’t love flowers? Floral designs can range from simple daisies to intricate wildflowers.
– **Simple Daisies**: Easy to DIY, and they give off a cheerful vibe.
– **Wildflowers**: A bit more complex but worth it for the detail.
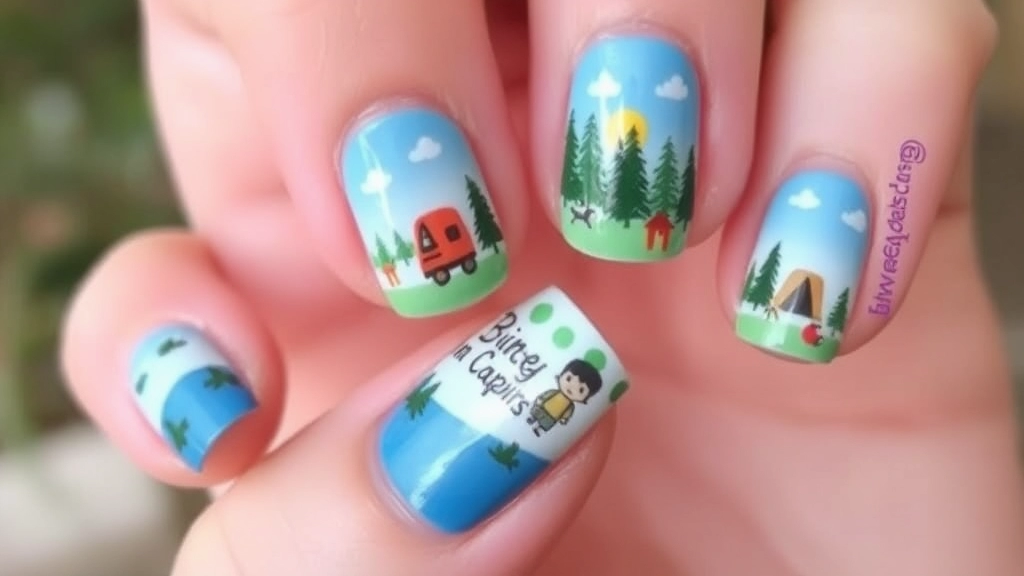
– **Mountain Scapes**: Capture the essence of your adventure with mountain-themed designs.
– **Silhouetted Mountains**: Use dark colours for a striking contrast.
– **Snow-Capped Peaks**: Add a touch of white for that snowy effect.
– **Animal Prints**: Whether it’s a subtle feather or a bold paw print, animal-inspired designs add a fun twist.
– **Feathers**: Symbolise freedom and adventure.
– **Paw Prints**: Perfect for the animal lover in you.
### How to DIY These Designs
You don’t need to be a nail art pro to pull off these designs. Here’s how to get started:
– **Tools You’ll Need**: Nail polish in your chosen colours, a thin brush for detailing, and a top coat.
– **Step-by-Step**:
1. **Prep Your Nails**: Clean, shape, and apply a base coat.
2. **Base Colour**: Apply your chosen base colour (forest green, earthy brown, etc.).
3. **Design**: Use the thin brush to create your design. Don’t worry about perfection; nature isn’t perfect either.
4. **Top Coat**: Seal your design with a top coat to make it last longer.
### Real Talk: What Works and What Doesn’t
Here’s the deal â not all nail art is created equal when it comes to camping. I’ve tried and tested a lot, and here’s what I’ve found:
#### What Works
– **Durable Polishes**: Go for long-lasting formulas.
– **Simple Designs**: Easier to touch up if they chip.
– **Neutral Colours**: Hide dirt better.
#### What Doesn’t
– **Intricate Designs**: They look amazing but are hard to maintain.
– **Light Colours**: Show dirt and chips easily.
Nature-inspired nail art is a fun and creative way to express your love for the outdoors. Whether you’re a seasoned camper or a newbie, these designs are easy to achieve and maintain. So next time you’re packing for a camping trip, don’t forget to pack your nail art supplies too. Trust me, your nails will thank you.
Ready to take your camping nails to the next level? Check out our other tips on [Durable Nail Polishes for Summer Camping Trips](https://summercamp.blog/summer-camp-nails-trendy-tiedye-and-nature-designs/) and [Quick and Easy DIY Camping-Themed Nail Designs](https://summercamp.blog/summer-camp-craft-ideas-for-all-ages/). Let’s keep those nails looking fab, no matter where your adventures take you!
Durable Nail Polishes for Summer Camping Trips
Ever worried about your nail polish chipping halfway through a camping trip?
Yeah, me too.
When you’re out in the wild, the last thing you need is to worry about your nails.
So, let’s talk about durable nail polishes for summer camping trips.
Why Durability Matters
Camping isn’t exactly a spa day.
You’re dealing with:
- Setting up tents
- Cooking over a fire
- Hiking through rough terrain
Your nails are gonna take a beating.
You need a nail polish that can handle the action.
Top Durable Nail Polishes
Here are some rock-solid options that won’t let you down:
- Sally Hansen Miracle Gel: This one’s a trooper. No UV light needed.
- Essie Gel Couture: Lasts up to 14 days. Perfect for a week-long adventure.
- OPI Infinite Shine: Shiny and tough. What more could you ask for?
Application Tips for Extra Durability
Even the best polish needs a solid application.
Here’s how to make it last:
- Clean Nails: Make sure they’re oil-free.
- Base Coat: Don’t skip this. It helps the polish stick.
- Thin Layers: Thick layers chip faster.
- Top Coat: Seal the deal. Reapply every few days.
Real Talk: My Camping Nail Story
Last summer, I went on a week-long camping trip.
I used Essie Gel Couture.
Guess what? Not a single chip.
I was setting up tents, fishing, and even chopping wood.
My nails looked fresh the whole time.
Internal Links for More Tips
Want more camping nail tips? Check out our Quick and Easy DIY Camping-Themed Nail Designs.
Or maybe you’re into Long-Lasting Gel Nail Designs for Summer Outdoors.
Quick and Easy DIY Camping-Themed Nail Designs
Ever found yourself staring at your nails, thinking, “How can I make these look cool for my camping trip without spending hours?” Yep, been there. We all want those Instagram-worthy nails, but who’s got the time? So, let’s dive into some quick and easy DIY camping-themed nail designs that’ll have your nails looking fab in no time.
Why Camping-Themed Nail Designs?
Before we get into the nitty-gritty, let’s address the big question: why even bother with camping-themed nail designs? Well, for starters:
- They’re Fun: Who doesn’t love a bit of whimsy?
- They’re Conversation Starters: Perfect for breaking the ice around the campfire.
- They Show Off Your Personality: Your nails can say a lot about you.
Quick and Easy Designs to Try
- Forest Vibes: Think greens and browns.
- Base Coat: Start with a clear base coat.
- Green Polish: Apply a forest green polish on all nails.
- Tree Silhouettes: Use a thin brush to draw simple tree shapes in brown or black.
- Starry Night: Perfect for those clear camping nights.
- Base Coat: Clear base coat.
- Dark Blue Polish: Apply a dark blue polish.
- Stars and Moons: Use a toothpick or dotting tool to add white dots (stars) and small crescents (moons).
- Campfire Flames: Bring the warmth of the campfire to your nails.
- Base Coat: Always start with a clear base coat.
- Gradient Effect: Use a sponge to dab on red, orange, and yellow polishes for a flame effect.
- Tent Tips: Simple yet effective.
- Base Coat: Clear base coat.
- Neutral Polish: Apply a neutral or light brown polish.
- Tent Shapes: Draw small tent shapes at the tips of your nails using a thin brush and a darker colour.
Tools You’ll Need
- Toothpick or Dotting Tool: Perfect for those tiny details.
- Thin Brush: For drawing lines and shapes.
- Sponge: For gradient effects.
- Top Coat: To seal your masterpiece and make it last.
Pro Tips for DIY Nail Art
- Practice on Paper: Before you go straight to your nails, practice your designs on paper.
- Keep It Simple: Don’t go overboard with details. Simple designs can be just as striking.
- Use Tape: For clean lines, use tape to section off parts of your nail.
Real Talk: Common Worries
You might be thinking, “I’m not an artist,” or “What if I mess up?” Hey, we’ve all been there. The key is to keep it simple and have fun with it. Your nails don’t have to be perfect; they just have to be you.
For more inspiration on summer activities, check out our Summer Camp Arrow Signpost DIY Guide and get creative with our Summer Camp Bulletin Board Ideas.
Trendy Nail Shapes for Outdoor Activities
Ever wondered which nail shapes are best for your outdoor adventures?
I get it.
You want your nails to look fab but also need them to hold up against the elements.
Let’s dive into some trendy nail shapes that are perfect for your next camping trip.
Why Nail Shape Matters
First off, why should you care about nail shape?
Because the wrong shape can lead to breaks, chips, and a whole lot of frustration.
The right shape?
It can make your nails both stylish and durable.
Top Nail Shapes for Outdoor Fun
1. Round Nails
- Why They Rock: Super easy to maintain.
- Best For: Avoiding snags and breaks.
- How to Get Them: File in a circular motion, following the natural curve of your fingertip.
2. Squoval Nails
- Why They Rock: Combines the best of square and oval shapes.
- Best For: Extra strength without sharp edges.
- How to Get Them: File straight across for a square base, then round the edges slightly.
3. Oval Nails
- Why They Rock: Elegant and less prone to breakage.
- Best For: A bit of length without the risk.
- How to Get Them: File into an egg shape, tapering towards the tip.
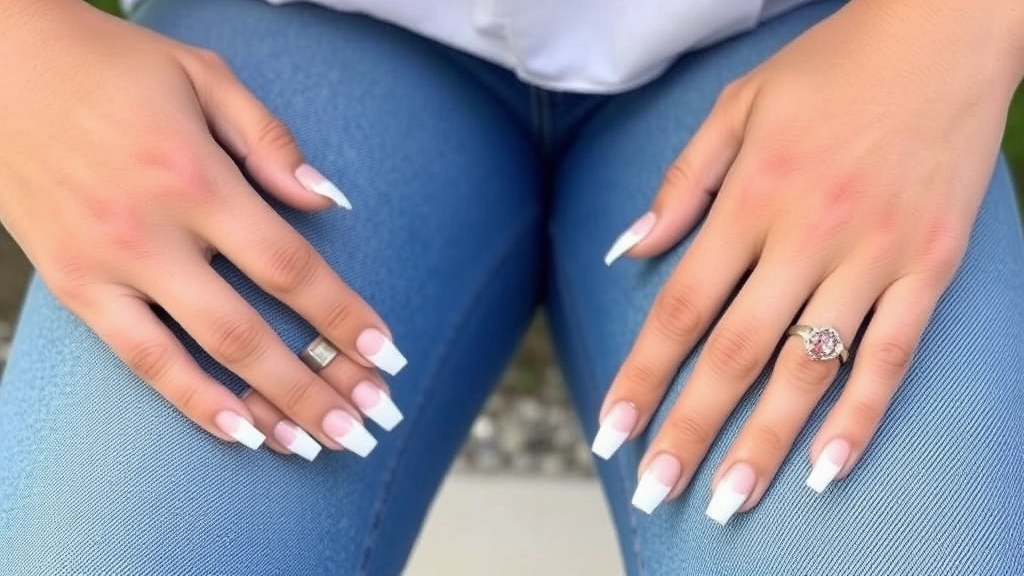
4. Almond Nails
- Why They Rock: Stylish yet practical.
- Best For: A chic look that won’t get in the way.
- How to Get Them: File the sides to taper towards a rounded tip.
Real Talk: My Camping Experience
Last summer, I tried almond nails on a camping trip.
Guess what?
They held up through hiking, fishing, and even setting up a tent.
No breaks, no chips.
Just fabulous nails all week long.
Quick Tips for Nail Shape Maintenance
- Keep a Nail File Handy: A quick touch-up can prevent a small chip from becoming a big break.
- Use a Strengthening Base Coat: It adds an extra layer of protection.
- Moisturise Regularly: Keeps your nails flexible and less likely to snap.
Long-Lasting Gel Nail Designs for Summer Outdoors
Worried about your nails chipping during your summer camping trip? You’re not alone. Many of us love flaunting fabulous nails even when we’re out in the wild. But here’s the real kicker: how do you keep them looking fresh and fabulous in the great outdoors? The answer is simpleâlong-lasting gel nail designs.
Why Gel Nails are Perfect for Camping
Gel nails are a total game-changer. They’re not just about looking good; they’re about staying good. Here’s why they’re perfect for your camping adventures:
- Durability: Gel nails can withstand the wear and tear of outdoor activities. Whether you’re setting up a tent, hiking, or swimming, these nails won’t chip easily.
- Longevity: Unlike regular nail polish, gel nails can last up to three weeks without losing their shine.
- Low Maintenance: Once done, you don’t have to worry about touch-ups. They stay intact, making them ideal for trips where you might not have access to your nail kit.
Top Gel Nail Designs for the Outdoors
Now, let’s get into some killer designs that are both trendy and practical for your summer escapades.
Nature-Inspired Patterns
Think leaves, flowers, and earthy tones. These designs not only blend well with the outdoor vibe but also look super chic.
- Leafy Greens: Opt for shades of green with leaf patterns. It’s subtle yet stylish.
- Floral Accents: A few floral designs on a neutral base can make your nails pop without being too loud.
Minimalist Geometrics
If you’re into something more modern, geometric patterns are your go-to. They’re sleek and sophisticated.
- Simple Lines: A few well-placed lines can make a big impact.
- Subtle Triangles: Small triangles at the base or tips of your nails can add a touch of elegance.
Bold Colours
Don’t shy away from bold colours like deep blues, vibrant reds, or even neon shades. They can add a fun twist to your camping look.
- Solid Colours: Sometimes, a single bold colour can make a statement.
- Colour Blocking: Mix and match complementary colours for a dynamic look.
Pro Tips for Applying Gel Nails
Here are some quick tips to get the best results from your gel nails:
- Prep Your Nails: Make sure your nails are clean and dry before starting. Buff them lightly to create a good base.
- Thin Layers: Apply the gel polish in thin layers. This helps in even curing and reduces the chances of chipping.
- Seal the Edges: Don’t forget to seal the edges of your nails. This adds an extra layer of protection against chips.
Maintaining Your Gel Nails During Camping
Even though gel nails are low maintenance, a little care can go a long way.
Fun and Whimsical Camping Nail Art Inspirations
Ever wondered how to keep your nails looking fab while camping?
Yeah, me too.
We all want to look good, even when we’re roughing it in the great outdoors.
So, let’s dive into some fun and whimsical camping nail art inspirations that are easy, durable, and totally Instagram-worthy.
Why Whimsical Nail Art?
Whimsical nail art isn’t just for the city.
Imagine this: you’re sitting around the campfire, and your nails are the talk of the night.
It’s a real mood booster.
Plus, whimsical designs can be simple and quick to do.
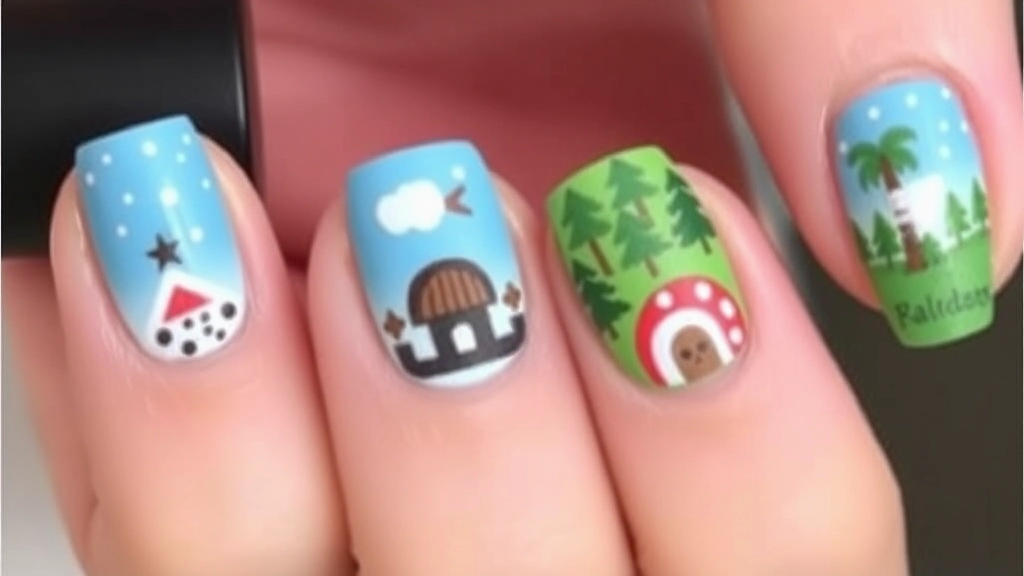
Top Whimsical Camping Nail Art Ideas
- Forest Vibes
- Tree Silhouettes: Simple black trees on a green background.
- Leaf Patterns: Use a thin brush to create delicate leaves.
- Gold Accents: Add a bit of shimmer with gold polish.
- Starry Nights
- Galaxy Nails: Use a sponge to dab on blue, purple, and black polish.
- Star Stickers: Easy to apply and look amazing.
- Moon Phases: Draw tiny moons on a dark background.
- Campfire Flames
- Flame Tips: Red and orange flames on the tips of your nails.
- Marble Effect: Swirl red, orange, and yellow for a fire-like effect.
- Glitter Polish: Add some sparkle to mimic the fire’s glow.
- Animal Tracks
- Paw Prints: Small black paw prints on a neutral background.
- Animal Silhouettes: Tiny bears, deer, or foxes.
- Nature Scenes: Miniature forests or mountains.
How to Make It Last
Camping can be tough on your nails.
But don’t worry, I’ve got some tips.
- Base Coat: Always start with a strong base coat.
- Top Coat: Seal your design with a durable top coat.
- Gel Polish: For extra staying power, go for gel polish.
- Nail Strengthener: Apply it daily to keep your nails strong.
Real Talk: Stories from the Trail
Last summer, I went camping with some friends.
We all decided to do our nails before the trip.
One of my friends did these amazing galaxy nails.
Every night around the campfire, her nails would catch the light, and everyone was obsessed.
It was a small thing, but it made the trip even more memorable.
So, don’t underestimate the power of whimsical nail art.
It’s a fun way to express yourself and make your camping adventure even more special.
Practical Tips for Maintaining Nails During Camping
Ever been worried about your nails while camping? Trust me, I get it. You’re out in the wild, trying to enjoy nature, but you can’t help but think, “How am I going to keep my nails looking decent?” Well, here are some practical tips for maintaining nails during camping that’ll keep your hands in tip-top shape.
Prep Before You Go
First things first, preparation is key. Before you even start packing your tent and sleeping bag, make sure your nails are ready for the adventure.
- Trim and File: Keep your nails short. Long nails are more prone to breaking and chipping. Use a nail file to smooth out any rough edges.
- Moisturise: Hydrate your cuticles and nails. A good hand cream or cuticle oil can work wonders.
- Base Coat: Apply a strong base coat to protect your nails from staining and to add an extra layer of strength.
Gear Up with the Right Products
Next, let’s talk about the products you should bring along. You don’t need a full salon kit, but a few essentials can make a huge difference.
- Nail Clipper and File: These are non-negotiable. A broken nail can be a real pain, so be prepared.
- Hand Sanitiser: Keep those hands clean without needing water. Dirty nails can lead to infections.
- Moisturising Hand Cream: The outdoors can be harsh on your skin. Keep your hands and nails hydrated.
Daily Maintenance Tips
Now, once you’re out there, how do you keep your nails looking good? Here are some daily maintenance tips:
- Wear Gloves: Whether you’re setting up camp, cooking, or hiking, gloves can protect your nails from dirt and damage.
- Avoid Biting or Picking: It’s easy to get into bad habits when you’re out of your usual routine. Stay mindful and avoid biting or picking at your nails.
- Hydrate: Drink plenty of water. Your nails are a reflection of your overall health, and hydration is key.
Emergency Fixes
Accidents happen, even in the great outdoors. Here’s how to handle some common nail emergencies:
- Broken Nail: If you break a nail, file down any rough edges immediately to prevent further damage.
- Hangnail: Use a nail clipper to trim it carefully. Apply some moisturiser to prevent infection.
- Chips and Cracks: A clear topcoat can help seal small chips and cracks, keeping your nails intact until you get back home.
Post-Camping Care
When you’re back from your adventure, give your nails some extra love.
- Deep Clean: Remove any dirt and grime that’s accumulated under your nails.
- Nourish: Apply a nourishing nail treatment or oil to restore moisture and strength.
- Trim and Shape: Give your nails a fresh trim and shape to keep them looking neat.
Keep It Real
Look, maintaining nails during camping isn’t about having a perfect manicure. It’s about keeping them healthy and practical. Remember, you’re out there to enjoy nature, not worry about your nails. But with these tips, you can have the best of both worlds.
So, next time you’re packing for a camping trip, don’t forget these practical tips for maintaining nails during camping. Your nails will thank you, and you’ll spend more time enjoying the great outdoors and less time worrying about broken nails. Happy camping!
For more ideas on how to make your camping experience enjoyable, check out our top tips and gear essentials for summer camping. And if you’re looking for fun activities to do while camping, don’t miss our summer camp game ideas for endless fun!
Waterproof and Chip-Resistant Summer Nail Products
Ever worried about your nail polish chipping during a camping trip?
Yeah, me too.
It’s a bummer when your nails don’t hold up to the great outdoors.
So, let’s talk about waterproof and chip-resistant summer nail products.
Why You Need Them
Camping can be rough on your nails.
From setting up tents to hiking, your hands are in the thick of it.
You need nail products that can keep up.
What to Look For
When choosing nail products for your summer adventures, focus on:
- Durability: Products that promise long-lasting wear.
- Waterproof: Essential for those spontaneous swims.
- Chip-Resistant: Because who has time for touch-ups?
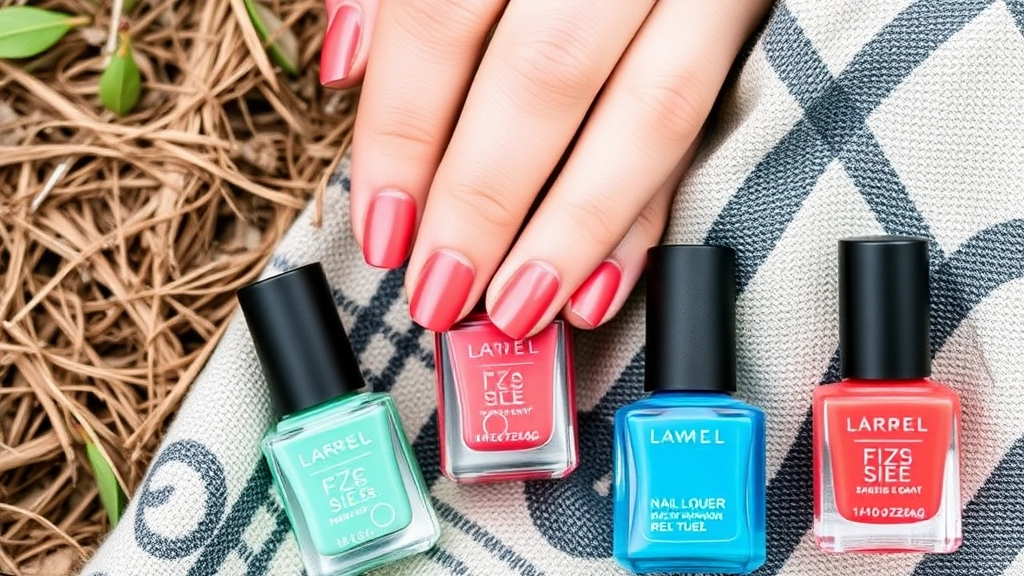
Top Picks
Here are some top-notch options I’ve tried and loved:
- Gel Nail Polishes: These are a game-changer. They last longer and are more resistant to chipping.
- Top Coats: A good top coat can make any polish more durable. Look for ones specifically labelled as “chip-resistant.”
- Waterproof Nail Wraps: If polish isn’t your thing, nail wraps are a solid alternative. They’re easy to apply and last for weeks.
Real Stories
Last summer, I went on a week-long camping trip.
I used a gel polish with a chip-resistant top coat.
Guess what?
My nails stayed perfect the entire trip.
No chips, no fading.
Quick Tips
- Prep Your Nails: Clean and buff your nails before applying any product.
- Apply Thin Layers: Multiple thin layers are better than one thick layer.
- Seal the Edges: Don’t forget to seal the tips of your nails with polish.
Internal Links
- Check out our guide on Durable Nail Polishes for Summer Camping Trips.
- Need inspiration? Browse our Nature-Inspired Nail Art Ideas for Camping Adventures.
Outdoor-Friendly Nail Care for Active Summer Trips
Alright, let’s get real. You’re gearing up for a summer camping trip, but you don’t want your nails to look like they’ve been through a war zone. We all know that camping can be rough on the hands. So, how do you keep your nails looking fresh and fab while you’re out there conquering the great outdoors? Here’s the lowdown on outdoor-friendly nail care for active summer trips.
Common Concerns:
- Will my nails survive the trip?
- How do I keep them from chipping?
- Can I still have cute nails without spending hours on them?
The Basics of Outdoor Nail Care
First things first, let’s talk basics. When you’re out camping, your nails are exposed to dirt, water, and all kinds of rough surfaces. Here’s what you need to do:
1. Prep Before You Go:
- Trim and File: Short nails are less likely to break. Trim them to a manageable length and file the edges to prevent snagging.
- Base Coat: A good base coat can protect your nails from staining and give your polish something to stick to.
2. Choose the Right Products:
- Durable Nail Polishes: Opt for long-lasting, chip-resistant formulas. Brands like OPI and Essie have great options.
- Top Coat: A strong top coat will seal in your polish and add an extra layer of protection.
3. Pack a Mini Nail Kit:
- Nail Clipper and File: For quick fixes.
- Travel-Sized Polish Remover: Just in case you need to start fresh.
- Moisturiser and Cuticle Oil: Keep your nails and cuticles hydrated.
Nail Care Tips While Camping
When you’re out in the wild, the last thing you want to worry about is your nails. Here are some practical tips to keep them in check:
1. Keep Them Clean:
- Use a Nail Brush: A small nail brush can help get rid of dirt and grime.
- Hand Sanitiser: Regular use can keep your hands and nails clean without needing water.
2. Hydrate:
- Moisturise Regularly: Camping can dry out your skin and nails. Use a hand cream or cuticle oil to keep them hydrated.
- Stay Hydrated: Drinking water is crucial for overall health, including your nails.
3. Protect Your Hands:
- Wear Gloves: When doing heavy-duty tasks like setting up tents or gathering firewood, gloves can protect your nails from breaking and chipping.
Real Talk: My Camping Nail Care Story
I remember my first camping trip. I didn’t think twice about my nails, and by the end of the weekend, they were a messâchipped, dirty, and some even broken. Lesson learned. Now, I always prep my nails before heading out and carry a mini nail kit. It makes a world of difference.
Quick Fixes for Nail Emergencies
Sometimes, despite all precautions, things go south. Here’s how to handle nail emergencies:
Minimalist Camping Nail Art for Subtle Summer Vibes
Alright, let’s be real for a sec.
You’re heading out for a camping trip and you want your nails to look fab but not over-the-top, right?
Minimalist camping nail art is your answer.
No fuss, just subtle summer vibes.
Why Go Minimalist?
Camping isn’t exactly nail salon territory.
You need something that:
- Lasts through outdoor activities
- Looks good without constant touch-ups
- Matches the natural, laid-back vibe of camping
Simple Ideas to Try
Here are some easy, minimalist nail art ideas that scream “I’m ready for the outdoors”:
1. Nature Hues:
- Think greens, browns, and blues.
- One solid colour per nail or mix and match.
2. Tiny Details:
- Small leaves or tree designs.
- A single dot or stripe for a clean look.
3. Matte Finish:
- Less shine, more durability.
- Earthy and understated.
How to Keep It Fresh
Minimalist doesn’t mean boring.
Here’s how to add a bit of flair:
- Accent Nails: One nail with a tiny design, the rest plain.
- Mix Textures: Matte and glossy on different nails.
- Neutral Ombre: Light to dark shades of the same colour.
Real Talk: Maintenance Tips
Camping can be rough on your nails.
Here’s how to keep them looking good:
- Pack a Nail File: Quick fixes on the go.
- Use a Top Coat: Adds durability.
- Moisturise: Keep your cuticles from drying out.
Products That Work
Look for these features in your nail products:
- Waterproof: Because you’ll be around lakes and rivers.
- Chip-Resistant: For all the hiking and climbing.
- Quick-Dry: No time to wait around.
If you’re planning to explore more summer camp activities, don’t miss our STEM activities for summer camp fun. For those interested in a more comprehensive camp experience, check out our guide to lifetime summer camp fun for all ages.
FAQs on Summer Camping Nails
Why is durable nail polish important for camping trips?
Camping involves activities like setting up tents, cooking over a fire, and hiking through rough terrain, which can be tough on your nails. Durable nail polish ensures your nails stay intact and look good throughout your trip.
What are some top durable nail polish brands for camping?
Some highly recommended durable nail polishes for camping include:
- Sally Hansen Miracle Gel: No UV light needed and very resilient.
- Essie Gel Couture: Lasts up to 14 days, ideal for week-long trips.
- OPI Infinite Shine: Offers a shiny and tough finish.
How can I make my nail polish last longer during a camping trip?
To ensure your nail polish lasts longer, follow these tips:
- Clean Nails: Make sure your nails are oil-free before applying polish.
- Base Coat: Always use a base coat to help the polish adhere better.
- Thin Layers: Apply thin layers of polish to prevent chipping.
- Top Coat: Use a top coat and reapply every few days to seal your polish.
Which nail shapes are best for outdoor activities like camping?
The best nail shapes for outdoor activities are:
- Round Nails: Easy to maintain and avoid snags and breaks.
- Squoval Nails: Combines the strength of square and oval shapes without sharp edges.
- Oval Nails: Elegant and less prone to breakage.
- Almond Nails: Stylish yet practical for a chic look.
What are some fun and whimsical nail art ideas for camping?
Here are some whimsical nail art ideas perfect for camping:
- Forest Vibes: Tree silhouettes, leaf patterns, and gold accents.
- Starry Nights: Galaxy nails, star stickers, and moon phases.
- Campfire Flames: Flame tips, marble effect, and glitter polish.
- Animal Tracks: Paw prints, animal silhouettes, and nature scenes.
What makes a nail product waterproof and chip-resistant?
Waterproof and chip-resistant nail products are designed to withstand the rigors of outdoor activities. Look for products that promise long-lasting wear, are waterproof, and specifically labeled as chip-resistant.
What are some top waterproof and chip-resistant nail products?
Some top picks include:
- Gel Nail Polishes: These last longer and are more resistant to chipping.
- Top Coats: A good top coat can make any polish more durable. Look for “chip-resistant” labels.
- Waterproof Nail Wraps: Easy to apply and last for weeks, a great alternative to polish.
How can I maintain my nail shape during a camping trip?
To maintain your nail shape, keep a nail file handy for quick touch-ups, use a strengthening base coat, and moisturize regularly to keep your nails flexible and less likely to snap.
Are there any internal resources for more camping nail tips and inspirations?
Yes, you can check out our guides on Durable Nail Polishes for Summer Camping Trips and Nature-Inspired Nail Art Ideas for Camping Adventures for more tips and inspirations.
References
-
Sally Hansen Miracle Gel: This one’s a trooper. No UV light needed.
-
Essie Gel Couture: Lasts up to 14 days. Perfect for a week-long adventure.
-
OPI Infinite Shine: Shiny and tough. What more could you ask for?