Keeping Your Camper Cool in Summer
Ever found yourself sweltering inside your camper during a summer trip, wondering if there’s a better way to keep cool? You’re not alone. In this article, we’ll explore the best way to keep your camper cool in summer, covering practical and effective strategies from parking smartly to using personal cooling items for extra relief. Whether you’re a seasoned camper or a newbie, these tips will help you enjoy your summer adventures without breaking a sweat.
From maximizing shade with strategic parking and reflective window insulation to optimizing airflow with roof vents and fans, we’ve got you covered. We’ll also delve into energy-efficient lighting, outdoor cooking, and the benefits of dehumidifiers. Plus, learn how to enhance your camper’s insulation and make the most of natural shade. Ready to transform your camper into a cool, comfortable oasis? Let’s dive in!
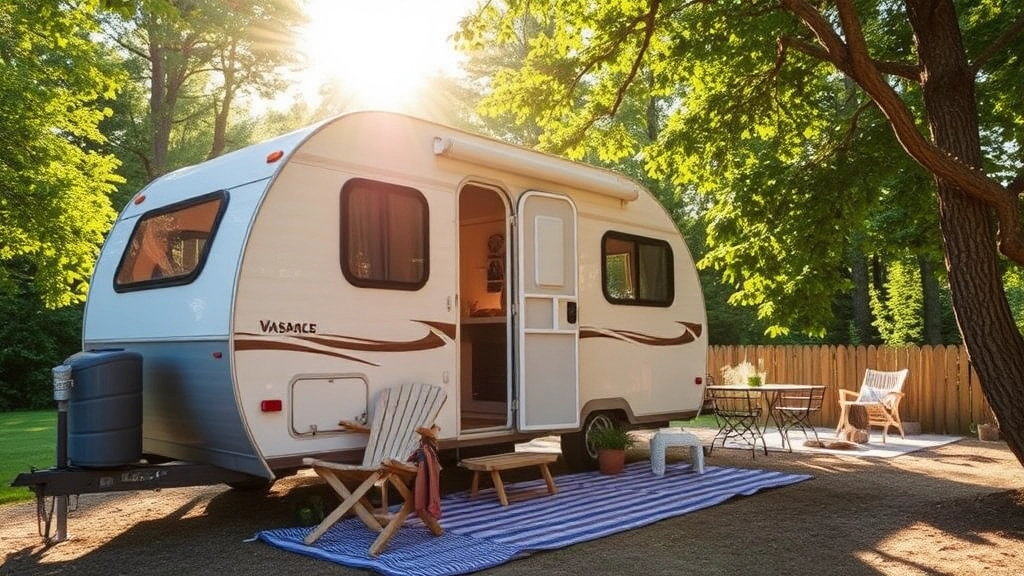
Park Smartly to Maximize Shade
Ever found yourself sweating buckets in your campervan, wondering why it feels like a sauna on wheels? Yeah, we’ve all been there. The struggle is real. But here’s the kicker: you can actually do something about it. Let’s dive into how parking smartly can make all the difference.
Why Shade Matters
First off, let’s talk about why parking in the shade is a game-changer. When you park under the blazing sun, your campervan turns into an oven. The heat gets trapped inside, making it unbearable. But when you park in the shade, you’re already a step ahead in keeping things cool.
Tips for Finding Shade
- Scout the Area: Before you settle in, take a quick stroll or drive around. Look for trees, buildings, or even large rocks that can provide natural shade.
- Use Technology: Apps like Google Maps can help you identify shaded areas. Look for green patches or areas with dense tree cover.
- Time it Right: The sun’s position changes throughout the day. Park in a spot that will be shaded during the hottest parts of the day, usually between 11 AM and 3 PM.
Real-Life Example
I remember this one time, parked at a campsite with no shade in sight. It was a scorcher of a day, and I was roasting inside. Then, I noticed a large tree at the far end of the site. Moved the campervan there, and boomâinstant relief. The temperature inside dropped significantly, making it way more comfortable.
Benefits of Parking Smartly
- Lower Interior Temperature: This is the big one. Parking in the shade can lower the interior temperature by several degrees.
- Protects Your Gear: Direct sunlight can damage your electronics and other gear. Shade helps protect your stuff.
- Saves Energy: Less need for air conditioning means you’re saving on energy, which is always a win.
Quick Checklist
- Look for natural shade: Trees, buildings, rocks.
- Use apps to find shaded areas.
- Park strategically for maximum shade during peak heat hours.
For more tips on staying cool during your summer adventures, check out our essential tips for camping in summer. And if you’re planning your next trip, don’t miss our ultimate guide to summer camp bonfire fun for some unforgettable experiences.
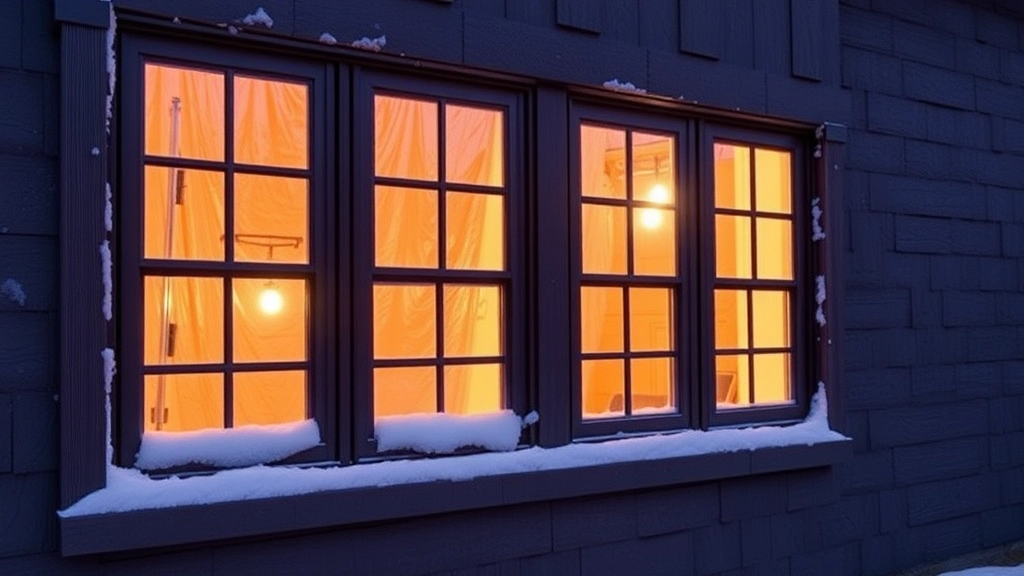
Utilize Reflective Window Insulation
Ever parked your RV in a scorching spot and felt like you were in an oven?
Yeah, me too.
Reflective window insulation can be a game-changer.
Why Bother with Reflective Window Insulation?
Let’s break it down.
Reflective window insulation does a few things:
- Blocks Heat: Keeps the sun’s rays from turning your RV into a sauna.
- Saves Energy: Less strain on your AC means less energy used.
- Boosts Comfort: A cooler RV makes for a happier you.
How to Use Reflective Window Insulation
It’s simple, really.
Here’s what you need to do:
- Measure Your Windows: Get the dimensions right. Trust me, you don’t want to eyeball this.
- Cut the Insulation: Use a sharp utility knife. Clean cuts make for better coverage.
- Attach the Insulation: Use Velcro strips or suction cups. Easy to put up, easy to take down.
Pro Tips for Maximum Effectiveness
- Cover All Windows: Don’t skip any. Even the small ones matter.
- Double Up: For windows that get a lot of sun, consider double layers.
- Check for Gaps: Make sure there are no gaps where heat can sneak in.
Real Talk: Does it Really Work?
Absolutely.
I’ve seen the difference firsthand.
Before using reflective insulation, my RV felt like a furnace.
After, it was like stepping into a cool oasis.
Optimize Roof Vents and Fans for Airflow
Ever wondered why your RV feels like a sauna on wheels during the summer? Yeah, me too. It’s like living in a metal box under the sun. But here’s the kicker: optimizing roof vents and fans for airflow can make a world of difference. Let’s break it down so you can enjoy your travels without feeling like you’re melting.
Why Roof Vents and Fans Matter
First off, let’s talk about why this is so crucial. Your RV’s roof vents and fans are like the lungs of your vehicle. They help circulate air, keeping it fresh and cool. Without proper airflow, you’re basically cooking yourself inside. Not fun, right?
Key Steps to Optimize Airflow
So, how do we get this airflow thing right? Here are some practical tips:
- Install High-Quality Roof Vents: Not all vents are created equal. Go for ones that are designed to move a lot of air. Look for features like built-in fans and adjustable covers.
- Use Vent Covers: These allow you to keep vents open even when it’s raining. More airflow, less hassle.
- Strategic Fan Placement: Place fans in areas where air tends to stagnate. Think kitchen, bathroom, and sleeping areas.
- Dual-Fan Setup: One fan pulls air in while another pushes it out. This creates a constant flow of fresh air.
Real-World Example
Let me share a quick story. I was on a road trip through the Arizona desert last summer. The heat was unbearable, and my old vent fan just wasn’t cutting it. I upgraded to a high-quality vent fan with a rain cover and added a second fan in the bedroom area. The difference was night and day. My RV went from a sweatbox to a comfortable living space.
Maintenance Tips
Don’t forget, maintenance is key:
- Regular Cleaning: Dust and debris can clog your vents and fans, reducing their efficiency. Clean them regularly to keep the airflow smooth.
- Check for Leaks: A leaky vent can let in hot air, defeating the purpose. Make sure everything is sealed tight.
- Fan Blades: Ensure the fan blades are free of dirt and grime. Dirty blades can slow down the fan, reducing airflow.
Quick FAQs
Q: How often should I clean my roof vents and fans?
A: Aim for every three months. More often if you’re in a dusty area.
Q: Can I install these myself?
A: Absolutely. Most roof vents and fans come with easy-to-follow instructions. If you’re handy with basic tools, you should be good to go.
For more tips on making the most of your summer adventures, check out our guide to exploring bucolic summer camps and learn how to keep your family entertained with our summer camp activity ideas for endless fun.
Upgrade Lighting with Energy-Efficient LED Bulbs

Ever feel like your RV turns into a sauna the second you flip on the lights?
Yeah, me too.
Energy-efficient LED bulbs are a game-changer.
Why?
Because they don’t just save energy—they save you from sweating buckets.
Why Switch to LEDs?
- Less Heat: Traditional bulbs are like mini heaters. LEDs? Not so much.
- Energy Savings: Lower energy consumption means less strain on your RV’s power system.
- Longevity: These bad boys last way longer. Think years, not months.
Real Talk: How to Make the Switch
Upgrading to LED bulbs isn’t rocket science, but here’s how to nail it:
- Identify Your Current Bulbs: Check what type you’re using now.
- Match the Base: Make sure the LED bulbs you buy fit your current fixtures.
- Check the Lumens: Forget watts; focus on lumens to match brightness levels.
- Colour Temperature: Want a cosy vibe? Go for warm white. Need bright light? Cool white is your friend.
The Payoff
Switching to LEDs isn’t just about staying cool. It’s about saving money and extending the life of your RV’s electrical system. Plus, you’ll feel like a sustainability champ.
Story Time
I remember the first time I swapped out my old bulbs for LEDs. I was sceptical, but the difference was night and day. No more sweltering heat every time I turned on a light. And my energy bills? They practically thanked me.
Quick Tips
- Bulk Buy: LEDs are cheaper in packs. Stock up and save.
- Dimmable Options: Want mood lighting? Go for dimmable LEDs.
- Outdoor Use: Don’t forget the exterior lights. LEDs work wonders there too.
Minimize Heat by Cooking Outdoors
Ever feel like your RV turns into a sauna every time you cook a meal? You’re not alone. Cooking indoors can crank up the heat, making your RV feel like an oven. But don’t sweat it! Here’s how you can keep your cool by taking your culinary skills outside.
Why Cooking Indoors Heats Up Your RV
Cooking indoors releases a lot of heat, especially if you’re using the oven or stove. This can make your air conditioning work overtime, leading to higher energy consumption and less comfort. Plus, nobody wants to feel like they’re roasting while preparing dinner.
Benefits of Cooking Outdoors
Cooking outdoors isn’t just a smart move for keeping your RV cool. It also:
- Reduces Indoor Heat: Keeps the heat outside where it belongs.
- Saves Energy: Less strain on your air conditioning system.
- Enhances the Camping Experience: Cooking outside can be a fun and social activity.
Outdoor Cooking Options
There are plenty of ways to cook outside without compromising on meal quality. Here are some options to consider:
- Portable Grills: Easy to set up and perfect for grilling everything from steaks to veggies.
- Camp Stoves: Compact and efficient, ideal for boiling water or frying up breakfast.
- Dutch Ovens: Great for slow-cooking stews or baking bread over an open fire.
- Solar Ovens: Eco-friendly and perfect for sunny days, these ovens use solar energy to cook your food.
- Fire Pits: A classic choice for roasting marshmallows or cooking up a hearty meal.
Tips for Successful Outdoor Cooking
- Prep Ahead: Chop veggies, marinate meats, and get everything ready inside to minimize trips in and out.
- Stay Safe: Make sure your cooking area is well-ventilated and away from flammable materials.
- Use the Right Tools: Invest in good quality, portable cooking equipment to make the process smoother.
- Clean Up: Keep your outdoor cooking area clean to avoid attracting wildlife.
Real-Life Example
Let me tell you about the time I decided to cook a full English breakfast outside. I set up my portable grill and camp stove, and within minutes, I had bacon sizzling and beans bubbling. Not only did I avoid heating up the RV, but I also got to enjoy the fresh morning air and the sounds of nature. It turned a simple meal into a memorable experience.
Minimizing heat by cooking outdoors is a game-changer for RV living. It keeps your RV cooler, saves energy, and adds an extra layer of enjoyment to your camping adventures. So next time you’re planning a meal, consider taking it outside. Your RVâand your comfortâwill thank you. For more tips on enhancing your camping experience, check out our summer camping checklist and learn about the ultimate guide to summer camp bonfire fun.
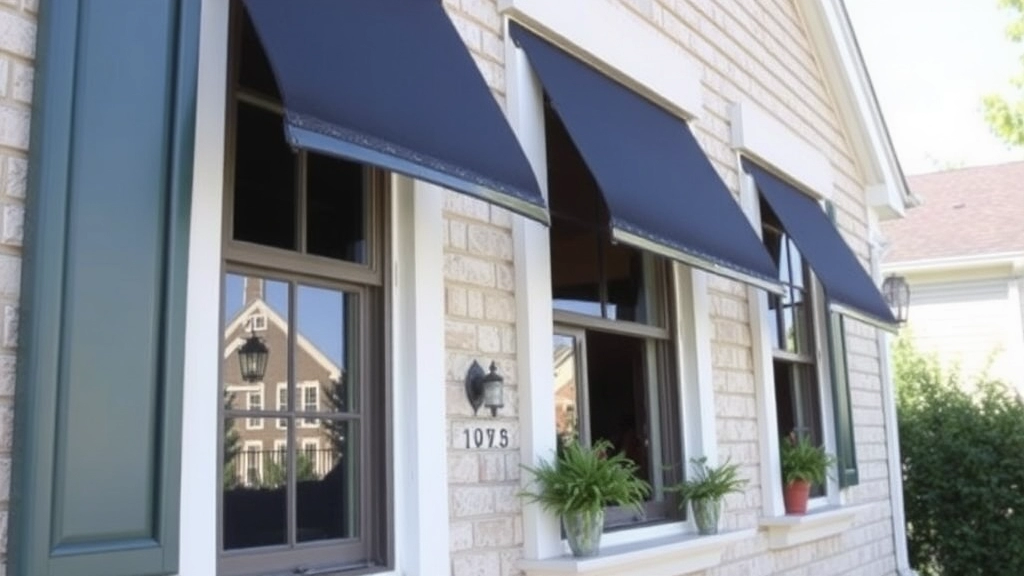
Install Exterior Sunshades for Windows
Ever parked your car on a scorching summer day and felt like you were stepping into an oven?
Yeah, your RV feels the same way.
Exterior sunshades for windows are a game-changer.
They keep the sun out and the cool in.
Why Bother with Exterior Sunshades?
You might be thinking, “Why should I invest in exterior sunshades?”
Here’s why:
- Temperature Control: They block direct sunlight, keeping your RV cooler.
- Energy Efficiency: Your air conditioner won’t have to work overtime.
- Privacy: They give you that extra layer of privacy without shutting out the light completely.
How to Choose the Right Sunshades
Not all sunshades are created equal.
Here’s what to look for:
- Material: Go for high-quality, UV-resistant fabric.
- Fit: Custom-fit sunshades work best. They cover the entire window and don’t leave gaps.
- Ease of Installation: Look for ones that are easy to install and remove. Velcro or snap-on types are user-friendly.
Installation Tips
Installing these bad boys is easier than you think.
Here’s a quick rundown:
- Measure Your Windows: Get the exact dimensions.
- Select Your Sunshade: Pick one that fits your measurements.
- Install: Follow the manufacturer’s instructions. Usually, it’s a simple snap-on or Velcro process.
Real Talk: My Experience with Sunshades
When I first installed sunshades on my RV, I was sceptical.
But man, did they make a difference.
The inside of my RV felt like a cool oasis compared to the blazing heat outside.
Plus, I didn’t have to crank up the AC all the time.
Regularly Maintain Air Conditioning Units
Ever felt like your RV’s air conditioning unit is just blowing hot air? Yeah, we’ve all been there. It’s a common gripe, especially during those scorching summer months. But here’s the thing: regular maintenance can make a world of difference.
Why Maintenance Matters
First off, let’s get one thing straightâyour air conditioning unit is the heart of your RV’s cooling system. If it’s not working efficiently, you’re basically stuck in a mobile sauna. Regular maintenance isn’t just about comfort; it’s about keeping your unit running efficiently and extending its lifespan.
Basic Maintenance Steps
Now, I’m not talking about anything crazy here. You don’t need to be an HVAC expert to keep your unit in top shape. Here are some simple steps you can take:
- Clean or Replace Filters: Dirty filters restrict airflow, making your unit work harder than it needs to. Check and clean them every month, and replace them if they’re worn out.
- Inspect the Coils: Over time, the coils can get dirty and reduce efficiency. A quick clean can improve airflow and cooling.
- Check the Thermostat: Make sure it’s calibrated correctly. Sometimes, a simple adjustment can make a huge difference.
- Clear the Vents: Blocked vents can restrict airflow. Ensure nothing is obstructing them.
Stories from the Road
I remember this one time, we were in the middle of a heatwave, and our AC just stopped working. Turns out, the filter was so clogged it could’ve been a bird’s nest. A quick clean, and we were back to chilling in no time. For more tips on how to keep cool during summer, check out our affordable summer camp costs tips and options.
Pro Tips for Longevity
- Regular Inspections: Schedule a professional inspection at least once a year. They’ll catch issues you might miss.
- Use a Surge Protector: Power surges can damage your AC unit. A surge protector can save you from costly repairs.
- Keep It Covered: When not in use, cover your unit to protect it from debris and weather conditions. For more advice on summer maintenance, visit our summer camping captions guide.
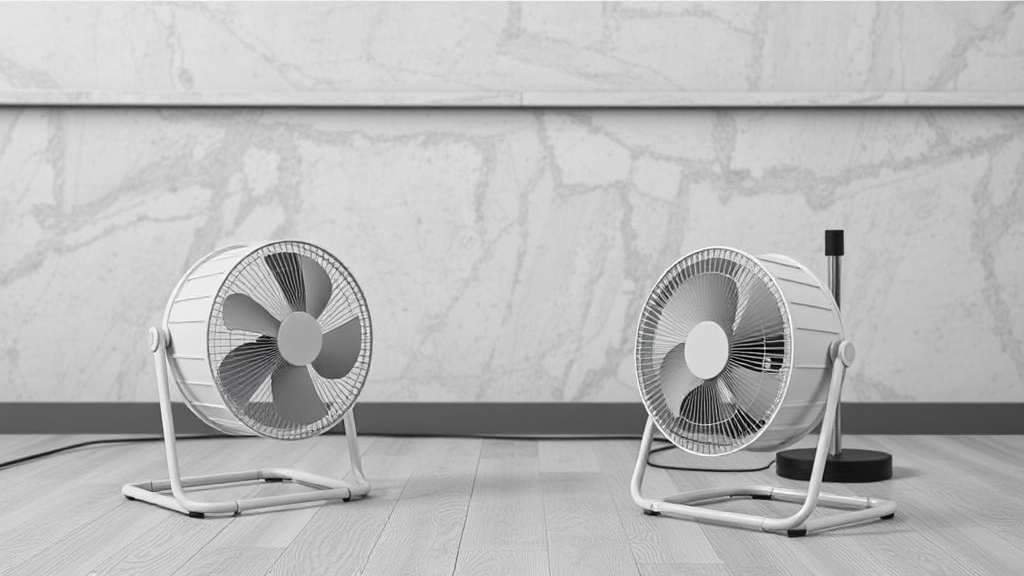
Use Portable Fans Strategically
Ever feel like your RV turns into an oven during the summer?
You’re not alone.
Keeping your space cool without breaking the bank can be a real challenge.
But let me tell you, using portable fans strategically can be a game-changer.
Why Portable Fans?
Portable fans are lightweight, easy to move around, and don’t use much energy.
They’re a quick fix when you’re roasting inside your RV.
Placement Matters
Where you place these fans makes all the difference.
Here’s how to get the most out of them:
- Near Windows: Set up fans near windows to pull in cooler air from outside.
- Cross-Ventilation: Place fans on opposite sides of the RV to create a breeze that flows through the entire space.
- Near Heat Sources: Position fans near stoves or other heat-producing appliances to blow hot air out.
Types of Portable Fans
Not all fans are created equal.
Here are a few types you might want to consider:
- Box Fans: Great for moving a lot of air but can be bulky.
- Tower Fans: Sleek and efficient, perfect for tight spaces.
- Clip-On Fans: Attach these to shelves or counters for targeted cooling.
Real-Life Example
Last summer, I was parked at a campsite with zero shade.
It felt like I was living in a sauna.
I placed a tower fan near the window and a box fan at the opposite end.
The cross-ventilation was a lifesaver.
Extra Tips
- Battery-Operated Fans: Useful for boondocking or when you’re off the grid.
- Misting Fans: Add a bit of water to cool the air even more.
- Oscillating Fans: These rotate to cover a larger area.
Got any fan tips of your own?
Share them below!
By the way, if you’re looking for more ways to keep your RV cool, check out our guide on Optimize Roof Vents and Fans for Airflow.
Stay cool and happy travels!
Enhance Ventilation with Roof and Ceiling Fans
Ever felt like your RV is a sauna on wheels? Yeah, me too. Let’s talk about how to enhance ventilation with roof and ceiling fans to keep that rig cool and comfy.
Why Bother with Roof and Ceiling Fans?
You might be wondering, “Why do I need roof and ceiling fans when I’ve got A/C?” Well, here’s the deal:
- Energy Efficiency: Fans use way less power than your air conditioning unit.
- Air Circulation: They keep the air moving, reducing hot spots.
- Cost Savings: Lower energy use means lower bills.
Types of Fans to Consider
- Roof Vent Fans: These are great for pulling hot air out of your RV.
- Ceiling Fans: Perfect for circulating air and creating a breeze.
Installation Tips
- Placement Matters: Install roof vent fans in areas where heat tends to build up, like the kitchen or bathroom.
- Dual Functionality: Some fans can both intake and exhaust air. These are gold for versatile cooling.
- Power Source: Make sure your fans are compatible with your RV’s power setup, whether it’s 12V or 110V.
How to Maximize Efficiency
- Use in Tandem: Run your roof vent fan to pull hot air out and a ceiling fan to circulate cooler air.
- Timing is Key: Turn on the fans in the early morning or late evening when it’s cooler outside.
- Cross Ventilation: Open windows opposite the fans to create a cross breeze.
Real-Life Example
Last summer, I was parked in a sweltering desert. My A/C was struggling, so I installed a roof vent fan and a ceiling fan. Game changer! I could actually enjoy being inside my RV without feeling like I was melting.
Practical Tips
- Regular Cleaning: Dust and grime can clog your fans, reducing efficiency.
- Check Seals: Ensure there are no leaks around the fan mounts.
- Adjust Speed: Many fans come with variable speeds. Use higher speeds for quick cooling and lower speeds for gentle circulation.
Troubleshooting Common Issues
- Noise: If your fan is noisy, check for loose parts or debris.
- Power Issues: Make sure your electrical connections are solid and your battery is charged.
For more tips on enhancing your summer experience, check out our summer camp newsletter themes and discover the top animation summer camps for kids.
Avoid Heat-Producing Appliances During Peak Hours

Ever find yourself sweating buckets in your camper during the hottest part of the day?
Yeah, me too.
Let’s talk about how to avoid heat-producing appliances during peak hours.
Why It’s Important
Using appliances like ovens, stoves, and even some electronics during peak heat hours can turn your camper into a sauna.
No one wants that.
Peak Hours Defined
Peak hours are generally between 11 AM and 4 PM.
That’s when the sun is blazing and your camper is most vulnerable to heat buildup.
What to Avoid
- Ovens and Stoves: These are the biggest culprits. Cooking a meal can spike the internal temperature by several degrees.
- Electronics: Laptops, TVs, and even some chargers can generate surprising amounts of heat.
- Lights: Incandescent bulbs are heat factories. If you haven’t switched to LEDs yet, now’s the time.
Easy Alternatives
- Cook Outdoors: Use a portable grill or campfire. Keeps the heat outside where it belongs.
- Cold Meals: Think salads, sandwiches, or anything that doesn’t require cooking.
- Unplug Electronics: Only use what you absolutely need. Your phone can charge later.
Real-Life Example
Last summer, I decided to bake a pizza at 2 PM.
Bad idea.
The camper felt like an oven for hours.
Lesson learned: cook in the morning or evening.
Quick Tips
- Plan Your Meals: Prep in the cooler hours.
- Use a Slow Cooker: These can be set outside and won’t heat up your space.
- Switch to LEDs: They use less energy and produce less heat.
Got any other tips for keeping cool?
Share them in the comments!
Check out our guide on Optimizing Roof Vents and Fans for Airflow to further beat the heat.
Also, learn how to Minimize Heat by Cooking Outdoors for more cool cooking ideas.
Place Ice or Cooling Devices Near Fans
Ever found yourself sweating bullets inside your caravan, even with the fan cranked up to max? Yeah, me too. So, let’s talk about a simple hack that can make a world of difference: placing ice or cooling devices near fans.
Why This Works
Here’s the deal: fans are great for circulating air, but they don’t actually cool the air. They just move it around. By placing a bowl of ice or a cooling device in front of your fan, you’re essentially creating a DIY air conditioner. The fan blows air over the ice, which cools it down before it hits you. It’s like a breath of fresh, chilly air on a scorching day.
How to Do It Right
Alright, let’s break this down into easy steps:
- Grab a Shallow Bowl or Tray: You want something wide enough to hold a good amount of ice but shallow enough to let the air flow over it easily.
- Fill It with Ice or Frozen Packs: You can use regular ice cubes, frozen water bottles, or those reusable ice packs. The key is to keep it simple and effective.
- Place It in Front of the Fan: Position the bowl or tray right in front of your fan. Make sure the fan is on a stable surface to avoid any mishaps.
- Turn on the Fan: Switch on the fan and let it blow the cool air your way. You’ll feel the difference almost immediately.
- Replace the Ice as Needed: Depending on how hot it is, you might need to replace the ice every couple of hours. Keep a stash in your freezer for quick swaps.
Pro Tip: For an extra cooling boost, add a few drops of essential oils like peppermint or eucalyptus to the ice. Not only will it cool you down, but it’ll also make your space smell amazing.
Real-Life Example
Let me share a quick story. Last summer, I was camping in Devon during a heatwave. My caravan turned into a sauna, and the fan was just blowing hot air around. I remembered this ice trick and decided to give it a shot. I filled a baking tray with ice cubes and placed it in front of the fan. Within minutes, the temperature inside dropped noticeably. It was like magic. My mates were so impressed that they all started doing it too. We ended up having a much cooler and more comfortable trip, all thanks to a bit of ice and a fan.
Internal Linking Opportunity
Looking for more ways to beat the heat in your caravan? Check out our section on decoration ideas for a fun vibe for another simple yet effective tip. Also, if you’re planning your next trip, don’t miss our essential packing guide to make sure you have everything you need.
Use Dehumidifiers to Improve Comfort

Feeling sticky and uncomfortable in your space?
Humidity can be a real pain, especially when you’re trying to stay cool.
Let’s talk about how dehumidifiers can make a world of difference.
Why Bother with a Dehumidifier?
Humidity makes everything feel hotter.
It’s like wearing a wet blanket in the middle of summer.
A dehumidifier pulls that extra moisture out of the air.
Less moisture means less sweat sticking to your skin.
How to Use a Dehumidifier Effectively
Placement is Key
- Put it in the room you use the most.
- Bedrooms and living rooms are prime spots.
Size Matters
- Small room? Small dehumidifier.
- Big room? You guessed it, go bigger.
Maintenance
- Empty the water tank regularly.
- Clean the filter to keep it running smoothly.
Benefits You’ll Notice
Better Sleep
- Less humidity means you can sleep without waking up drenched in sweat.
Healthier Air
- Reduces mold and mildew.
- Say goodbye to that musty smell.
Energy Efficiency
- Your AC won’t have to work as hard.
- Lower energy bills? Yes, please.
Real Talk: My Experience
I used to wake up feeling like I’d run a marathon in my sleep.
Got a dehumidifier, and it was a game-changer.
No more sticky sheets or sweaty mornings.
Quick Tips for Maximum Comfort
Combine with Fans
- Place a fan near the dehumidifier.
- Better air circulation means quicker results.
Use During Peak Humidity Hours
- Early morning and late evening are usually the worst.
- Run it during these times for best results.
Monitor Humidity Levels
- Aim for 30-50% humidity.
- Too dry isn’t good either.
Wrap-Up
Dehumidifiers are a simple, effective way to improve comfort.
Less humidity equals a happier you.
Trust me, it’s worth the investment.
Got any questions or tips of your own?
Drop them in the comments below!
Stay cool and comfortable, folks!
Plan for Natural Shade with Trees or Awnings
Ever feel like your RV is an oven on wheels? Yeah, me too. The sun can turn your cosy home-on-wheels into a sauna faster than you can say “road trip.” So, how do we combat this? Natural shade. You heard me right. Trees and awnings can make a world of difference. Let’s dive into how you can plan for natural shade and keep your RV cool.
Why Natural Shade Matters
First off, why should you even bother with natural shade? Here’s the deal:
- Reduces Heat: Direct sunlight can spike the temperature inside your RV. Shade keeps it cooler.
- Protects Your RV: UV rays can damage your RV’s exterior and interior over time. Shade prolongs its life.
- Energy Efficiency: Less heat means your air conditioning doesn’t have to work as hard, saving you energy and money.
Finding the Perfect Spot
When you roll into a campsite, look around. Trees are your best friends. Here’s what I do:
- Scout the Area: Before you park, take a walk and find a spot with good tree coverage.
- Consider the Sun’s Path: Remember, the sun moves. What’s shady in the morning might be sunny in the afternoon. Plan accordingly.
- Check for Hazards: Make sure the trees are healthy. You don’t want a branch falling on your RV.
Using Awnings
No trees? No problem. Awnings are the next best thing. Here’s how to make the most of them:
- Install Retractable Awnings: These are great because you can adjust them based on the sun’s position.
- Use Reflective Materials: Some awnings come with reflective surfaces that bounce the heat away.
- Extend Fully: Make sure you extend your awning fully to cover as much area as possible.
Combining Trees and Awnings
Why not use both? Here’s a combo strategy:
- Park Near Trees: Use the natural shade for the bulk of the day.
- Deploy Awnings: When the sun shifts, extend your awnings to cover the exposed areas.
Real-Life Example
Let me tell you about a trip I took last summer. We parked our RV in a spot with a couple of tall oaks. The temperature inside stayed a good 10 degrees cooler than the neighbouring RVs parked in full sun. We also used our awning to cover the side that got the afternoon sun. It was like having our own little oasis.
Quick Tips for Maximum Shade
- Early Bird Gets the Shade: Arrive early to snag the best spots.
- Portable Shade: Consider portable shade options like pop-up canopies.
- Check Regulations: Some campsites have rules about where you can park and set up awnings.
Planning for natural shade is a game-changer. It’s simple, effective, and can make your RVing experience so much more comfortable. So next time you’re setting up camp, think about where the shade is. Trust me, your future self will thank you.
For more tips on making your camping experience enjoyable, check out our guide on summer camping gear tips and fun activities. If you’re planning a trip with kids, don’t miss our article on summer camp packing list essentials to ensure you have everything you need.
Improve Underbelly and Door Insulation
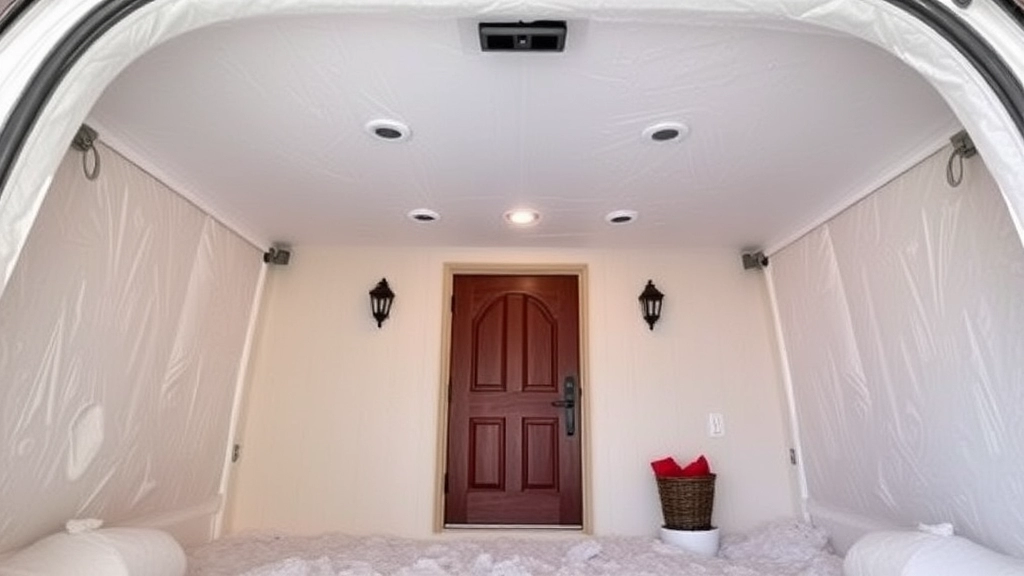
Ever wondered why your RV feels like an oven in the summer and a freezer in the winter?
The answer is simple: poor insulation.
Let’s fix that.
Why Bother with Underbelly and Door Insulation?
Because it makes a massive difference.
Better insulation means:
- A cooler RV in the summer.
- A warmer RV in the winter.
- Less strain on your air conditioning and heating systems.
- More money saved on energy bills.
Start with the Underbelly
The underbelly is often overlooked, but it’s crucial.
Here’s what you can do:
- Install Insulation Sheets: Get some high-quality insulation sheets. Attach them to the underside of your RV. Easy and effective.
- Seal Gaps and Cracks: Use spray foam or sealant. Cover every gap and crack. This stops unwanted air from sneaking in or out.
- Add Skirting: Skirting not only insulates but also protects against wind and debris. It’s a win-win.
Don’t Forget the Doors
Doors are another weak spot.
Here’s how to beef them up:
- Weatherstripping: Install weatherstripping around the edges. This blocks drafts and keeps the temperature steady.
- Insulated Curtains: Hang heavy, insulated curtains over the doors. They add an extra layer of protection.
- Door Insulation Kits: These kits are easy to install and make a big difference. They come with all the materials you need.
Real Talk: My Experience
When I first got my RV, I ignored insulation.
Big mistake.
The summers were unbearable, and the winters were brutal.
After insulating the underbelly and doors, the change was night and day.
No more sweating buckets in July or freezing toes in January.
Quick Tips for Better Insulation
- Use Reflective Insulation: This stuff is gold. It reflects heat away from your RV in the summer and keeps it in during the winter.
- Double Up: If one layer of insulation is good, two are better. Don’t be afraid to double up in key areas.
- Regular Checks: Insulation can degrade over time. Check it regularly and replace it as needed.
Improving your RV’s underbelly and door insulation is a game-changer.
It’s a small investment with huge returns.
So, don’t wait.
Get insulating now and enjoy a more comfortable, energy-efficient RV.
And remember, it’s all about the details.
Each little bit of insulation adds up to a big difference.
Stay cool, stay warm, and stay happy on the road.
Ready to take your RV comfort to the next level?
Start with insulation.
Trust me, you won’t regret it.
Consider Personal Cooling Items for Extra Relief
When preparing for summer camp, it’s essential to think about ways to stay cool, especially if the camp is in a hot climate. Personal cooling items like portable fans, cooling towels, and hydration packs can make a significant difference. For more tips on what to pack, check out our Summer Camping Checklist: Essential Gear and Tips.
Additionally, it’s crucial to be aware of the average costs associated with summer camps. Understanding the financial aspect can help you plan better and ensure a stress-free experience. For detailed information, read our guide on the Average Price of Summer Camps: What to Expect.
FAQs on the Best Way to Keep a Camper Cool in Summer
What is the most effective way to keep my RV cool in the summer?
Utilizing reflective window insulation, upgrading to energy-efficient LED bulbs, installing exterior sunshades, using portable fans strategically, avoiding heat-producing appliances during peak hours, using dehumidifiers, and improving underbelly and door insulation are all highly effective methods.
Why should I use reflective window insulation?
Reflective window insulation blocks heat, saves energy, and boosts comfort by keeping your RV cooler.
How do I install reflective window insulation?
Measure your windows, cut the insulation to size, and attach it using Velcro strips or suction cups. Ensure there are no gaps for maximum effectiveness.
Are energy-efficient LED bulbs really worth it?
Yes, they produce less heat, save energy, and last much longer than traditional bulbs, making them a great investment for your RV.
How do I switch to LED bulbs in my RV?
Identify your current bulbs, match the base, check the lumens for brightness, and choose the right color temperature. Installation is straightforward and can make a big difference.
What are the benefits of exterior sunshades for windows?
They control temperature by blocking direct sunlight, improve energy efficiency, and provide added privacy without completely shutting out light.
How do I choose the right sunshades for my RV?
Look for high-quality, UV-resistant fabric, custom-fit options for better coverage, and easy installation methods like Velcro or snap-on types.
Why should I use portable fans in my RV?
Portable fans are lightweight, energy-efficient, and can be strategically placed to improve airflow and reduce heat buildup.
What types of portable fans work best in an RV?
Box fans, tower fans, and clip-on fans are all good options, depending on your space and cooling needs.
Why should I avoid using heat-producing appliances during peak hours?
Using ovens, stoves, and certain electronics during peak heat hours can significantly increase the internal temperature of your RV, making it uncomfortable.
What are peak hours for heat in an RV?
Peak hours are generally between 11 AM and 4 PM, when the sun is at its strongest and your RV is most vulnerable to heat buildup.
How can a dehumidifier improve comfort in my RV?
A dehumidifier reduces humidity, making the air feel cooler and more comfortable. It also helps prevent mold and mildew, improving air quality.
Where should I place a dehumidifier in my RV?
Place it in the room you use the most, like the bedroom or living room, for maximum effectiveness. Ensure you empty the water tank regularly and clean the filter.
Why is underbelly and door insulation important?
Improving insulation in these areas helps keep your RV cooler in the summer and warmer in the winter, reducing strain on your air conditioning and heating systems.
What materials should I use for underbelly insulation?
High-quality insulation sheets, spray foam, or sealant for gaps and cracks, and skirting for additional protection and insulation.
How can I improve door insulation in my RV?
Install weatherstripping around the edges, use insulated curtains, and consider door insulation kits for better temperature control.
How often should I check my RV’s insulation?
Regularly check your insulation for any signs of wear or degradation and replace it as needed to maintain its effectiveness.
Can combining different cooling methods make a significant difference?
Absolutely. Using a combination of reflective window insulation, LED bulbs, sunshades, portable fans, dehumidifiers, and improved insulation can dramatically improve your RV’s comfort and energy efficiency.
References
-
How to Insulate Your RV Windows
-
LED Lighting
-
RV Sunshade Installation Tips