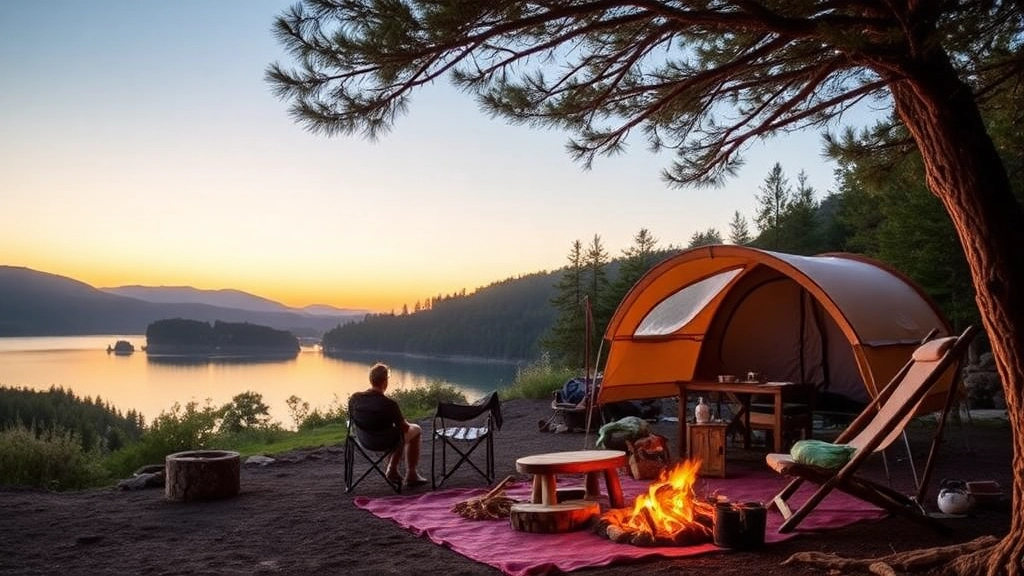
Summer Camping Photography Guide
Summer camping offers a unique opportunity to capture breathtaking images that tell the story of your outdoor adventures. Whether you’re a seasoned photographer or a novice with a smartphone, this guide will help you elevate your camping photography game. From discovering the best summer camping spots to essential gear recommendations, creative ideas, and editing tips, we’ve got you covered.
We’ll explore everything you need to know about capturing stunning summer camping images, including pro tips for high-quality shots, popular hashtags for social media, and common mistakes to avoid. Plus, we’ll recommend the best cameras and lenses for your camping trips and showcase inspiring photo galleries to spark your creativity. So grab your camera, pack your gear, and get ready to create unforgettable memories through your lens!
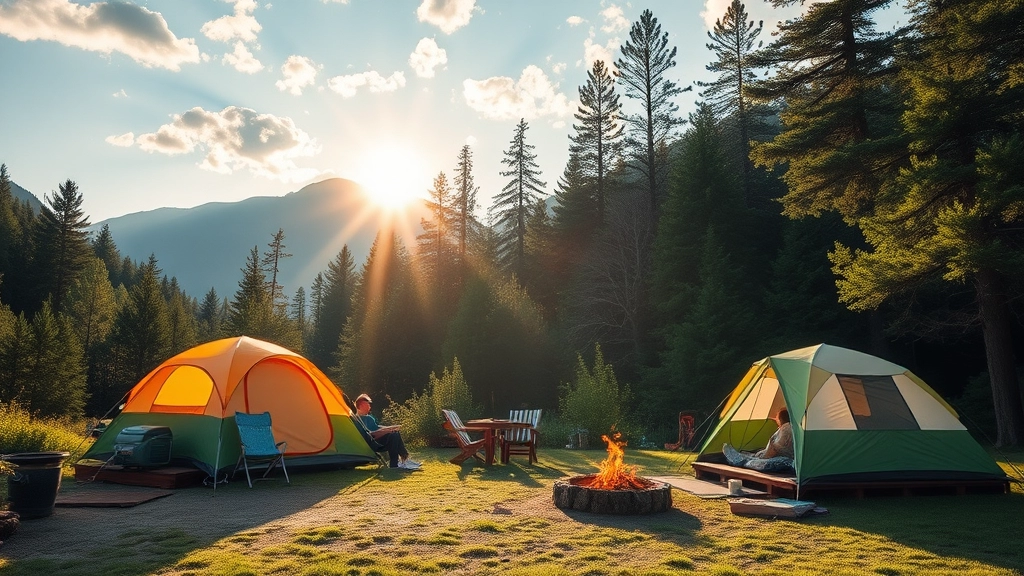
Best Summer Camping Spots for Photography
Alright, let’s cut to the chase. You’re itching to find the best summer camping spots for photography, right? You’re not alone. We’ve all been there, scrolling through endless Instagram feeds, wondering where those jaw-dropping camping photos are taken. I’ve got you covered. Let’s dive into some killer spots that’ll make your camera (and your followers) very happy.
Lake District, England
Why it’s awesome: Think rolling hills, serene lakes, and that perfect golden hour light. The Lake District is a photographer’s dream.
Top spots to snap:
- Derwentwater: Early morning mist over the lake.
- Catbells: A short hike with panoramic views.
- Buttermere: Reflections that’ll make you do a double-take.
Snowdonia, Wales
Why it’s awesome: Rugged landscapes, dramatic mountains, and lush valleys. Snowdonia is like stepping into a fantasy novel.
Top spots to snap:
- Mount Snowdon: Catch the sunrise from the summit.
- Llyn Idwal: Crystal-clear waters surrounded by peaks.
- Fairy Glen: A hidden gem with magical vibes.
Scottish Highlands
Why it’s awesome: Wild, untamed beauty with a side of misty lochs and ancient castles. The Highlands are pure magic.
Top spots to snap:
- Glencoe: Moody landscapes that scream epic.
- Isle of Skye: Fairy pools and rugged coastlines.
- Loch Ness: Maybe you’ll spot Nessie, but the views alone are worth it.
Peak District, England
Why it’s awesome: Gentle hills, winding rivers, and picturesque villages. The Peak District is perfect for those classic countryside shots.
Top spots to snap:
- Mam Tor: Sunrise shots with a view.
- Dovedale: Limestone ravines and stepping stones.
- Chatsworth House: Stunning architecture and gardens.
Dartmoor, England
Why it’s awesome: Mysterious moorlands, ancient woodlands, and granite tors. Dartmoor is a landscape photographer’s playground.
Top spots to snap:
- Haytor: Granite rocks with sweeping views.
- Wistman’s Wood: An ancient, twisted woodland.
- Brentor Church: A church on a hill with epic vistas.
Real Talk: What’s Your Biggest Worry?
I get it. You’re thinking, âWhat if I can’t capture these places like I see them online?â Here’s the deal: it’s not just about the location. It’s about being there at the right time, with the right gear, and having a bit of patience. Trust me, even the pros have off days. But these spots? They’re a solid start.
Pro Tips for Each Location:
- Timing is everything: Sunrise and sunset are your best friends.
- Weather check: Cloudy days can add drama; clear days are great for vibrant colours.
- Pack light: You’ll be hiking, so keep your gear minimal but effective.
Internal Linking Opportunities
While you’re planning your trip, don’t forget to check out our Essential Gear for Capturing Stunning Camping Photos. And once you’ve got your shots, head over to How to Edit and Enhance Camping Photos to make them pop.
Essential Gear for Capturing Stunning Camping Photos
Alright, let’s talk gear.
Ever been out camping, seen a jaw-dropping view, and thought, “Wish I had the right kit to capture this”?
Yeah, me too.
Getting the right gear can make or break your camping photography.
Here’s what you need:
Camera
- DSLR or Mirrorless: These are your go-to options. Think Canon EOS R or Nikon Z6.
- Point-and-Shoot: For those who want simplicity. Try the Sony RX100 series.
- Action Cameras: GoPro HERO series for those adventurous, action-packed shots.
Lenses
- Wide-Angle Lens: Perfect for those sweeping landscapes. Look for something like a 16-35mm.
- Zoom Lens: Great for wildlife or distant mountains. A 70-200mm works wonders.
- Prime Lens: For crisp, clear shots. A 50mm f/1.8 is a solid choice.
Tripod
- Lightweight and Compact: You don’t want to lug around a heavy tripod. Look for carbon fibre options.
- Flexible Legs: Like the Joby GorillaPod, for uneven terrain.
Filters
- Polarising Filter: Cuts through glare and enhances colours.
- ND Filters: For those long exposure shots of rivers and waterfalls.
Accessories
- Extra Batteries: You don’t want to run out of juice in the middle of nowhere.
- Memory Cards: Pack a few, and go for high-speed options.
- Camera Bag: Something weatherproof, like the Lowepro Whistler.
Drone
- DJI Mavic Series: For those epic aerial shots. Easy to carry and great quality.
Cleaning Kit
- Lens Cloths: Keep your lenses spotless.
- Blower: To remove dust and debris.
Personal Stories
I once went on a camping trip without a polarising filter.
Big mistake.
The glare off the lake ruined what could’ve been some stunning shots.
Lesson learned.
Internal Links
Check out our guide on Best Summer Camping Spots for Photography for some inspo on where to use all this gear.
Related Reads
Keywords and LSIs
- Camping photography gear
- Best camera for camping
- Essential photography equipment
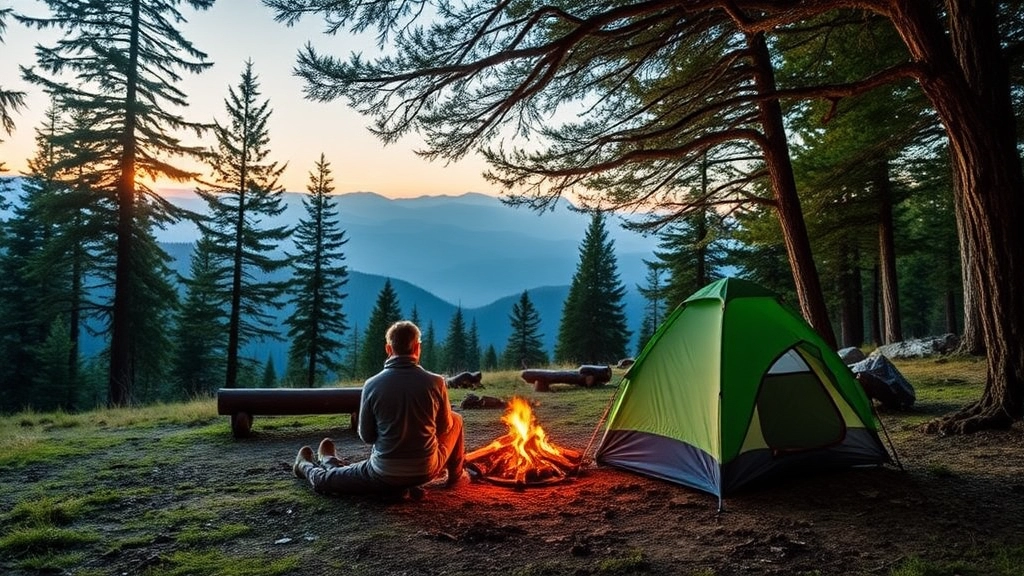
Tips for Taking High-Quality Camping Images
Alright, let’s get straight to it. You’re out in the wild, the scenery is perfect, but your photos? Not so much. How do you make sure you’re capturing the essence of your camping trip? Here are some actionable tips to help you take high-quality camping images.
Start with the Basics: Lighting and Composition
Lighting is everything. You’ve got to work with what nature gives you. The golden hoursâright after sunrise and just before sunsetâare your best friends. The light is soft, the shadows are long, and everything looks magical.
Composition matters. The rule of thirds is a game-changer. Imagine your frame divided into nine equal parts by two vertical and two horizontal lines. Place the key elements of your photo along these lines or at their intersections. Trust me, it works.
Gear Up: Use What You Have, Know What You Need
You don’t need a £5,000 camera to take great photos, but you do need to know your gear. Whether it’s a smartphone or a DSLR, get familiar with its settings.
- Smartphones: Use HDR mode for balanced exposure.
- DSLRs: Play with aperture settings (f/8 is a good start for landscapes).
Steady Hands, Clear Shots
Blurry photos? No thanks. Use a tripod, especially in low light. If you don’t have one, improvise. A rock or a backpack can work in a pinch.
Get Close, but Not Too Close
Details matter, but don’t forget the bigger picture. Mix wide shots with close-ups. Capture the vastness of the landscape and the intricate details of a leaf or a campfire.
Tell a Story with Your Photos
Think of your camping trip as a story. Start with setting the sceneâwide shots of the campsite, the surrounding nature. Then move to the actionâsetting up the tent, cooking over the fire. Don’t forget the candid momentsâlaughs, quiet reflections, the joy of being outdoors.
Use Natural Frames
Nature provides plenty of framesâtree branches, cave openings, even the tent door. Use these to add depth and context to your photos.
Experiment with Angles
Don’t just shoot from eye level. Get low to the ground or find a higher vantage point. Different angles can make a familiar scene look fresh and exciting.
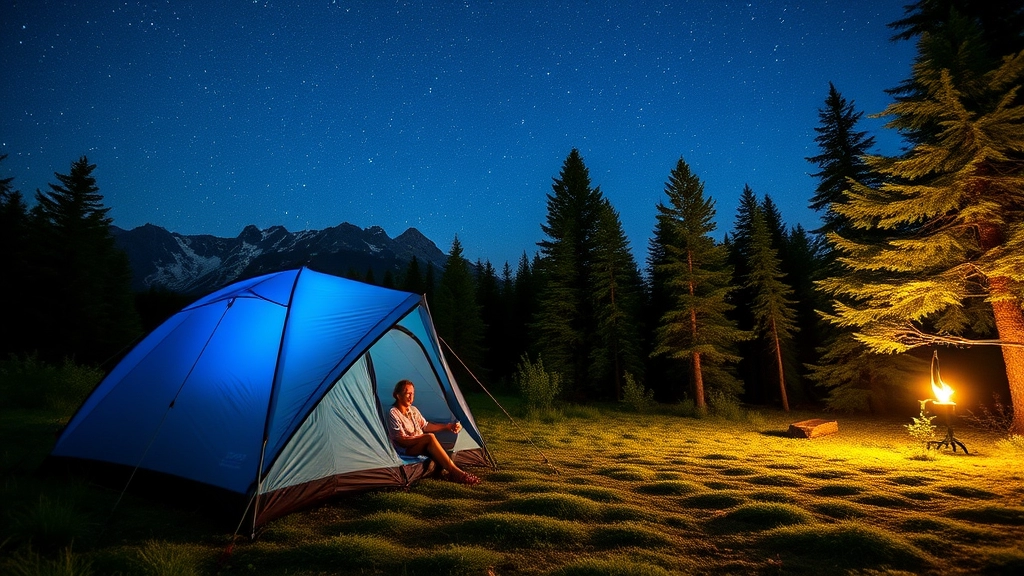
Capture the Night Sky
Camping and starry skies go hand in hand. Use a tripod and a slow shutter speed to capture the stars. A wide-angle lens helps, but even a smartphone can do wonders with the right app.
Include People
People add scale and emotion to your photos. Capture the joy, the struggle, the camaraderie. It makes your photos relatable and engaging.
Keep It Real
Don’t over-edit. Nature is beautiful as it is. Enhance your photos, don’t alter them. Adjust the brightness, contrast, and saturation, but keep it natural.
Real-World Example
Last summer, I was camping in the Lake District. I woke up early to catch the sunrise over Buttermere. I set up my tripod, framed the shot with the mountains reflecting in the lake, and waited for the perfect moment. The result? A stunning photo that captured the serene beauty of the place. It’s now my phone wallpaper.
Quick Recap
- Lighting: Golden hours are key.
- Composition: Use the rule of thirds.
- Gear: Know your camera, use a tripod.
- Variety: Mix wide shots with close-ups.
- Storytelling: Capture the whole experience.
- Natural Frames: Use what’s around you.
- Angles: Experiment for fresh perspectives.
- Night Sky: Use slow shutter speeds.
- People: Add emotion and scale.
- Editing: Enhance, don’t alter.
For more inspiration on capturing the essence of your camping trips, check out our guide on summer camp craft ideas and learn how to make your memories even more special. If you’re looking for ways to enhance your campsite experience, our guide on summer camp building trends can offer some great insights.
Creative Ideas for Summer Camping Photography
Ever wondered how to make your camping photos pop? You’re not alone.
Capture the Golden Hour
The golden hour—that magical time just after sunrise and before sunset—offers the best natural light.
- Soft Light: Perfect for portraits and landscape shots.
- Warm Tones: Adds a dreamy effect to your images.
Play with Perspectives
Don’t stick to eye level. Mix it up!
- Low Angles: Make the scene look grand.
- High Angles: Offer a fresh perspective.
- Close-ups: Capture the details—like morning dew on a leaf.
Use Natural Frames
Nature has its own frames. Use them.
- Tree Branches: Frame your subject with overhanging branches.
- Caves and Arches: Perfect for dramatic shots.
Night Sky Photography
Camping means you’re away from the city lights. Use it to your advantage.
- Star Trails: Set up a long exposure.
- Milky Way: Capture the galaxy in all its glory.
Capture the Campfire
Nothing says camping like a roaring campfire.
- Long Exposure: Get the dancing flames.
- Silhouettes: Capture people around the fire.
Action Shots
Get those candid moments.
- Hiking: Snap those uphill struggles and downhill runs.
- Fishing: Capture the moment they reel in a big catch.
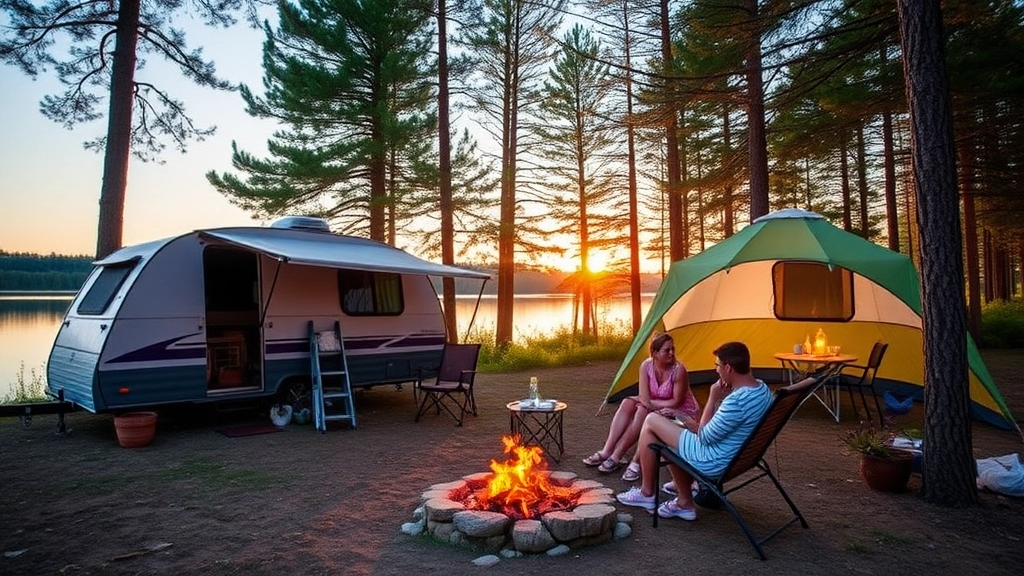
Incorporate People
Make your photos tell a story.
- Group Shots: Show the camaraderie.
- Solo Shots: Capture the peace and solitude.
Use Props
Props can add an extra layer to your photos.
- Tents: Use them as a backdrop.
- Camping Gear: Show off your setup.
Experiment with Filters
Filters aren’t just for Instagram.
- Polarising Filter: Reduces glare and enhances colours.
- ND Filter: Perfect for long exposures in daylight.
Bring a Drone
Drones offer a bird’s-eye view.
- Aerial Shots: Capture the campsite from above.
- Dynamic Videos: Make your footage stand out.
How to Edit and Enhance Camping Photos
Ever snapped a camping photo and thought, “How do I make this pop?” You’re not alone. Editing can turn a good photo into a great one, but where do you start? Let’s dive into some practical tips to make your camping photos shine.
Why Editing Matters
First off, why should you even bother with editing? Well, even the best photographers tweak their shots. Editing helps:
- Enhance colours: Make those sunsets and landscapes vibrant.
- Correct exposure: Fix too dark or too bright images.
- Add sharpness: Highlight details in nature.
- Remove distractions: Clean up unwanted elements.
Basic Editing Tools
Before we get into the nitty-gritty, you’ll need some tools. Here are some user-friendly ones:
- Adobe Lightroom: A staple for many photographers.
- Snapseed: Great for mobile editing.
- VSCO: Offers excellent filters.
- Photoshop: For more advanced tweaks.
Step-by-Step Editing Guide
Alright, let’s break it down. Here’s a simple process to follow:
- Crop and Straighten: Make sure your horizon is level. Use the crop tool to frame your shot better.
- Adjust Exposure: Fix any lighting issues. Brighten up shadows and tone down highlights.
- Tweak Colours: Use the saturation and vibrance sliders to make colours pop without going overboard.
- Sharpen: Add some sharpness to bring out details. But be careful, too much can make your photo look fake.
- Remove Distractions: Use the healing brush to get rid of any unwanted elements like litter or people in the background.
Advanced Tips
Want to take it a notch higher? Try these:
- Use Presets: Lightroom offers presets that can give your photos a consistent look.
- Play with Curves: Adjust the tone curve for more control over brightness and contrast.
- Selective Editing: Focus on specific areas of your photo using radial or graduated filters.
- Experiment with Black and White: Sometimes, a monochrome look can add drama and focus to your images.
Real-Life Example
I remember this one time, I was camping in the Lake District. The scenery was breathtaking, but my photos? Not so much. They looked dull and flat. Using Lightroom, I bumped up the vibrance, adjusted the shadows and highlights, and voilà ! The photos finally did justice to the landscape.
Common Pitfalls
Editing can be a double-edged sword. Here are some mistakes to avoid:
- Over-editing: Less is more. Too much saturation or sharpness can ruin a photo.
- Ignoring the Original: Always compare your edited photo to the original. You don’t want to lose the essence.
- Neglecting Composition: Editing can’t fix a poorly composed shot. Get it right in-camera first.
Wrapping It Up
Editing camping photos doesn’t have to be daunting. With the right tools and a bit of practice, you can enhance your images to capture the true beauty of your adventures. Remember, the goal is to make your photos look natural yet captivating. Happy editing!
For more tips on capturing stunning camping photos, check out our section on essential camping gear. And if you want to dive deeper into photography tips, our guide on summer camp activities is a great resource.
Sharing Your Summer Camping Images on Social Media
Ever wondered how to make your camping photos pop on social media?
Let’s dive in.
Why Share Your Camping Photos?
We all want those likes and comments, right?
But it’s more than that.
Sharing your camping images connects you with fellow adventurers and inspires others to explore.
How to Stand Out
Start with these simple steps:
- Tell a Story: Every photo should have a story. Capture the moment, not just the scene.
- Use Natural Light: Early mornings and late afternoons are your best friends.
- Engage with Your Audience: Ask questions. Get them to share their experiences.
Optimise for Each Platform
Different platforms, different vibes.
- Instagram: Focus on aesthetics. Use those filters wisely.
- Facebook: Share albums and detailed stories.
- Twitter: Short and sweet. Use captivating captions.
Hashtags and Tags
Don’t skip this.
- Camping Hashtags: #CampingLife, #NaturePhotography, #CampVibes
- Tag Locations: People love to see where you’ve been.
Consistency is Key
Post regularly.
Keep your audience engaged.
Real-Life Example
I once shared a sunrise shot from a camping trip in the Lake District.
Used the right hashtags and tagged the location.
It got shared by a local tourism page and my followers doubled overnight.
Popular Hashtags for Camping Photography
Alright, let’s get real for a second. You’ve just come back from an epic summer camping trip, your camera’s bursting with stunning shots, and now you’re itching to share them with the world. But how do you make sure your photos get the attention they deserve on social media? The secret sauce: hashtags.
Why Hashtags Matter
You might be wondering, âDo hashtags really make a difference?â The short answer: absolutely. Hashtags help your photos get discovered by a wider audience, not just your followers. They can boost your engagement, increase your reach, and even get you featured on popular pages. But not all hashtags are created equal. You need the right ones to hit the sweet spot.
Top Hashtags for Camping Photography
Here’s a breakdown of the most effective hashtags to use for your camping photography:
- #CampingLife: This one’s a classic. It’s broad enough to attract a wide audience but still specific to camping enthusiasts.
- #CampingAdventures: Perfect for those action-packed shots of hiking, kayaking, or any other adventurous activities.
- #NaturePhotography: Ideal for showcasing the stunning landscapes and natural beauty you captured.
- #TentLife: Got a cool shot of your tent set up in a picturesque location? This hashtag’s for you.
- #OutdoorLiving: Great for photos that capture the essence of living in the great outdoors.
- #WildernessCulture: Use this for those raw, unfiltered moments that show the true spirit of camping.
- #CampingVibes: Perfect for capturing the overall feel and atmosphere of your camping trip.
- #ExploreMore: Encourages others to get out and explore, just like you did.
- #CampingWithDogs: If you brought your furry friend along, this hashtag is a must.
- #CampFireStories: Use this for those cozy, intimate shots around the campfire.
How to Use Hashtags Effectively
Using hashtags is more than just slapping a bunch of them onto your post. Here’s how to do it right:
- Mix Popular and Niche Hashtags: Combine widely-used hashtags with more specific ones to reach both large and targeted audiences.
- Keep it Relevant: Only use hashtags that are directly related to your photo. Irrelevant hashtags can come off as spammy.
- Limit Your Hashtags: Instagram allows up to 30 hashtags per post, but you don’t need to use all of them. Aim for around 10-15 quality hashtags.
- Engage with Hashtags: Don’t just use them; interact with them. Like and comment on other photos using the same hashtags to build a community.
Real-Life Example
I remember one of my trips to the Lake District. I had this killer shot of my tent pitched right by the water with the mountains in the background. I used hashtags like #TentLife, #CampingAdventures, and #NaturePhotography. Not only did my photo get more likes than usual, but I also got comments from other campers asking for tips and sharing their own experiences. It felt like I was part of a bigger community, all thanks to the right hashtags.
If you’re looking for more ways to enhance your camping experience, check out our top summer camping songs to keep the vibes high around the campfire. And for those who love to capture moments, here are some ultimate tips for capturing the flag during your summer camp adventures.
Inspiring Summer Camping Photo Galleries
Ever wondered how to capture those jaw-dropping camping shots that make everyone go “Wow!”?
Well, you’re not alone.
We all want those perfect snaps that tell a story.
But where do you find inspiration?
Here’s the deal:
Why You Need Inspiration
We all hit creative blocks.
Sometimes, you just need a spark to get the fire going again.
That’s where photo galleries come in.
They’re like a treasure chest of ideas.
Top Galleries to Check Out
- National Geographic’s Adventure Gallery
- Stunning landscapes
- Real-life camping experiences
- Outdoor Photographer’s Best of Summer
- Tips from pros
- User-submitted gems
- Instagram Hashtag #SummerCamping
- Real-time updates
- Community-driven content
- Pinterest Camping Boards
- DIY ideas
- Creative compositions
What to Look For
- Lighting: Notice how they use natural light.
- Angles: Different perspectives can make a huge difference.
- Subjects: People, tents, campfires, landscapes.
- Editing: Subtle edits that enhance but don’t overdo it.
Personal Favourites
I remember stumbling upon a gallery where a photographer captured the Milky Way over their tent.
It was magical.
Gave me chills.
And guess what?
I tried it out on my next trip.
Nailed it.
How to Use This Inspiration
- Experiment: Don’t just copy. Make it your own.
- Practice: The more you shoot, the better you get.
- Share: Post your work and get feedback.
Wrapping It Up
Inspiration is everywhere.
From National Geographic to Instagram, you’ve got endless resources.
Dive into these galleries, get inspired, and start capturing those epic summer camping moments.
Trust me, your camera roll will thank you.
And hey, who knows?
Your photos might just end up inspiring someone else.
Happy snapping!
Common Mistakes to Avoid in Camping Photography
Ever come back from a camping trip and realise your photos didn’t quite capture the magic? You’re not alone. Many of us have been there, and it’s frustrating. So, let’s dive into the common mistakes in camping photography and how to avoid them. This way, you’ll return with images that truly reflect the beauty of your adventure.
1. Ignoring the Golden Hours
One of the biggest mistakes is not taking advantage of the golden hoursâthose precious moments just after sunrise and just before sunset. The light is softer, the shadows are longer, and your photos will have that warm, magical glow.
- Tip: Set an alarm for dawn and plan your evening around the sunset. Trust me, it’s worth it.
2. Overpacking Gear
It’s tempting to bring every piece of equipment you own, but this can weigh you down and make the hike less enjoyable.
- Tip: Stick to the essentials: a good camera, a versatile lens, a lightweight tripod, and maybe a drone if you’re into aerial shots. Keep it simple.
3. Poor Composition
We’ve all taken those photos where the subject is dead centre and the background is just meh. Composition can make or break your shot.
- Tip: Use the rule of thirds. Imagine your frame divided into nine equal parts. Place your subject along these lines or at their intersections. This adds balance and interest.
4. Ignoring Weather Conditions
Weather can be unpredictable, especially in the great outdoors. Not preparing for it can ruin your shots.
- Tip: Check the weather forecast before you go. Pack protective gear for your camera, like a rain cover. Embrace the elements; sometimes, a stormy sky can add drama to your photos.
5. Not Bringing Extra Batteries and Memory Cards
Running out of battery or memory is a surefire way to miss out on capturing those epic moments.
- Tip: Always bring extra batteries and memory cards. Store them in a waterproof case to avoid any mishaps.
6. Forgetting to Clean Your Lens
Dust, fingerprints, and smudges can ruin an otherwise perfect shot.
- Tip: Carry a lens cleaning kit. Make it a habit to clean your lens before and after each shoot.
7. Not Experimenting with Angles
Shooting everything from eye level can make your photos look monotonous.
- Tip: Get creative. Shoot from ground level, climb a tree, or find a higher vantage point. Different angles can offer fresh perspectives.
8. Neglecting to Capture Candid Moments
We often focus on landscapes and forget about the people and moments that make the trip memorable.
- Tip: Capture candid shots of your friends setting up camp, cooking, or just enjoying the scenery. These moments add a personal touch to your photo collection.
9. Over-Editing
It’s easy to go overboard with filters and adjustments, making your photos look unnatural.
- Tip: Keep it subtle. Enhance the natural beauty of your shots without overdoing it. Less is often more.
10. Not Planning Your Shots
Winging it can work sometimes, but having a rough plan can help you make the most of your time and opportunities.
- Tip: Scout your location in advance if possible. Make a shot list of must-capture scenes and moments. This keeps you focused and ensures you don’t miss anything important.
By avoiding these common mistakes, you’ll be well on your way to capturing stunning camping photos that truly reflect the essence of your adventure. Remember, it’s not just about the gear or the settings; it’s about telling a story that resonates. So next time you’re out in the wild, keep these tips in mind and watch your photography game soar.
For more tips on making your camping trips memorable, check out our Summer Camping Top Tips and our guide on Top Summer Camp Games and Activities.
Recommended Cameras and Lenses for Camping Trips
Ever wondered what the best cameras and lenses are for camping trips?
I get it.
You’re out there, surrounded by nature, and you want to capture every stunning moment.
But what gear should you bring?
Here’s the lowdown.
Best Cameras for Camping Trips
You need something durable, lightweight, and versatile.
Mirrorless Cameras are a solid choice.
Why?
- Compact Size: Easy to carry around.
- Interchangeable Lenses: Flexibility for different shots.
- Great Image Quality: Even in low light.
My Top Picks:
- Sony Alpha a7 III: Full-frame, great in low light, and has fantastic autofocus.
- Fujifilm X-T4: Amazing colour reproduction and built like a tank.
- Canon EOS R6: Excellent for both photos and videos.
Best Lenses for Camping Photography
Now, let’s talk lenses.
You don’t want to lug around a whole kit, so versatility is key.
Zoom Lenses are your best mate here.
Top Recommendations:
- 24-70mm f/2.8: Perfect for landscapes and portraits.
- 70-200mm f/2.8: Great for wildlife and distant subjects.
- 16-35mm f/4: Ideal for wide-angle shots and starry skies.
Why These Choices?
You need gear that can handle the elements and still deliver top-notch images.
Real Talk:
- Durability: Weather-sealed bodies and lenses are a must.
- Battery Life: You don’t want your camera dying halfway through the day.
- Weight: Hiking with heavy gear is a no-go.
Practical Tips
What I Do:
- Carry Extra Batteries: Always.
- Use a Sturdy Tripod: For those epic long-exposure shots.
- Lens Cleaning Kit: Dust and moisture are your enemies.
Stories from the Field
Once, I was camping in the Lake District.
Had my Sony Alpha a7 III with me.
Caught this incredible sunrise over Scafell Pike.
Wouldn’t have been possible without a good camera and the right lens.
For more tips on making your camping experience memorable, check out our Summer Camping Top Tips. And if you’re planning to capture those moments with a group, consider organizing a Summer Camp Party for even more fun.
FAQs on Summer Camping Images
What kind of camera should I bring for camping photography?
For capturing stunning camping photos, consider bringing a DSLR or mirrorless camera like the Canon EOS R or Nikon Z6. If you prefer simplicity, a point-and-shoot camera like the Sony RX100 series is a good choice. For action shots, the GoPro HERO series is ideal.
Which lenses are best for camping photography?
For sweeping landscapes, a wide-angle lens (e.g., 16-35mm) is perfect. A zoom lens (e.g., 70-200mm) is great for wildlife or distant subjects, while a prime lens (e.g., 50mm f/1.8) offers crisp, clear shots.
Do I need a tripod for camping photography?
Yes, a lightweight and compact tripod is essential, especially for long exposure shots. Consider options like carbon fibre tripods or those with flexible legs such as the Joby GorillaPod.
What filters should I use for camping photography?
Use a polarising filter to cut through glare and enhance colours, and ND filters for long exposure shots of rivers and waterfalls.
What accessories are essential for camping photography?
Make sure to bring extra batteries, high-speed memory cards, and a weatherproof camera bag like the Lowepro Whistler. Also, consider a cleaning kit with lens cloths and a blower.
Is a drone useful for camping photography?
Absolutely! Drones like the DJI Mavic series can capture epic aerial shots and provide a unique perspective of your campsite.
What are some creative ideas for summer camping photography?
Try capturing during the golden hour for the best natural light, play with different perspectives and angles, use natural frames like tree branches, and don’t forget to capture the night sky and campfire scenes.
How can I make my camping photos stand out on social media?
Tell a story with each photo, use natural light, engage with your audience, and optimise your posts for each platform. Don’t forget to use relevant hashtags and tag locations.
Where can I find inspiration for summer camping photography?
Check out photo galleries from National Geographic’s Adventure Gallery, Outdoor Photographer’s Best of Summer, Instagram hashtags like #SummerCamping, and Pinterest camping boards for creative ideas and compositions.
What should I look for in inspiring photo galleries?
Pay attention to the use of lighting, different angles, interesting subjects like people and landscapes, and subtle editing techniques that enhance the photos without overdoing it.
References
-
Essential Gear for Capturing Stunning Camping Photos
-
Creative Ideas for Summer Camping Photography
-
Sharing Your Summer Camping Images on Social Media