Looking for fresh and engaging summer camp art ideas? You’ve come to the right place! As someone who loves to keep things real and exciting, I’ve gathered a variety of art activities that are perfect for all ages. From easy craft projects to nature-inspired art, these ideas will keep campers entertained and creatively stimulated.
Whether you’re planning group art projects for team building or exploring recycled material art ideas, there’s something here for everyone. Dive into outdoor painting sessions, try out DIY tie-dye techniques, or get creative with sculpture projects. These summer camp art ideas will ensure your campers have a blast while unleashing their artistic potential.
Easy Craft Projects for All Ages
Ever found yourself wondering, “How can I keep everyone entertained without pulling my hair out?” Well, you’re not alone. Craft projects are your golden ticket, and the best part? They’re easy enough for anyone to dive into. Whether you’re dealing with a group of energetic kids or looking to keep the adults engaged, these easy craft projects for all ages will save the day.
Why Easy Craft Projects?
First off, let’s get real. No one wants to spend hours prepping for an activity that ends up being more frustrating than fun. Easy craft projects are the way to go because:
- Minimal Prep Time: Who has hours to spend gathering supplies? Not us.
- Simple Instructions: If you can’t explain it in a few steps, it’s too complicated.
- Fun for Everyone: From toddlers to grandparents, everyone can get involved.
Top Easy Craft Projects
Paper Plate Animals
- Supplies Needed: Paper plates, markers, glue, construction paper, googly eyes.
- Steps:
- Choose an animal (lion, fish, etc.).
- Colour the paper plate.
- Cut out shapes from the construction paper for ears, fins, etc.
- Glue the shapes and googly eyes onto the plate.
- Why It Works: It’s straightforward, requires minimal supplies, and kids love the end result.
Beaded Bracelets
- Supplies Needed: Elastic string, assorted beads.
- Steps:
- Cut a piece of elastic string to the desired length.
- Thread beads onto the string in your preferred pattern.
- Tie a secure knot to finish.
- Why It Works: It’s a great way to improve fine motor skills and allows for endless creativity.
DIY Bookmarks
- Supplies Needed: Cardstock, markers, stickers, ribbon.
- Steps:
- Cut the cardstock into bookmark-sized strips.
- Decorate with markers and stickers.
- Punch a hole at the top and thread a ribbon through.
- Why It Works: Functional and fun, plus it encourages reading.
Nature Collages
- Supplies Needed: Leaves, flowers, twigs, glue, paper.
- Steps:
- Collect natural items from outside.
- Arrange them on a piece of paper.
- Glue them down to create a beautiful collage.
- Why It Works: It gets everyone outside and appreciating nature, and the results are always unique.
Real Talk: Why You’ll Love These Projects
These easy craft projects are not just about keeping everyone busyâthey’re about creating something together. You’ll find that even the most reluctant participants get drawn in, and before you know it, you’ve got a table full of happy crafters. Plus, these projects are low-cost and use materials you probably already have lying around.
So, next time you’re scratching your head for ideas, remember these easy craft projects. Trust me, they’re a game-changer.
Now that we’ve got the basics covered, let’s dive into something a bit more earthy and inspiring. Ready to get your hands dirty? Up next: Nature-Inspired Art Activities. For more ideas, check out our Fun Summer Camp Crafts for Kids and Summer Camp Projects: Fun and Creative Ideas.
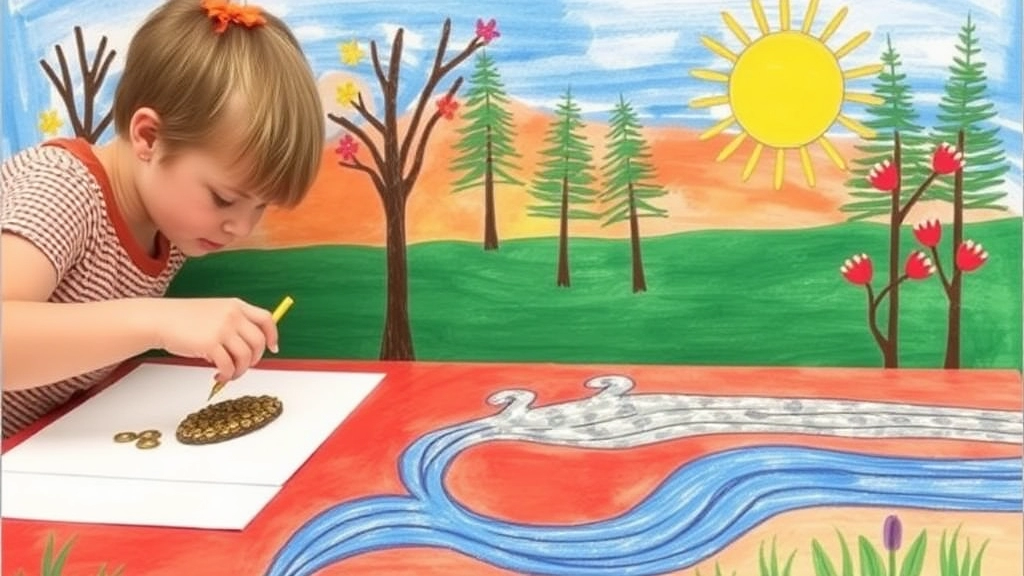
Nature-Inspired Art Activities
Ever wondered how to bring the outdoors inside?
Nature-inspired art is your answer.
It’s simple, engaging, and perfect for all ages.
Why Nature-Inspired Art?
- Connect with Nature: Helps kids appreciate the environment.
- Easy Materials: Leaves, rocks, flowers—stuff you can find in your backyard.
- Creativity Boost: Nature offers endless inspiration.
Quick Ideas:
- Leaf Prints: Paint leaves and press them onto paper.
- Rock Painting: Turn stones into mini masterpieces.
- Flower Collages: Arrange petals and leaves into beautiful designs.
Pro Tip: Collect materials during a nature walk for an added adventure.
Next up, let’s dive into group art projects that build teamwork and creativity.
Group Art Projects for Team Building
Ever wondered how to get everyone in a group to bond and collaborate? Group art projects for team building are a fantastic way to achieve just that. They’re not just fun; they also foster communication, creativity, and a sense of collective accomplishment. Let’s dive into some ideas that will get everyone working together and thinking outside the box.
Why Group Art Projects?
Team building through art isn’t just about creating something beautiful. It’s about breaking down barriers, encouraging collaboration, and boosting morale. Here’s why they work:
- Communication: Art projects require talking, planning, and sharing ideas.
- Creativity: Everyone brings their unique perspective, leading to innovative outcomes.
- Problem-solving: Working together to overcome challenges strengthens the team.
Types of Group Art Projects
- Collaborative Murals
- Materials: Large canvas or wall space, paints, brushes.
- Process: Each team member contributes to a section of the mural, creating a cohesive piece that represents the group’s collective vision.
- Giant Jigsaw Puzzle Art
- Materials: Large sheets of cardboard, paints, markers.
- Process: Create a large image, cut it into puzzle pieces, and have each team member decorate a piece. Assemble the pieces to reveal the final artwork.
- Sculpture Building
- Materials: Recycled materials like bottles, cans, cardboard, and glue.
- Process: Teams work together to build a sculpture, focusing on themes like sustainability or innovation.
Tips for Successful Group Art Projects
- Set Clear Goals: Define what you want to achieve with the project. Is it about creativity, communication, or simply having fun?
- Assign Roles: Make sure everyone knows their part. Some might be better at planning, while others excel at execution.
- Encourage Open Communication: Foster an environment where everyone feels comfortable sharing their ideas and feedback.
- Celebrate the Outcome: Once the project is complete, take the time to appreciate everyone’s effort and creativity.
Real-Life Example
I once facilitated a mural project at a summer camp. We divided the campers into small groups, each responsible for a section of the mural. Initially, there was a lot of chaos and differing opinions. But as the project progressed, the kids started to communicate better, share ideas, and compromise. By the end, not only did we have a stunning mural, but the campers also formed stronger bonds and learned the value of teamwork.
Transition to Next Section
Now that we’ve explored how group art projects can be a powerful tool for team building, let’s shift our focus to another exciting realm of creativity: Recycled Material Art Ideas. This next section will show you how to turn everyday waste into extraordinary art, promoting sustainability and innovation.
For more ideas on engaging summer activities, you might also be interested in our top craft ideas for summer camp fun.
Recycled Material Art Ideas
Ever found yourself staring at a pile of rubbish and wondering if there’s a better use for it? Trust me, you’re not alone. One of the biggest worries parents and camp organisers face is how to keep kids engaged without breaking the bank. Enter: recycled material art ideas. It’s not just about saving money; it’s about teaching kids to see potential in what others see as waste. Plus, it’s a win for the environment. So, let’s dive in, shall we?
Why Recycled Art?
First off, why should you even bother with recycled materials? Well, for starters:
- Cost-Effective: You don’t need to spend a fortune on art supplies.
- Eco-Friendly: Reduces waste and promotes sustainability.
- Creativity Boost: Forces kids to think outside the box.
Materials to Collect
Before you start, gather some common recycled items. Here’s a quick list:
- Cardboard Boxes: From cereal boxes to shipping cartons.
- Plastic Bottles: Any size will do.
- Old Magazines and Newspapers: Perfect for collages.
- Bottle Caps: Great for mosaics and other decorative projects.
- Fabric Scraps: Old clothes, curtains, or any textile remnants.
Project Ideas
Alright, now that you’ve got your materials, let’s get into some fun projects.
Cardboard Castles
- Supplies: Cardboard boxes, scissors, glue, paint.
- Steps: Cut out shapes for towers, walls, and gates. Glue them together and let the kids paint their dream castle.
Plastic Bottle Planters
- Supplies: Plastic bottles, soil, seeds, paint.
- Steps: Cut the bottle in half, decorate it, fill it with soil, and plant some seeds. Watch them grow over the camp period!
Magazine Collages
- Supplies: Old magazines, scissors, glue, large paper.
- Steps: Have kids cut out their favourite images and glue them onto a large sheet of paper to create a themed collage.
Bottle Cap Mosaics
- Supplies: Bottle caps, a sturdy base (like cardboard), glue.
- Steps: Arrange the bottle caps in a pattern or image on the base and glue them down. It’s like a puzzle, but more colourful!
Fabric Scrap Art
- Supplies: Fabric scraps, needle and thread, glue.
- Steps: Create patchwork designs or use the scraps to add texture to other art projects.
Tips for Success
- Prep the Materials: Make sure all materials are clean and safe to use.
- Guidance but Freedom: Offer guidance but let the kids’ creativity take the lead.
- Group Projects: Encourage teamwork by having kids work on larger projects together.
Recycled material art not only keeps kids busy but also instils a sense of responsibility towards the environment. It’s a win-win situation.
Now that we’ve covered how to turn trash into treasure, let’s step outside and get inspired by nature. Up next: Nature-Inspired Art Activities. This is where we blend the beauty of the outdoors with the creativity of art. Ready? Let’s go!
Outdoor Painting Sessions
Ever wondered how to keep kids engaged and excited about art, especially when the weather’s perfect? Outdoor painting sessions are your golden ticket. Imagine this: the sun shining, a gentle breeze, and kids with paintbrushes in hand, ready to turn the great outdoors into their canvas. Sounds awesome, right? But it can be a bit daunting to plan. Don’t sweat it; I’ve got your back.
Why Outdoor Painting?
First off, why take the painting outside? Simple. Nature is the best inspiration. The colours, textures, and sounds all contribute to a richer artistic experience. Plus, it’s a great way to get kids off screens and into fresh air.
Setting Up for Success
Here’s how to nail it:
- Location, Location, Location: Choose a spot with good natural light but also some shade. Think parks, gardens, or even your backyard.
- Materials: You’ll need easels, canvases, brushes, and non-toxic paints. Don’t forget water containers and paper towels for clean-up.
- Comfort: Bring along some blankets or mats for kids to sit on. Trust me, comfort is key.
- Weather Check: Always have a plan B in case Mother Nature decides to rain on your parade.
Fun Themes to Get Started
To keep things fresh, try different themes:
- Landscape Painting: Encourage kids to capture the scenery around them.
- Still Life: Set up a table with flowers, fruits, or interesting objects.
- Abstract Art: Let them go wild with colours and shapes, no rules!
Pro Tips
Sharing some nuggets from my own experience:
- Mini Demos: Start with a quick demo to show basic techniques. It helps to break the ice and get those creative juices flowing.
- Encourage Exploration: Let kids experiment with mixing colours and different brush strokes. There’s no right or wrong in art.
- Group Critique: Once everyone’s done, have a little show-and-tell. It’s a great confidence booster and helps kids learn from each other.
Real-Life Example
Last summer, I organised an outdoor painting session at a local park. We had a “Nature’s Palette” theme. One kid painted a tree with rainbow leaves, another captured a butterfly up close. The best part? Watching their faces light up with pride when they showed off their masterpieces.
Outdoor painting sessions not only foster creativity but also build a sense of community and appreciation for nature. It’s a win-win all around.
Next up, let’s dive into something equally excitingâDIY Tie-Dye Techniques. This is another fantastic, hands-on activity that kids absolutely love. Get ready to add some vibrant colours to your camp!
For more exciting camp activities, check out our Summer Camp Scavenger Hunt Ideas and Summer Camp Cooking Fun for more creative ways to keep kids engaged.
DIY Tie-Dye Techniques
Ever wondered how to nail that perfect tie-dye look?
Trust me, it’s easier than you think.
First, grab a plain white T-shirt.
Supplies you’ll need:
- Fabric dye (various colours)
- Rubber bands
- Plastic squeeze bottles
- Gloves
Step-by-step:
- Prep your shirt: Soak it in a water and soda ash solution.
- Twist and bind: Twist the fabric and secure it with rubber bands.
- Dye time: Fill your squeeze bottles with dye and apply it to the fabric.
- Set the dye: Let it sit for 6-8 hours.
- Rinse and reveal: Rinse in cold water until it runs clear.
And boom, you’ve got a masterpiece.
Next up, let’s dive into Creative Sculpture Projects.
Creative Sculpture Projects
Ever wondered how to keep kids engaged and spark their creativity at the same time? Sculpture projects are the answer. Sculpture projects are not only fun but also a fantastic way for kids to express themselves. Plus, they help develop fine motor skills and spatial awareness. But let’s be realâsetting up a sculpture project can feel like a logistical nightmare. Don’t worry; I’ve got you covered.
Materials You Can Use
First things first, you don’t need fancy materials. Here’s a list of easy-to-find items:
- Clay: Air-dry clay is perfect. No need for a kiln.
- Playdough: Great for younger kids.
- Recyclables: Cardboard, plastic bottles, and even old newspapers.
- Natural items: Think twigs, leaves, and stones.
- Wire and beads: For more advanced projects.
Step-by-Step Guide
- Choose Your Material: Decide based on the age group and skill level.
- Plan Your Project: Sketch out a simple design. Even a rough idea helps.
- Set Up the Workspace: Cover tables with old newspapers. Trust me, this saves a lot of cleaning time.
- Get Sculpting: Encourage kids to start with basic shapes. They can always add details later.
- Drying Time: If using clay or playdough, ensure you have a drying area.
- Paint and Decorate: Once dry, let the kids paint their sculptures.
Real-Life Example
Last summer, we did a project with clay animals. Each kid picked their favourite animal and sculpted it. The results were amazing! One kid even made a three-headed dragon. It was a hit and kept them busy for hours.
Tips for Success
- Keep it Simple: Start with basic projects and gradually move to complex ones.
- Encourage Creativity: There’s no right or wrong way to sculpt.
- Be Patient: Some kids might need more time and guidance.
- Safety First: Make sure all materials are non-toxic and safe for kids.
Sculpture projects are a blast, and the kids will love showing off their creations. Plus, it’s a great way to foster a sense of accomplishment.
Now that we’ve got the creative juices flowing with sculpture projects, let’s take it a step further. How about diving into some themed art days? Imagine a whole day dedicated to “Under the Sea” or “Space Exploration.” Sounds exciting, right? Stay tuned for some fantastic ideas on themed art days in the next section.
For more inspiration on how to keep kids engaged and entertained, you might also want to check out our summer camp ice breakers that are perfect for all ages.
Themed Art Days (e.g., Under the Sea, Space Exploration)
Ever wondered how to keep kids engaged and excited about art?
Themed Art Days are your answer.
Imagine turning your art room into an underwater adventure or a space mission.
Kids love themes.
They spark creativity and make activities more immersive.
Here’s how you can do it:
- Under the Sea: Think fish, coral reefs, and submarines. Use blue hues and lots of glitter.
- Space Exploration: Rockets, planets, and stars. Black paper and glow-in-the-dark paint work wonders.
These themes make art more fun and keep everyone involved.
Ready to take it up a notch?
Let’s dive into Collaborative Mural Creation next.
Collaborative Mural Creation
Ever tried painting a mural with a group of people and wondered how to make it a smashing success? Let’s dive into how to create a collaborative mural that not only looks amazing but also brings everyone together.
Why Collaborative Murals?
First off, why even bother with a mural? Well, murals are a fantastic way to build teamwork, spark creativity, and leave a lasting mark. Imagine the sense of pride and accomplishment everyone will feel when they see their collective masterpiece. Plus, it’s a killer way to bond and have a blast.
Getting Started
Step 1: Planning
- Theme Selection: Choose a theme that resonates with everyone. Maybe it’s something simple like nature, or something more intricate like a fantasy world.
- Sketch It Out: Before you start slapping paint on the wall, sketch out your ideas. This gives everyone a clear vision and avoids the chaos of too many cooks in the kitchen.
Step 2: Materials
- Paint: Make sure you have enough paint in various colours. Go for non-toxic, water-based paints for easy clean-up.
- Brushes & Rollers: Different sizes for different details.
- Protective Gear: Aprons, gloves, and drop cloths to keep things tidy.
Execution
Step 3: Assign Roles
- Lead Artist: Someone to oversee the project and make sure it stays on track.
- Detail Artists: Folks who are good with the finer details.
- Fillers: People who can handle the larger areas.
Step 4: Teamwork Makes the Dream Work
- Communication: Keep the lines of communication open. If someone has a new idea, let them share it.
- Flexibility: Be ready to adapt. Sometimes the best ideas come mid-project.
Step 5: Final Touches
- Review: Step back and look at the mural as a whole. Are there any areas that need touching up?
- Signatures: Let everyone sign their name somewhere on the mural. It’s a great way to acknowledge everyone’s contribution.
Real-Life Example
Remember that time we painted a mural at the community centre? We chose a âgardenâ theme, and everyone from kids to adults pitched in. It wasn’t just about painting; it was about sharing stories, laughing, and creating something beautiful together.
Benefits
- Team Building: Strengthens relationships and fosters a sense of community.
- Creativity: Encourages out-of-the-box thinking.
- Pride: Leaves a lasting piece of art everyone can be proud of.
Creating a collaborative mural isn’t just about the end result; it’s about the journey. It’s about working together, sharing ideas, and creating something that’s bigger than any one person.
Now, speaking of working together, let’s shift gears and talk about what to do when the weather turns gloomy. Stay tuned for some awesome Art Activities for Rainy Days that will keep everyone engaged and creative, no matter what Mother Nature throws our way.
For more ideas on fostering creativity and teamwork, you might also be interested in our Fun Summer Camp Crafts for Kids and our Summer Camp Bulletin Board Ideas. These activities are perfect for keeping the fun going all summer long!
Art Activities for Rainy Days
Stuck inside because of the rain? No problem.
Rainy days can be the perfect opportunity to get creative indoors.
Why Rainy Day Art?
- Keeps kids entertained
- Sparks creativity
- Easy to set up
Quick and Fun Ideas:
- Paper Plate Masks: Grab some paper plates, markers, and string. Let the kids create their own masks.
- Indoor Collages: Use old magazines, scissors, and glue. Let them piece together their own masterpieces.
- Salt Dough Sculptures: Mix up some salt dough and let them mould their own mini sculptures. Bake them for lasting keepsakes.
Pro Tip: Always have a rainy day art kit ready. Stock it with essentials like paper, crayons, and glue.
Rainy days don’t have to be boring. They can be a chance to unleash some serious creativity.
Ready to take it outside? Next up: Outdoor Painting Sessions.
Digital Art Workshops for Kids
Alright, let’s talk digital art workshops for kids. Ever wondered how to keep the little ones engaged and creative in this tech-savvy world? Trust me, you’re not alone. Parents and educators everywhere are scratching their heads, trying to find ways to merge creativity with technology. And guess what? Digital art workshops are the answer.
Why Digital Art?
First off, why even bother with digital art? Well, it’s simple. Kids are glued to screens anyway, so why not turn that screen time into something productive? Digital art is not only fun but also a great way to teach kids about technology, creativity, and problem-solvingâall in one go.
Getting Started: The Basics
You don’t need to be a tech wizard to get started. Here’s a quick rundown of what you’ll need:
- Tablet or Computer: Any basic device will do. iPads and Chromebooks are popular choices.
- Stylus: Not mandatory, but it makes drawing a lot easier.
- Drawing Software: Programs like Procreate, Adobe Fresco, or even free ones like Krita and Autodesk SketchBook are fantastic.
Workshop Structure
So, how do you structure these workshops? Here’s a simple format:
- Introduction to Tools: Spend the first session familiarising kids with the tools and software. Think of it as a digital art boot camp.
- Basic Techniques: Teach them basic drawing techniquesâlines, shapes, and colours. Keep it simple.
- Project-Based Learning: Assign small projects. For example, create a digital birthday card or a simple comic strip.
- Feedback & Showcase: Always end with a feedback session. Let kids showcase their work and discuss what they learned.
Tips for Keeping It Engaging
- Gamify the Learning: Turn lessons into games. For instance, who can draw the best monster in 10 minutes?
- Interactive Sessions: Use screen sharing to provide real-time feedback.
- Guest Artists: Invite digital artists to give mini-tutorials or talks.
Real-Life Example
I once ran a digital art workshop where kids had to design their own video game characters. The excitement was off the charts. They learned about character design, colour theory, and even a bit of storytelling. By the end, they were not just participants but mini-art directors.
Common Pitfalls and How to Avoid Them
- Overcomplicating Tools: Keep it simple. Start with basic tools and gradually introduce more complex features.
- Ignoring Traditional Art Skills: Balance digital with traditional. Encourage sketching on paper too.
- Lack of Structure: Kids thrive on routine. Stick to a consistent schedule.
Digital art workshops are a fantastic way to blend creativity with technology. They’re engaging, educational, and most importantly, fun. Plus, they pave the way for the next exciting activity on our list: Art Show and Exhibition Ideas for the End of Camp. Stay tuned!
For more ideas on keeping kids engaged and creative during summer, check out our guide on Creative Summer Camp Sign Ideas and Tips.
Art Show and Exhibition Ideas for the End of Camp
Worried about how to wrap up camp with a bang?
An art show can be the perfect solution.
Here’s how to make it unforgettable:
Plan Ahead
- Choose a Theme: Make it cohesive.
- Set a Date: Give everyone enough time.
Get Everyone Involved
- Collaborative Projects: Show off group efforts.
- Individual Pieces: Let each camper shine.
Create a Buzz
- Invite Families: Make it a community event.
- Promote on Social Media: Build excitement.
Set Up Like a Pro
- Use Proper Lighting: Highlight the artwork.
- Create Labels: Add names and descriptions.
Interactive Elements
- Live Demos: Show the process.
- Q&A Sessions: Engage the audience.
Wrapping up with an art show not only showcases talent but also leaves lasting memories.
Make sure to plan ahead and get everyone involved for the best results. For more tips on organizing successful camp events, check out our Ultimate Summer Camp Calendar Guide.
If you’re looking for more creative ideas, explore our Explore Art Summer Camps: Benefits & Tips for additional inspiration.
FAQs on Summer Camp Art Ideas
What are some nature-inspired art activities for kids?
Nature-inspired art activities are great for connecting kids with the environment. Some popular ideas include:
- Leaf Prints: Paint leaves and press them onto paper.
- Rock Painting: Turn stones into mini masterpieces.
- Flower Collages: Arrange petals and leaves into beautiful designs.
Pro Tip: Collect materials during a nature walk for an added adventure.
Why should we use recycled materials for art projects?
Recycled material art is beneficial for several reasons:
- Cost-Effective: You don’t need to spend a fortune on art supplies.
- Eco-Friendly: Reduces waste and promotes sustainability.
- Creativity Boost: Forces kids to think outside the box.
What are some easy recycled art projects?
Here are some fun and easy projects using recycled materials:
- Cardboard Castles: Use cardboard boxes, scissors, glue, and paint to create castles.
- Plastic Bottle Planters: Decorate plastic bottles, fill them with soil, and plant seeds.
- Magazine Collages: Cut out images from old magazines and create themed collages.
- Bottle Cap Mosaics: Arrange bottle caps in patterns and glue them onto a sturdy base.
- Fabric Scrap Art: Use fabric scraps to create patchwork designs or add texture to other projects.
What supplies are needed for DIY tie-dye projects?
For a successful tie-dye project, you’ll need:
- Fabric dye (various colours)
- Rubber bands
- Plastic squeeze bottles
- Gloves
Pro Tip: Soak the shirt in a water and soda ash solution before applying dye.
How can themed art days enhance creativity?
Themed Art Days, such as “Under the Sea” or “Space Exploration,” can make art activities more immersive and fun. They spark creativity and keep kids engaged by turning the art room into an adventure.
- Under the Sea: Use blue hues and glitter to create fish, coral reefs, and submarines.
- Space Exploration: Use black paper and glow-in-the-dark paint for rockets, planets, and stars.
What are some art activities for rainy days?
Rainy days can be perfect for indoor creativity. Here are some quick and fun ideas:
- Paper Plate Masks: Use paper plates, markers, and string to create masks.
- Indoor Collages: Use old magazines, scissors, and glue to piece together masterpieces.
- Salt Dough Sculptures: Mix salt dough and let kids mould mini sculptures, then bake them for keepsakes.
Pro Tip: Always have a rainy day art kit ready with essentials like paper, crayons, and glue.
References
-
Nature-Inspired Art Projects for Kids
-
Recycled Art Projects for Kids
-
Tie-Dye Crafts for Kids