Welcome to the Ultimate Guide on Creating the Perfect Summer Camp Arrow Sign!
Whether you’re a camp director or a creative enthusiast, this article will walk you through everything you need to know about designing, customizing, and maintaining effective arrow signs for your summer camp. From choosing durable materials to incorporating branding and placement strategies, we’ve got you covered.
Importance of Effective Signage
Effective signage is crucial for keeping your camp organized and ensuring everyone knows where to go. We’ll explore cost-effective solutions, safety considerations, and creative ideas to make your signs stand out.
What You’ll Learn
By the end of this guide, you’ll have all the tips and tricks to create arrow signs that are not only functional but also add a fun, professional touch to your camp environment.
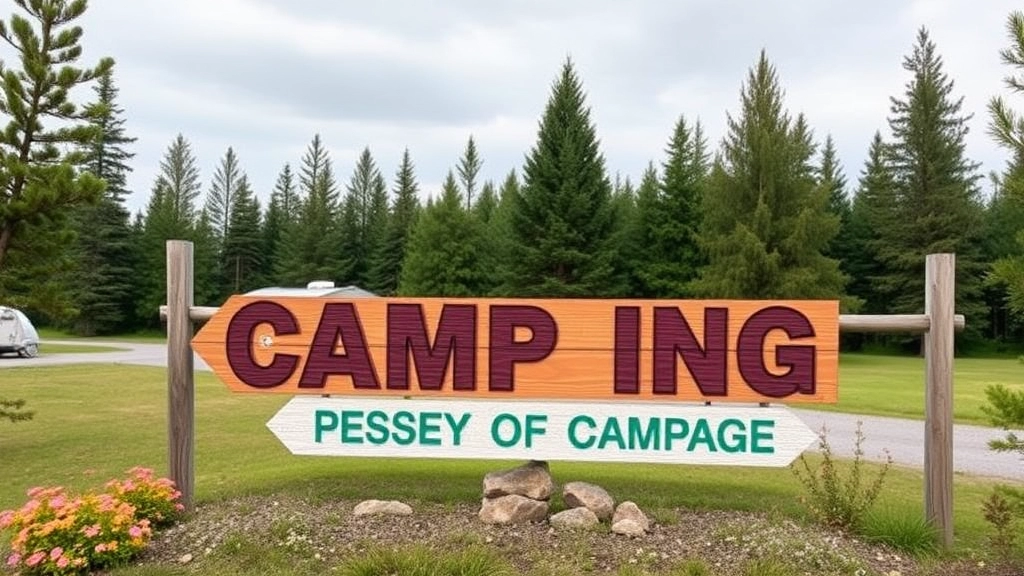
### Designing Effective Summer Camp Arrow Signs
Alright, let’s cut to the chase. You’re running a summer camp, and you need arrow signs that do more than just point the way. You want them to be clear, durable, and a bit of fun, right? So, let’s dive into how to design effective summer camp arrow signs that tick all those boxes.
#### Why Are Effective Arrow Signs Crucial?
First off, let’s tackle the big question: why bother with effective arrow signs? Well, imagine this. Kids are running around, parents are trying to find their way, and staff are busy keeping everything under control. The last thing anyone needs is to get lost. Clear, well-designed arrow signs keep everyone on track and stress levels low. For more on keeping your camp organized and fun, check out our [summer camp culture, traditions, activities, and growth](https://summercamp.blog/summer-camp-culture-traditions-activities-and-growth/).
#### What Makes an Arrow Sign Effective?
So, what’s the secret sauce? Here’s a breakdown:
– **Simplicity is Key**: Overcomplicated designs are a no-go. Your signs should be straightforward. Think bold colours, large fonts, and simple graphics.
– **Legibility**: If people can’t read your signs from a distance, they’re useless. Use high-contrast colours and sans-serif fonts.
– **Consistency**: Keep the design elements consistent across all signs. This means using the same colours, fonts, and styles.
– **Directional Clarity**: The arrow should be unmistakable. No fancy shapesâjust a clear, bold arrow pointing the way.
#### Real-Life Example
Picture this: Last summer, we had a camp where we used bright yellow signs with big black arrows. Parents loved them because they were easy to spot from a distance, and kids thought they were fun because we added a little camp mascot next to the arrow. Win-win!
#### Breaking Down the Design Process
Now, let’s break it down step-by-step:
1. **Choose Your Colours**: Go for high-contrast combinations. Think yellow and black, white and blue, or red and white.
2. **Select Your Font**: Sans-serif fonts like Arial or Helvetica are easy to read. Make sure the text is big enough to read from at least 20 feet away.
3. **Add Graphics Wisely**: A small graphic or mascot can make the sign more engaging but don’t overdo it. The arrow is the star of the show.
4. **Material Matters**: More on this later, but your design needs to work on the material you choose, whether it’s wood, metal, or plastic. For inspiration on materials, explore our [build a summer camp wooden arch guide](https://summercamp.blog/build-a-summer-camp-wooden-arch-a-complete-guide/).
Materials for Durable and Weather-Resistant Signs
Ever wonder why some summer camp signs look like they’ve been through a tornado? Yeah, me too.
Choosing the right materials for your arrow signs is crucial. You want them to last through rain, wind, and blazing sun. So, what should you use?
Top Materials for Durability
- Aluminium:
- Lightweight but strong.
- Rust-resistant, so it’s perfect for all weather.
- Easy to print on and looks slick.
- PVC (Polyvinyl Chloride):
- Super durable and weatherproof.
- Doesn’t fade easily.
- Cost-effective, which is a win-win.
- Acrylic:
- Looks high-end and is very sturdy.
- UV-resistant, so it won’t yellow over time.
- A bit pricier, but worth it for that polished look.
- Coroplast (Corrugated Plastic):
- Cheap and cheerful.
- Waterproof and lightweight.
- Great for temporary signs.
Real Stories, Real Examples
I once worked with a camp that used wooden signs. Looked great at first, but after one rainy season? Total disaster. The paint chipped, wood warped, and it was a mess. They switched to aluminium, and guess what? No more problems.
Why It Matters
Your signs are the first thing people see. They guide campers and parents, setting the tone for the whole experience. Durable, weather-resistant signs keep your camp looking professional and welcoming.
Quick Tips for Choosing Materials
- Budget: If you’re tight on cash, go for Coroplast or PVC.
- Longevity: Aluminium and Acrylic are your best bets.
- Aesthetics: Want that high-end look? Acrylic all the way.
Creative Ideas for Customising Arrow Signs
Ever wondered how to make your summer camp arrow signs stand out? You’re not alone. We’ve all seen those generic signs that blend into the background, right? Let’s change that. Here’s how you can bring some creativity to the table and make your signs pop.
Personalised Themes
First off, think about the theme of your camp. Is it a pirate adventure, a nature retreat, or a sports camp? Customise your arrow signs to reflect the theme. Here’s how:
- Pirate Adventure: Use aged wood, treasure maps, and pirate fonts.
- Nature Retreat: Opt for earthy colours, leaf patterns, and animal icons.
- Sports Camp: Incorporate sports equipment, team colours, and energetic fonts.
Bright Colours and Bold Fonts
Visibility is key. You want your signs to be seen from a distance. Use bright, contrasting colours and bold, legible fonts. Here are some combos that work:
- Yellow and Black: High contrast and easily noticeable.
- Red and White: Bold and attention-grabbing.
- Green and White: Perfect for nature-themed camps.
Interactive Elements
Why not make your signs interactive? Kids love a bit of fun, and this can make navigation a part of the adventure. Consider:
- Spinning Arrows: Attach the arrow to a pivot so it can spin.
- Hidden Messages: Use UV paint that reveals messages under a blacklight.
- Puzzle Pieces: Make the sign part of a scavenger hunt.
Incorporate Camp Mascots
If your camp has a mascot, use it! Adding a familiar character can make the signs more engaging for the kids. Here’s how to do it:
- Mascot Cutouts: Create cutouts of the mascot pointing in the direction.
- Speech Bubbles: Have the mascot “speak” the directions through speech bubbles.
- Photo Ops: Make the signs large enough for kids to take pictures with the mascot.
Use Natural Elements
Integrate natural elements to blend the signs into the environment while still making them noticeable. Think:
- Wood and Stone: Use these materials for a rustic look.
- Plants and Flowers: Frame the signs with local flora.
- Recycled Materials: Go eco-friendly with repurposed items.
Fun Shapes and Sizes
Who says arrow signs have to be just arrows? Play around with shapes and sizes to add a touch of whimsy:
- Animal Shapes: Arrows shaped like animals native to the area.
- Oversized Arrows: Make them large for a dramatic effect.
- 3D Signs: Add depth to make them stand out even more.
Lighting Effects
Don’t let your signs disappear when the sun goes down. Add some lighting effects to keep them visible:
- Solar-Powered Lights: Eco-friendly and effective.
- Glow-in-the-Dark Paint: Simple and efficient.
- LED Strips: Bright and customisable.
Real-Life Example
I remember one summer camp where they had a medieval theme. They went all out with their arrow signs, using faux stone and wood, and even added small shields and swords to the signs. Kids were so excited, they followed the signs without needing any additional guidance.
Placement Strategies for Maximum Visibility

Ever been lost at a summer camp because the signs were hidden or confusing?
Yeah, me too.
Let’s make sure that doesn’t happen at your camp.
Here’s how you can nail the placement of your arrow signs for maximum visibility.
Start with the Basics
First things first, where do people need guidance the most?
Think about these spots:
- Entrance: Make it clear where to go right from the start.
- Crossroads: Any place where paths split.
- Activity Areas: Archery, swimming pool, dining hall.
- Emergency Exits: Safety first, always.
Height Matters
Not too high, not too low.
You want your signs at eye level.
For kids, this means a bit lower than for adults.
Angles and Orientation
Your arrows should point exactly where they need to go.
Sounds obvious, right?
But you’d be surprised how often this gets messed up.
Make sure the arrows are:
- Clear: No guessing games.
- Consistent: Same style and colour throughout.
Visibility in Different Conditions
Weather can be a game-changer.
Think about:
- Sunlight: Will your sign glare and become unreadable?
- Rain: Waterproof materials are a must.
- Night-time: Reflective signs or solar lights can save the day—or night.
Check for Obstructions
Overhanging branches, parked cars, or even other signs can block your arrows.
Do a walk-through to spot any potential issues.
Test Runs
Before the big day, do a test run.
Walk through the camp as if you were a newbie.
Are the signs easy to follow?
Real-Life Example
Last summer, I helped set up signs at a kids’ camp.
We placed a sign at a fork in the road, but it was too high.
Kids were missing it.
Adjusted it to their eye level, and boom—no more lost campers.
Safety Considerations for Sign Installation
Ever wondered if your summer camp arrow signs are as safe as they are eye-catching? Let’s dive into some real concerns and solutions to make sure your signage is not only visible but also secure.
Why Safety Matters
When setting up camp signs, the last thing you want is for them to become a hazard. Whether it’s a windy day or a bustling crowd, safety considerations are crucial. Here’s what you need to know:
Common Concerns
- Wind and Weather: Will your signs withstand a storm?
- Visibility: Are they clear and visible without causing distractions?
- Stability: Are they securely planted, or will they topple over?
Key Safety Tips
Let’s break it down into simple steps to ensure your signs are safe and sound:
Choose the Right Location
- Avoid High Traffic Areas: Keep signs away from paths where people frequently walk to prevent accidents.
- Height Matters: Ensure they’re at eye level for easy reading but not so low that they’re a tripping hazard.
Secure Installation
- Sturdy Materials: Use durable materials like aluminium or treated wood to withstand elements.
- Proper Anchoring: Use stakes or weights to secure signs. Sandbags or heavy bases work wonders.
Visibility and Clarity
- Reflective Surfaces: Consider reflective materials for signs to ensure visibility at night.
- Clear Fonts and Colours: Use bold fonts and contrasting colours to make sure the message is clear.
Real-Life Example
I once helped a camp that was struggling with signs blowing over in the wind. We switched to heavier bases and added reflective tape. Not only did it solve the problem, but it also made the signs more visible at night, enhancing safety.
Regular Checks
- Inspect Regularly: Make it a routine to check signs for wear and tear.
- Weather Updates: Keep an eye on the weather and adjust as needed.
For more tips on ensuring a safe and enjoyable camp experience, check out our Summer Camp Activities and our guide on Top Summer Camp Clipart Sources and Tips.
Cost-Effective Solutions for Camp Signage
Alright, let’s get real for a moment.
Running a summer camp isn’t cheap.
You’ve got a tight budget, and every penny counts.
So, how do you get those arrow signs up without breaking the bank?
Here’s the lowdown on cost-effective solutions for camp signage.
What’s the Problem?
You need signs that are:
- Durable
- Weather-resistant
- Easy to read
And, of course, cost-effective.
DIY vs. Professional
DIY (Do It Yourself)
It’s tempting, right?
Grab some wood, paint, and get crafty.
But let’s be honest, not everyone has the time or the skills.
However, if you do, it can save you a bundle.
Professional Services
They’ll cost more upfront, but you get quality and durability.
Sometimes, paying a bit more can save you headaches down the road.
Material Choices
Corrugated Plastic
Cheap and weather-resistant.
Perfect for temporary signs.
Plywood
Sturdy and can be painted any way you like.
Just make sure to seal it to protect against the elements.
Metal
More expensive, but it’ll last forever.
Ideal for permanent signage.
Smart Shopping Tips
Bulk Orders
Buying in bulk often gets you a discount.
Plus, you’ll have extras for future use.
Sales and Discounts
Keep an eye out for sales.
Sign companies often have discounts during off-peak seasons.
Local Suppliers
Sometimes, local suppliers can offer better deals than big chains.
Plus, you’re supporting local businesses.
Real-Life Example
Last summer, we needed signs for our camp.
We went the DIY route with corrugated plastic and some waterproof markers.
Cost us less than £50 for 20 signs.
They lasted all summer and looked great.
Reusing and Recycling
Repaint and Reuse
Got old signs?
A fresh coat of paint can make them look brand new.
Swap with Other Camps
Know other camp directors?
See if they’ve got signs they’re not using.
A little swap can save you both some cash.
Final Thoughts
Cost-effective doesn’t mean cheap and nasty.
It means smart and savvy.
Think about your needs, budget, and resources.
And remember, a little creativity goes a long way.
In the end, you’ll have signs that guide your campers and keep your budget in check.
Need more tips on designing effective summer camp arrow signs? Check out our guide on Designing Effective Summer Camp Arrow Signs.
Keep it real, keep it fresh, and keep those costs down.
Incorporating Branding into Camp Arrow Signs
Ever wondered how to make your summer camp stand out with just a few arrow signs? You’re not alone. Many camp organisers struggle with this. But here’s the deal: incorporating branding into your camp arrow signs can elevate your camp’s visibility and create a lasting impression. Let’s dive into how you can do this effectively.
Why Branding Matters
First off, why should you even bother with branding your arrow signs? It’s simple:
- Recognition: Helps campers and parents easily identify your camp.
- Professionalism: Shows that you’ve put thought and effort into every detail.
- Consistency: Reinforces your camp’s identity across all touchpoints.
Key Elements to Include
When we talk about branding, it’s not just slapping your logo on a sign. Here’s what you should focus on:
- Logo: Make sure your camp’s logo is prominently displayed.
- Colours: Use your camp’s colour scheme. Consistency is key.
- Fonts: Stick to your camp’s chosen fonts for a cohesive look.
- Tagline: If you have a catchy tagline, don’t hesitate to include it.
Practical Steps to Get Started
Alright, let’s break it down:
- Design Templates: Create a few design templates that incorporate your logo, colours, and fonts. This makes it easier to produce multiple signs.
- Professional Printing: Invest in professional printing to ensure high quality. Trust me, it’s worth it.
- DIY Options: If you’re on a tight budget, consider DIY options like vinyl stickers for logos and stencils for fonts.
Real-Life Example
Let me share a quick story. A friend of mine runs a summer camp and decided to rebrand their arrow signs. They used vibrant colours and a playful font that matched their camp’s theme. The result? Parents and kids started recognising their signs from a mile away, and their registration numbers shot up.
Placement and Visibility
Branding is pointless if no one sees your signs. Here are some tips:
- High-Traffic Areas: Place signs where they’re most likely to be seen.
- Eye Level: Ensure signs are at eye level for maximum impact.
- Lighting: Consider the lighting conditions. Reflective materials can be a game-changer.
Cost-Effective Branding
Worried about the cost? Here are some budget-friendly tips:
- Bulk Orders: Order signs in bulk to save money.
- Local Printers: Use local printing services to cut down on shipping costs.
- Reusable Materials: Opt for durable, weather-resistant materials so you don’t have to replace signs frequently.
Maintenance and Storage
To keep your branded signs looking fresh:
- Regular Cleaning: Wipe down signs regularly to remove dirt and grime.
- Proper Storage: Store signs in a dry, cool place when not in use to prevent damage.
Tips for Maintaining and Storing Signs
Ever wondered how to keep your summer camp arrow signs looking sharp year after year? Or maybe you’re tired of replacing them every season? Let’s dive into some no-nonsense tips to keep those signs in top-notch condition.
Regular Cleaning
First off, clean your signs regularly. Dirt, grime, and weather can take a toll.
- Use mild soap and water: Avoid harsh chemicals.
- Soft cloth or sponge: Gentle is the way to go.
Inspect for Damage
Routine inspections are crucial. When was the last time you checked for wear and tear?
- Cracks or fading: Catch these early.
- Loose fittings: Tighten them up.
Proper Storage
Now, let’s talk storage. You’re not just tossing these signs in a shed, right?
- Dry, cool place: Moisture is the enemy.
- Flat storage: Prevent warping by laying signs flat.
Seasonal Maintenance
Don’t wait until the last minute. Pre-season prep is a game-changer.
- Repaint if needed: Freshen up those faded colours.
- Check hardware: Make sure all screws and bolts are intact.
Use Protective Coatings
Invest in protective coatings. These can extend the life of your signs.
- UV-resistant paint: Stops the sun from bleaching your signs.
- Waterproof sealant: Keeps moisture at bay.
Real-Life Example
Remember that one time we had a storm, and our signs were scattered everywhere? Yeah, that was a lesson learned. Now, we secure them properly and store them safely.
Quick Recap
- Clean regularly
- Inspect for damage
- Store properly
- Seasonal maintenance
- Use protective coatings
By following these tips, you’ll keep your summer camp arrow signs looking fresh and functional. Trust me, a little effort goes a long way.
For more creative ideas, check out our creative summer camp themes to enhance your camp experience.
FAQs on Summer Camp Arrow Signs
What materials are best for durable and weather-resistant summer camp arrow signs?
Choosing the right materials is crucial for durability and weather resistance. The top materials include aluminium, PVC (Polyvinyl Chloride), acrylic, and Coroplast (corrugated plastic). Each offers unique benefits such as being rust-resistant, cost-effective, UV-resistant, and waterproof.
Why is aluminium a good choice for summer camp arrow signs?
Aluminium is lightweight but strong, rust-resistant, and easy to print on. It’s perfect for all weather conditions and looks slick, making it an excellent choice for durable signage.
How should I place my summer camp arrow signs for maximum visibility?
Effective placement involves positioning signs at key locations like entrances, crossroads, activity areas, and emergency exits. Signs should be at eye level, with clear and consistent arrows pointing precisely where needed. Consider weather conditions and potential obstructions when placing signs.
What are some cost-effective solutions for summer camp signage?
Cost-effective solutions include using materials like corrugated plastic and plywood. DIY options can save money, but professional services offer quality and durability. Buying in bulk, looking for sales, and sourcing from local suppliers can also reduce costs.
Can I reuse and recycle old signs?
Yes, you can repaint and reuse old signs to give them a fresh look. Additionally, swapping signs with other camp directors can be a cost-saving strategy.
What should I consider when choosing materials for my signs?
Consider your budget, the longevity of the material, and the desired aesthetics. For example, Coroplast and PVC are budget-friendly, while aluminium and acrylic offer better longevity and a high-end look.
Are there any tips for ensuring my signs are visible in different weather conditions?
Ensure your signs are made from waterproof materials and consider using reflective signs or solar lights for night-time visibility. Avoid glare from sunlight by positioning signs appropriately.
What are some real-life examples of effective signage strategies?
One camp switched from wooden signs to aluminium after experiencing issues with paint chipping and wood warping. Another camp adjusted sign height to kids’ eye level to improve visibility and reduce confusion.
Is it better to opt for DIY signs or professional services?
DIY signs can save money if you have the time and skills. However, professional services, although more expensive upfront, offer quality and durability that can save you from future headaches.
How can I make my signs look professional on a tight budget?
Using cost-effective materials like corrugated plastic and leveraging bulk orders, sales, and local suppliers can help. DIY options with a bit of creativity can also yield professional-looking results.
References
-
Materials for Durable and Weather-Resistant Signs
-
Placement Strategies for Maximum Visibility
-
Cost-Effective Solutions for Camp Signage