Creating a Summer Camp Quilt
Creating a Summer Camp Quilt can be a delightful journey, blending nostalgia with creativity. Whether you’re a beginner or an experienced quilter, this guide will walk you through every step, from gathering essential materials to incorporating personal memories into your design. Let’s dive into the vibrant world of summer camp-themed quilts and craft something truly special.
Gathering Materials
To start, you’ll need to gather some basic materials: high-quality fabric, a reliable sewing machine, and essential quilting tools. Choosing the right fabrics is crucial; opt for patterns and colours that evoke the fun and carefree spirit of summer camp. Think about incorporating elements like log cabin designs or patches that represent memorable camp activities. Ready to get started? Let’s make a quilt that captures the essence of summer camp adventures!
Step-by-Step Guide to Creating a Summer Camp Quilt
Why Create a Summer Camp Quilt?
Ever wondered how to capture the essence of those unforgettable summer camp memories? A Summer Camp Quilt might just be the perfect project for you. Whether you’re a seasoned quilter or a newbie, creating this quilt can be a fun and meaningful way to relive those sunny days and campfire nights. Plus, it’s a fantastic keepsake that can be passed down through generations. So, let’s dive right in!
Getting Started: What You Need to Know
Creating a Summer Camp Quilt can seem daunting at first, but trust me, it’s easier than you think. Here’s a straightforward, step-by-step guide to help you out:
1. Plan Your Quilt Design
First things first, you need a game plan. Think about the overall look and feel you want for your quilt. Do you want it to be vibrant and colourful, or more subdued and earthy?
- Sketch Your Ideas: Grab a notebook and start sketching. This doesn’t have to be perfect. Just get your ideas down.
- Choose a Theme: Maybe you want to focus on camp activities like canoeing, hiking, or archery. Or perhaps you want to highlight the natural beauty of the campgrounds.
2. Gather Your Materials
Before you start cutting and sewing, make sure you have all the essential materials on hand. This will save you countless trips to the craft store.
- Fabric: Choose fabrics that remind you of summer camp. Think plaids, nature prints, and solid colours that match your theme.
- Thread: Make sure you have plenty of thread in colours that complement your fabric.
- Batting: This is the middle layer that gives your quilt its warmth and thickness.
- Backing Fabric: The fabric that will be on the back of your quilt.
3. Cutting the Fabric
Now comes the fun part â cutting your fabric into pieces. This is where your sketch will come in handy.
- Use a Rotary Cutter: This tool will make your life so much easier. Trust me.
- Cutting Mat: Protect your surfaces and get cleaner cuts.
- Ruler: Ensure your pieces are straight and even.
4. Assembling the Quilt Top
This is where your quilt starts to come to life. Lay out your pieces according to your sketch.
- Sew the Pieces Together: Start with small sections and gradually piece them together.
- Press the Seams: Use an iron to press the seams flat. This will make your quilt look more polished.
5. Adding the Batting and Backing
Once your quilt top is assembled, it’s time to add the batting and backing.
- Layer the Quilt: Lay the backing fabric down first, then the batting, and finally the quilt top.
- Baste the Layers: Use safety pins or basting spray to hold the layers together.
6. Quilting the Layers Together
This step involves stitching through all three layers to hold them together.
- Choose a Quilting Pattern: You can go for straight lines, free-motion quilting, or even hand quilting if you’re feeling adventurous.
- Quilt from the Center Out: This helps to prevent bunching and ensures a smoother finish.
7. Binding the Edges
The final step is to bind the edges of your quilt. This gives it a finished look and protects the edges from fraying.
- Cut Binding Strips: These should be about 2.5 inches wide.
- Sew the Binding: Attach the binding to the front of the quilt first, then fold it over to the back and hand-stitch it in place.
If you’re looking for more creative ideas to enhance your summer camp experience, check out our Creative Summer Camp Cabin Decor Ideas and make your camp cabin feel like a cozy retreat. Additionally, for those who love combining fun and learning, our Summer Camp Sewing Activities offer engaging projects suitable for all ages.
Essential Materials for a Summer Camp Quilt Project
Ever wondered what you actually need to make a summer camp quilt?
Let’s break it down.
Fabric Choices
First off, you need fabric.
But not just any fabric.
Go for cotton. It’s breathable and perfect for summer.
You’ll need:
- Main fabric: For the quilt top.
- Backing fabric: The backside of the quilt.
- Binding fabric: The edges.
Batting
This is the fluffy stuff in the middle.
It gives your quilt warmth and thickness.
Cotton batting is a solid choice.
Thread
You’ll want strong, durable thread.
Polyester or cotton thread works great.
Match the colour to your fabric or go for a contrasting look.
Cutting Tools
Sharp cutting tools are a must.
- Rotary cutter: For precise cuts.
- Cutting mat: Protects your table and keeps cuts clean.
- Quilting ruler: Ensures straight lines.
Sewing Machine
A good sewing machine is your best friend.
You don’t need anything fancy.
Just one that can handle multiple layers of fabric.
Pins and Needles
Keep your fabric in place with quilting pins.
Use quilting needles for hand stitching.
Iron and Ironing Board
Pressing your fabric is key.
An iron helps set your seams and keeps everything flat.
Quilting Hoop or Frame
Not essential, but helpful.
Keeps your fabric taut while you hand quilt.
Marking Tools
You’ll need to mark your fabric.
Fabric markers or chalk work well.
Quilting Templates
These are optional but can make your life easier.
Use them for consistent shapes and patterns.
Storage
Keep your materials organised.
Storage bins or baskets are perfect.
Real Talk
I know it sounds like a lot.
But trust me, having the right materials makes the process smoother.
And hey, if you’re missing something, improvise.
The key is to start.
So, grab your materials and let’s get quilting!
Common Design Elements in Summer Camp Quilts
Ever wondered what makes a summer camp quilt stand out? You’re not alone. Many quilters, both newbies and veterans, have the same question. Let’s dive into the common design elements that make these quilts special.
Nostalgia and Memories
Summer camp quilts are all about nostalgia. Think of all the memories you want to capture:
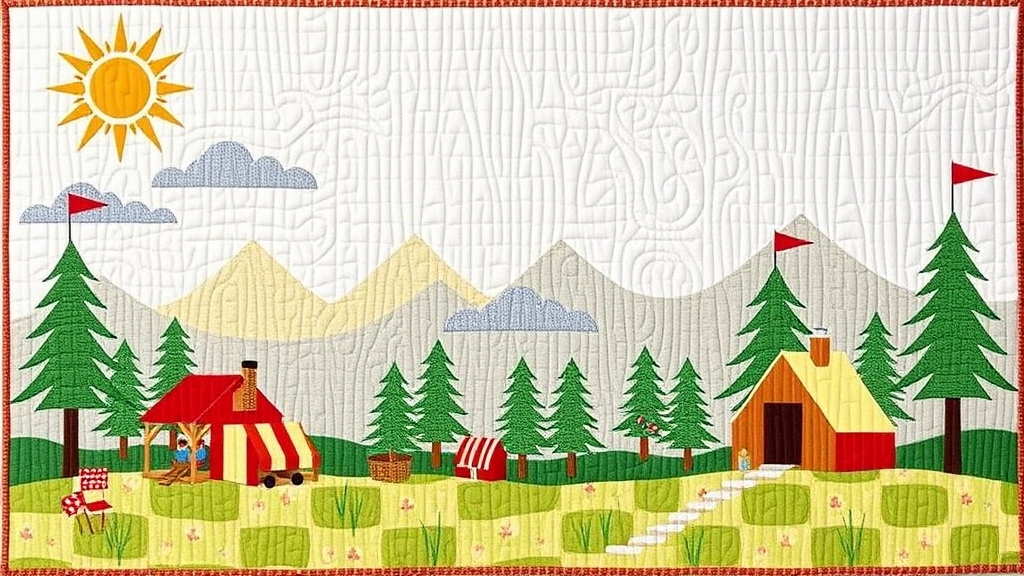
- Campfire nights: Imagine a quilt block with a campfire motif. It’s warm, inviting, and brings back those nights spent under the stars.
- Nature elements: Trees, lakes, and mountains can be incorporated into your quilt. These elements bring the great outdoors into your living space.
- Personal keepsakes: Old t-shirts, bandanas, or patches from camp can be sewn into the quilt. This adds a personal touch that’s irreplaceable.
Bright and Bold Colours
Summer camp quilts often feature bright and bold colours. Why? Because they reflect the vibrancy and energy of camp life. Here’s what to consider:
- Primary colours: Reds, blues, and yellows are common. They’re eye-catching and full of life.
- Nature-inspired hues: Greens, browns, and blues can evoke the feeling of being in the woods or by the lake.
- Mix and match: Don’t be afraid to mix patterns and solids. The more eclectic, the better.
Themed Blocks and Patterns
Themed blocks are another staple of summer camp quilts. These can include:
- Log cabin blocks: Symbolising the rustic cabins you stayed in.
- Star blocks: Representing those clear, starry nights.
- Animal motifs: Bears, deer, or even fish to remind you of the wildlife.
Texture and Fabric Choices
Texture plays a huge role in making your quilt unique. Consider these options:
- Flannel and fleece: These fabrics add warmth and a cosy feel.
- Cotton: Lightweight and breathable, perfect for summer nights.
- Mixed textures: Combining different fabrics can add depth and interest.
Storytelling Through Quilting
Every quilt tells a story, and summer camp quilts are no exception. Here’s how you can weave your tale:
- Chronological blocks: Arrange your blocks in a way that tells the story of your camp experience from start to finish.
- Journal blocks: Leave some space to write down memories or have friends and family sign their names.
- Photo transfers: Use fabric photo transfers to include actual pictures from camp.
Real Examples
Let me tell you about my friend Sarah. She made a summer camp quilt that included patches from every camp she attended as a kid. Each patch was a different colour and shape, making her quilt a vibrant patchwork of memories. Every time she looks at it, she’s transported back to those carefree days.
For more ideas on how to capture the essence of camp, check out our summer camp nature activities for kids and discover how summer camps build community and friendships.
Top Tips for Choosing Fabrics for Your Summer Camp Quilt

Ever found yourself staring at a wall of fabrics, totally overwhelmed? Yeah, me too.
Choosing fabrics for your summer camp quilt can feel like a daunting task. But don’t worry, I’ve got your back.
Here are some top tips to make the process a breeze:
1. Think About Durability
You want your quilt to last, right? Go for fabrics that can withstand some wear and tear. Cotton is a solid choice—easy to work with and durable.
2. Consider the Theme
What memories are you trying to capture? Think about the colours and patterns that remind you of summer camp. Greens for the forest, blues for the lake, maybe even some fun prints like tents or campfires.
3. Mix and Match
Don’t be afraid to mix different fabrics. Solids, prints, stripes—they can all work together. Just make sure they complement each other. Lay them out together before you commit.
4. Play with Texture
Adding different textures can make your quilt more interesting. Think about incorporating some flannel or linen. It adds a tactile element that’s super cosy.
5. Stick to a Colour Palette
Pick a colour palette and stick to it. This keeps your quilt looking cohesive. Use a colour wheel if you’re unsure. Complementary colours always work well together.
6. Sample First
Before you buy metres of fabric, get some samples. Make sure the colours and textures work well together. It’s easier to change your mind with small swatches than with a big pile of fabric.
7. Check for Quality
Not all fabrics are created equal. Feel the fabric, look at the weave, and make sure it’s good quality. You don’t want it falling apart after the first wash.
Real Talk: My Fabric Fiasco
I once picked a gorgeous patterned fabric online, only to find it was practically see-through when it arrived. Lesson learned: always check the fabric weight and quality before you buy.
8. Mind the Budget
Fabrics can get pricey. Set a budget before you start shopping. Look for sales or check out second-hand shops. Sometimes you can find hidden gems at a fraction of the cost.
9. Ask for Opinions
Sometimes you just need a second opinion. Don’t hesitate to ask friends or family what they think. A fresh set of eyes can spot things you might miss.
10. Have Fun with It
At the end of the day, it’s your quilt. Choose fabrics that make you happy. The process should be enjoyable, not stressful.
Choosing fabrics for your summer camp quilt doesn’t have to be a headache. Keep these tips in mind, and you’ll be well on your way to creating a quilt that’s both beautiful and meaningful.
How to Make a Log Cabin-Style Summer Camp Quilt
Alright, let’s dive into the nitty-gritty of making a Log Cabin-Style Summer Camp Quilt. You’re probably wondering, âHow do I even start?â or âWhat if I mess up?â Don’t worry, I’ve got your back. Let’s break it down together, step-by-step.
What is a Log Cabin Quilt?
First off, let’s talk about what a Log Cabin Quilt actually is. Picture this: it’s a classic quilt design that’s been around forever. It’s all about creating a series of “logs” or strips of fabric around a central square. The result? A beautifully intricate pattern that looks way harder to make than it actually is.
Getting Started: Materials You’ll Need
Before we jump into the process, let’s make sure you’ve got all the essential materials. Here’s a quick checklist:
- Fabric Strips: Go for a mix of colours that scream summer camp â think greens, blues, and earthy tones.
- Central Squares: These are the focal points of your blocks. Pick something bold.
- Rotary Cutter and Mat: Precision is key here.
- Sewing Machine: Unless you fancy hand-stitching, which is cool too.
- Thread: Match it to your fabric.
- Pins and Clips: To keep everything in place.
- Iron: For pressing seams.
Step-by-Step Guide to Making Your Log Cabin Quilt
1. Cut Your Fabric
Start by cutting your fabric into strips. Typically, you’ll want them around 2.5 inches wide, but feel free to adjust based on your design.
2. Create Your Central Square
Cut out your central squares. These are usually around 2.5 inches by 2.5 inches. This square will be the heart of each block.
3. Sew the First Strip
Place your first strip right side down on one edge of the central square. Sew it on, then press the seam open with your iron.
4. Add More Strips
Now, rotate the block and add another strip to the next edge. Keep sewing and pressing until you’ve gone all the way around the square. Repeat this process, building outwards in a spiral pattern.
5. Trim and Square Up
Once you’ve got a few rounds of strips, trim the block to ensure it’s square. This keeps everything neat and tidy.
6. Assemble the Blocks
Lay out your blocks in a pattern that you like. Play around with the arrangement until it feels right. Then, sew the blocks together row by row.
7. Add Borders (Optional)
If you want, you can add a border around the entire quilt. This gives it a finished look.
8. Quilting and Binding
Finally, quilt the layers together. You can do this by hand or with a machine. Then, bind the edges to complete your quilt.
Personal Tips and Tricks
- Mix and Match: Don’t stress about having perfectly matching fabrics. The charm of a summer camp quilt is in its eclectic nature.
- Press Often: Keep your iron handy and press your seams after every strip. It makes a world of difference.
- Have Fun: Remember, this is a labour of love. Enjoy the process, and don’t sweat the small stuff.
For more creative ideas, check out our Summer Camp Art: Creative and Eco-Friendly Ideas and if you’re looking for essential items to bring along, don’t miss our Ultimate Guide: Must-Have Items for Summer Camp.
Incorporating Personal Memories into Your Summer Camp Quilt

Ever thought about how to make your summer camp quilt truly one-of-a-kind?
Incorporating personal memories is the way to go.
You might be asking, “How do I even start?”
Well, let’s dive in.
Why Add Personal Touches?
You want your quilt to be more than just fabric and thread.
You want it to tell a story.
Your story.
Think about those unforgettable campfires, the friends you made, and the adventures you had.
Wouldn’t it be cool to weave those memories into your quilt?
Start With Keepsake Fabrics
First, gather fabrics that mean something to you.
- Old Camp T-Shirts: Cut out logos or designs from your favourite camp tees.
- Bandanas: Use those colourful bandanas you swapped with mates.
- Scout Badges: Sew on any badges you earned.
Use Photos
Yes, you can actually put photos on your quilt.
- Printable Fabric Sheets: These are a game-changer. Print your camp photos directly onto fabric.
- Photo Transfers: Use iron-on transfers to add images.
Add Handwritten Notes
Remember those notes you passed around the camp?
- Fabric Markers: Write messages, quotes, or even signatures from friends directly onto the quilt blocks.
- Embroidery: Stitch in special dates, names, or inside jokes.
Incorporate Nature Elements
Nature is a huge part of the camp experience.
- Leaf Prints: Use fabric paint to create leaf imprints.
- Pressed Flowers: Sew in small pockets to hold pressed flowers.
Mix in Camp Colours
Think about the colours that scream “summer camp” to you.
- Camp Colours: Match your fabric choices to the camp’s colour scheme.
- Nature Tones: Add greens, blues, and browns to reflect the great outdoors.
Don’t Forget the Details
It’s the little things that make a big difference.
- Pockets: Add small pockets to hold tiny keepsakes.
- Buttons: Use buttons from old camp gear or uniforms.
Real-Life Example
I once made a quilt with my niece using her camp memories.
We used her old camp shirts, printed photos of her and her friends, and even added a small pocket to hold a friendship bracelet.
She was over the moon.
Best Tools and Techniques for Quilting a Summer Camp Quilt
Ever find yourself staring at a pile of fabric and wondering, “Where do I even start?” Trust me, I’ve been there. Quilting can seem daunting, but with the right tools and techniques, you’ll be breezing through your Summer Camp Quilt project like a pro. Let’s break it down.
Essential Tools for Quilting a Summer Camp Quilt
First off, let’s talk tools. You don’t need a ton of fancy gadgets, but a few essentials will make your life a lot easier.
- Rotary Cutter and Mat: Think of these as your bread and butter. They allow you to cut fabric quickly and accurately.
- Quality Sewing Machine: You don’t need the latest model, but make sure it’s reliable and has a good stitch variety.
- Quilting Ruler: This will help you measure and cut your fabric pieces precisely.
- Iron and Ironing Board: Pressing your fabric is crucial for a polished look.
- Quilting Pins and Clips: These keep your fabric pieces in place as you sew.
- Seam Ripper: Mistakes happen. A seam ripper will be your best friend when they do.
Techniques to Master for a Flawless Quilt
Now, let’s dive into some techniques. Mastering these will take your quilting game to the next level.
- Chain Piecing: This is a time-saver. Instead of sewing one piece at a time, you sew multiple pieces in a continuous chain. It’s efficient and keeps your seams consistent.
- Pressing, Not Ironing: Pressing means lifting and setting the iron down rather than sliding it. This avoids stretching your fabric.
- Quarter-Inch Seams: Aim for a consistent quarter-inch seam allowance. It’s the gold standard in quilting.
- Basting: Whether you use pins, spray, or thread, basting holds your quilt sandwich together while you quilt it.
- Free-Motion Quilting: This technique allows you to quilt in any direction and create intricate patterns. It takes practice, but it’s worth it.
Real Talk: What’s the Biggest Challenge?
One of the biggest worries I hear from quilters is, “What if I mess up?” Here’s the thing: you will. And that’s okay. Every mistake is a learning opportunity. The seam ripper exists for a reason, and even seasoned quilters use it.
My Go-To Tools and Techniques
When I made my first Summer Camp Quilt, I leaned heavily on chain piecing and a rotary cutter. I was skeptical about the rotary cutter at first, but it made cutting fabric so much faster and more accurate. And chain piecing? It saved me hours.
If you’re looking for more inspiration and ideas for your quilting projects, check out our fun and creative summer camp projects. For those planning to attend a camp, don’t miss our guide on essential summer camp medical forms and submission tips.
Joining a Summer Camp Quilt-Along: Community and Creativity
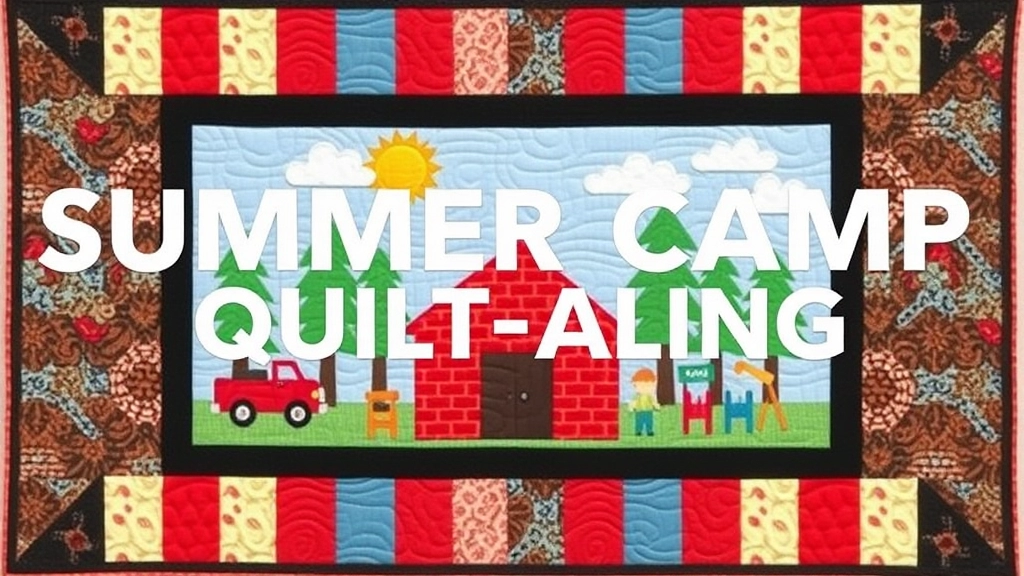
Ever wondered how to make quilting more fun and less lonely?
Joining a summer camp quilt-along might be your answer.
What is a Quilt-Along?
Alright, so a quilt-along is like a virtual quilting bee.
You join a group of folks online, and you all work on the same quilt project together.
It’s like having quilting buddies, but you don’t have to leave your house.
Why Join a Quilt-Along?
Community and Creativity are the big wins here.
You get to:
- Learn new techniques from experienced quilters.
- Share your progress and get feedback.
- Get inspired by seeing others’ work.
- Stay motivated to finish your project.
Getting Started
First, find a quilt-along that fits your style.
Check out quilting forums, social media groups, or even local quilt shops.
They usually announce these events well in advance.
What You’ll Need
Before you dive in, gather these essentials:
- Fabric: Choose your favourite colours and patterns.
- Tools: Rotary cutter, cutting mat, and quilting ruler.
- Sewing Machine: Make sure it’s in good working order.
- Pattern: Most quilt-alongs provide a specific pattern to follow.
How It Works
Once you join, you’ll get a schedule.
This breaks down the quilt project into manageable chunks.
Each week, you’ll complete a part of the quilt.
Tips for Success
- Stay on Schedule: Falling behind can be discouraging.
- Engage with the Group: Share your progress and ask questions.
- Have Fun: It’s about the journey, not just the finished quilt.
Real Stories
I remember my first quilt-along.
I was nervous and unsure.
But the community was so welcoming.
I learned new techniques and made friends who shared my passion.
Showcasing Finished Summer Camp Quilts: Sharing Ideas and Inspiration
Ever wondered how to show off your summer camp quilt and get some fresh ideas? You’re not alone. Many of us who dive into quilting often ask, “How do I share my work and get inspired by others?” Let’s break it down.
Why Showcase Your Summer Camp Quilt?
Showcasing your quilt isn’t just about bragging rights. It’s about:
- Inspiring others: Your unique design might spark someone else’s creativity.
- Getting feedback: Constructive criticism can help you improve.
- Building community: Sharing your work connects you with other quilters.
Where to Share Your Quilt
Online Platforms:
- Instagram: Use hashtags like #SummerCampQuilt and #QuiltingCommunity.
- Pinterest: Create a board dedicated to your quilting projects.
- Facebook Groups: Join quilting groups to share your work and get feedback.
Quilt Shows and Exhibitions:
- Local Quilt Shows: Check out community centres or local fairs.
- National Quilt Festivals: Events like the Festival of Quilts in Birmingham are perfect for showcasing your work.
Quilt-Alongs:
- Virtual Quilt-Alongs: Join online quilt-alongs to share progress and finished quilts.
- Local Quilt Guilds: Participate in guild meetings and show-and-tell sessions.
Tips for Showcasing Your Quilt
Taking Great Photos:
- Natural Light: Shoot your quilt in natural light to highlight the colours and details.
- Clean Background: Use a plain background to make your quilt pop.
- Close-Ups: Capture close-up shots of intricate details.
Writing a Captivating Description:
- Tell the Story: Share the inspiration behind your quilt.
- Highlight Unique Features: Point out any special techniques or fabrics you used.
- Ask for Feedback: Encourage viewers to share their thoughts.
Getting Inspired by Others
Follow Influential Quilters:
- Social Media: Follow quilters who inspire you on Instagram and Pinterest.
- Blogs and Websites: Bookmark quilting blogs for tutorials and ideas.
Attend Workshops and Classes:
- In-Person Classes: Local fabric shops often offer quilting classes.
- Online Workshops: Websites like Craftsy provide a plethora of online classes.
Join Quilt-Alongs:
- Community Projects: Participate in quilt-alongs to see different interpretations of the same pattern.
- Challenges: Join quilting challenges to push your creative boundaries.
Real Stories, Real Inspiration
I remember my first quilt show. I was nervous, but the feedback was invaluable. One lady pointed out how my colour choices brought out a nostalgic feel, something I hadn’t even noticed. It made me see my work in a new light.
Another time, I joined an online quilt-along. Seeing how others interpreted the same pattern was eye-opening. One quilter used vintage fabrics that added a whole new dimension to the design. It inspired me to dig through my own fabric stash and experiment.
For more tips on how to get the most out of your summer camp experiences, check out our top summer camp tips for parents and kids.
Ever wondered how to make your summer camp quilt stand out? Or how to give it a modern twist without losing that nostalgic charm? Let’s dive right in.
Summer camp quilts are timeless. But who says you can’t add a bit of flair? Here are some fresh takes:
Think beyond the traditional squares. Triangles, hexagons, and even circles can add a contemporary vibe.
Ditch the pastels. Go for vibrant, bold colours. They scream modern and make your quilt pop.
Less is more. Simple lines, clean shapes. A minimalist approach can make your quilt look sleek and stylish.
Your quilt should tell a story. Here’s how to make it personal:
Print your favourite camp photos onto fabric. Incorporate these into your quilt.
Stitch in handwritten notes or letters. It’s like a diary on a quilt.
Got any badges or patches from camp? Sew them in. They add character and memories.
Quilting has come a long way. Here are some techniques to consider:
Faster and more precise. Perfect for those intricate designs.
Gives you the freedom to create unique patterns. Let your creativity run wild.
Piece your quilt together in sections. Makes the process more manageable and less overwhelming.
Let me share a quick story. My friend Sarah made a quilt using her kids’ old camp t-shirts. She cut out the logos and sewed them into her quilt. Every time she looks at it, she’s reminded of those fun summers. That’s what it’s all about.
Modern variations can breathe new life into your summer camp quilt. Whether it’s through bold colours, geometric patterns, or personal touches. Make it yours. Make it memorable. Got any other cool ideas for a summer camp quilt? Share them with us. Let’s keep this creative train rolling.
For more exciting ideas on how to make your summer camp unforgettable, check out our [creative summer camp day themes](https://summercamp.blog/creative-summer-camp-day-themes-to-excite-and-engage-campers/) and explore the [culture of summer camps today](https://summercamp.blog/exploring-the-culture-of-summer-camps-today/).
FAQs about Summer Camp Quilt Projects
What materials do I need to start a summer camp quilt?
You’ll need several essential materials including cotton fabric for the quilt top, backing, and binding. You’ll also need cotton batting for warmth and thickness, strong polyester or cotton thread, and various cutting tools like a rotary cutter, cutting mat, and quilting ruler.
Why is cotton fabric recommended for summer camp quilts?
Cotton is breathable and perfect for summer, making it an ideal choice for both comfort and durability.
What kind of sewing machine should I use?
You don’t need a fancy sewing machine. A basic model that can handle multiple layers of fabric will work just fine.
How do I choose the right fabrics for my quilt?
Consider durability, the theme of your quilt, and try to mix and match different textures and patterns. It’s also helpful to stick to a colour palette for a cohesive look.
Can I incorporate personal memories into my quilt?
Yes! You can add personal touches by using keepsake fabrics like old camp t-shirts, photos printed on fabric, and even handwritten notes or embroidery.
What are some tips for choosing fabrics that work well together?
Mix different types of fabrics like solids, prints, and stripes, and consider adding textures like flannel or linen. Always sample first to make sure the colours and textures work well together.
How can I make quilting more fun and less lonely?
Joining a summer camp quilt-along can make the process more enjoyable. You’ll get to learn new techniques, share your progress, and stay motivated by being part of a community.
What is a quilt-along?
A quilt-along is a virtual quilting event where a group of people work on the same quilt project together. It’s like having quilting buddies online.
What should I do if I don’t have all the materials?
If you’re missing something, it’s okay to improvise. The key is to start with what you have and gather other materials as you go.
Why is it important to press fabric with an iron?
Pressing your fabric helps set your seams and keeps everything flat, making the quilting process smoother and more precise.
How do I keep my quilting materials organized?
Using storage bins or baskets can help keep your materials organized and easily accessible.
What are some optional tools that can make quilting easier?
Optional but helpful tools include a quilting hoop or frame to keep your fabric taut, and quilting templates for consistent shapes and patterns.
References
-
What is a Quilt-Along?
-
Top Tips for Choosing Fabrics for Your Quilt
-
10 Essential Quilting Tools for Beginners