Exciting and Educational Activities for Kids This Summer
Looking for exciting and educational activities for kids this summer? Dive into our top summer camp science experiments! From water-based explorations to creative chemistry projects, these hands-on experiments are perfect for keeping young minds engaged and learning outdoors.
Fun and Simple Science Activities
Whether you’re a camp organizer or a parent, these fun and simple science activities will make summer unforgettable. Explore natural phenomena, get messy with exciting projects, and inspire young inventors with DIY engineering challenges. Let’s make science fun and accessible this summer!
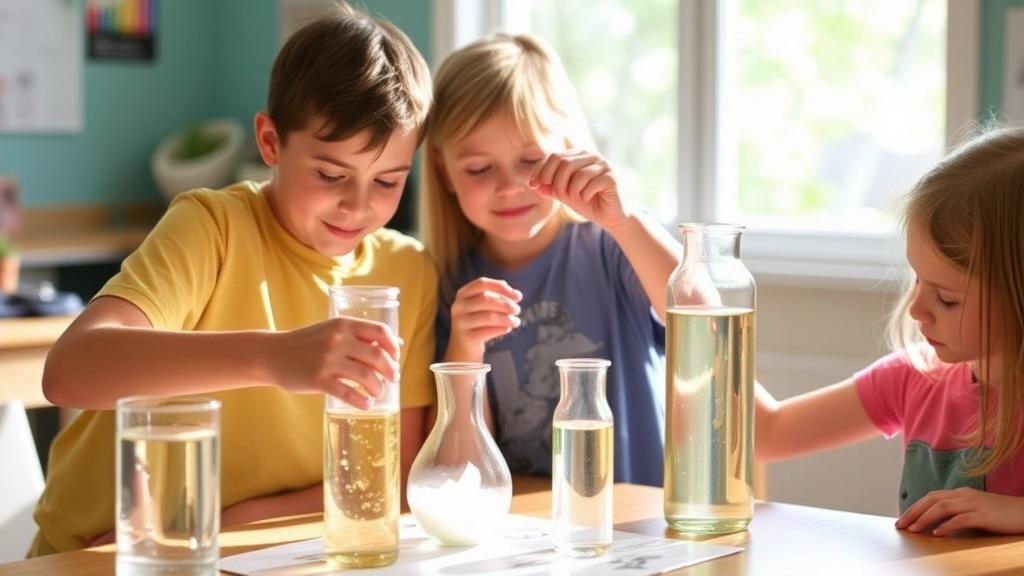
Fun Water-Based Science Experiments
Ever wondered how to keep kids entertained while sneaking in some learning? Water-based science experiments are your golden ticket. They’re fun, engaging, and perfect for those curious minds. Let’s dive into some exciting activities that you can easily do at home or in the garden.
Why Water-Based Science Experiments?
Parents often ask, “How can I make science fun for my kids?” The answer is simple: use water! Water-based experiments are not only entertaining but also educational. They help kids understand basic scientific principles in a hands-on way.
The Magic of Surface Tension
One of the coolest things about water is its surface tension. You can show this to your kids with a few simple items:
- Pepper and Soap Experiment: Fill a bowl with water and sprinkle some pepper on the surface. Dip a finger in soap and touch the water. Watch the pepper scatter! This demonstrates how soap breaks the surface tension of water.
- Floating Paperclip: Try to make a paperclip float on the surface of water. It’s tricky but possible! Use a piece of tissue to help balance it on the water’s surface.
Exploring Density with Water
Density is another fascinating concept that’s easy to explore with water. Here are a couple of experiments to try:
- Layered Liquids: Fill a glass with layers of different liquids like honey, dish soap, water, and oil. Watch how they stack up without mixing, showing the different densities.
- Floating and Sinking Objects: Gather various small objects (like a coin, a piece of cork, and a grape) and predict whether they will float or sink. Then, test your predictions in a bowl of water.
Colourful Water Experiments
Kids love colours, and water experiments can be a vibrant way to learn about mixing and diffusion:
- Walking Water Experiment: Place cups of coloured water next to an empty cup, with paper towels bridging between them. Watch as the colours “walk” from one cup to another, mixing in the empty cup.
- Rainbow Milk: Add drops of food colouring to a plate of milk. Touch the centre with a soapy cotton bud and see the colours swirl and mix in a beautiful display of colour diffusion.
Temperature Tricks with Water
Temperature can change the way water behaves. Here are some experiments to illustrate this:
Outdoor Weather Science Activities
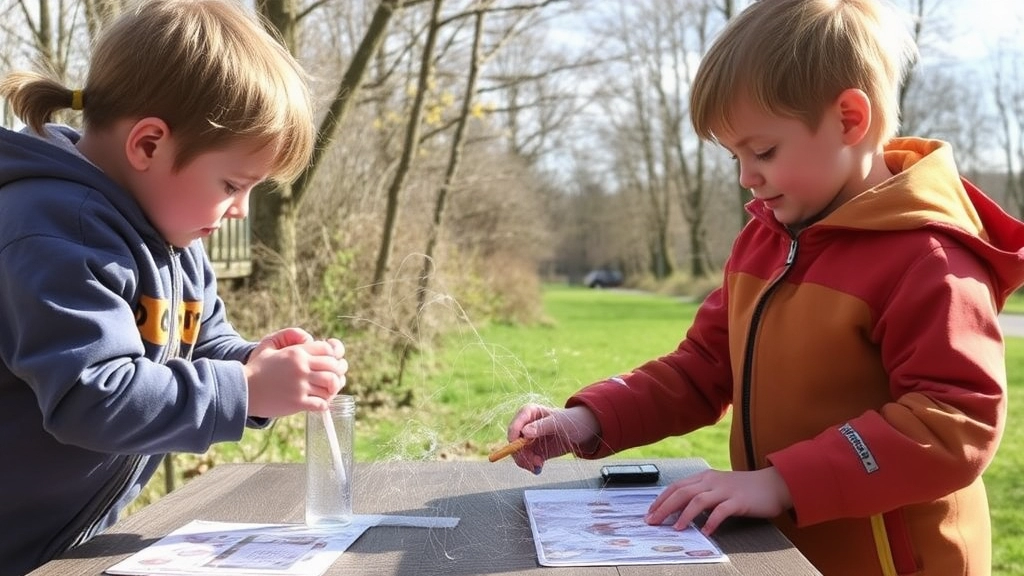
Ever wondered how to keep the kids entertained while sneaking in a bit of learning?
Outdoor weather science activities are your answer.
They’re fun, engaging, and, let’s be real, who doesn’t love playing outside?
Why Weather Science?
Weather is something we experience every day.
But how often do we really understand it?
Kids are naturally curious about why it rains, why the wind blows, or what makes a rainbow.
So, why not turn that curiosity into a learning adventure?
Simple Weather Experiments
You don’t need fancy equipment to get started.
Here are a few easy-to-do activities:
- Rain Gauge:
- Materials: Empty plastic bottle, ruler, marker.
- Steps: Cut the bottle in half, place it outside, and mark the water level daily.
- What They Learn: Measuring rainfall and understanding precipitation.
- Wind Sock:
- Materials: Paper, string, tape.
- Steps: Roll the paper into a cylinder, tape it, and attach strings to one end. Hang it outside.
- What They Learn: Wind direction and speed.
- Cloud Observation Chart:
- Materials: Paper, crayons, a chart template.
- Steps: Draw different cloud types and observe the sky daily, marking what you see.
- What They Learn: Types of clouds and weather prediction.
Real-Life Stories
Remember that time when you were a kid, and you made a weather vane out of a stick and some cardboard?
Yeah, it probably wasn’t accurate, but it was fun.
That’s the kind of hands-on experience we’re talking about here.
Tips for Success
- Keep it Simple: Don’t overcomplicate things.
- Be Consistent: Make it a daily or weekly activity.
- Get Involved: Participate with your kids. It’s more fun that way.
Nature-Inspired Experiments and Investigations
Ever wondered how to get your kids excited about nature? Or maybe you’re struggling to find ways to make science fun and engaging? Well, you’re in the right place. Let’s dive into some nature-inspired experiments and investigations that will keep your young ones entertained and educated.
Why Nature-Inspired Experiments?
First off, why should we even bother with nature-inspired experiments? Simple. Kids are naturally curious about the world around them. They see a leaf and want to know why it changes colour. They spot a bug and wonder how it moves. Nature is the ultimate playground for scientific discovery.
The Basics: Getting Started
Before we jump into the experiments, let’s talk basics. Here’s what you’ll need:
- Curiosity: Encourage your kids to ask questions.
- Simple Tools: Magnifying glass, notebook, and a pencil.
- Outdoor Space: A garden, park, or even a window will do.
Experiment 1: Leaf Chromatography
Ever noticed how leaves change colours in autumn? This experiment will show your kids why.
What You’ll Need:
- Fresh leaves
- Rubbing alcohol
- Coffee filters
- Jars
- Plastic wrap
Steps:
- Collect Leaves: Gather different types of leaves.
- Crush and Soak: Crush the leaves and soak them in rubbing alcohol.
- Filter: Place a coffee filter in the jar to absorb the liquid.
- Observe: Watch as different colours appear on the filter.
Why It Works: Leaves contain various pigments. The alcohol breaks down the leaf cells, releasing these pigments.
Experiment 2: Bug Hotel
Bugs are fascinating, and building a bug hotel is a great way to observe them up close.
What You’ll Need:
- Old wooden box or a crate
- Natural materials (twigs, leaves, pinecones)
- A bit of creativity
Steps:
- Build the Structure: Use the wooden box as the base.
- Fill It Up: Add natural materials to create hiding spots for bugs.
- Place It: Put your bug hotel in a quiet corner of your garden.
- Observe: Check back regularly to see which bugs have moved in.
Why It Works: Different bugs are attracted to different materials. This experiment teaches kids about habitats and ecosystems.
Experiment 3: Soil pH Testing
Soil is more than just dirt. It has different pH levels that can affect plant growth.
What You’ll Need:
- Soil samples
- pH test strips
- Water
- Clear containers
Steps:
- Collect Soil: Gather soil from different locations.
- Mix with Water: Add water to the soil samples.
- Test: Dip pH strips into the mixture.
- Record: Note the pH levels and compare.
Why It Works: This experiment shows how soil pH affects plant life and can lead to discussions about gardening and agriculture.
Real-Life Example: The Curious Case of the Changing Leaf
I remember doing the leaf chromatography experiment with my niece. She was amazed to see the different colours appear on the coffee filter. It sparked a whole conversation about why leaves change colours in autumn and how plants work. That one simple experiment opened up a world of curiosity for her.
If you’re looking for more ways to engage your kids in science, consider checking out some top STEM summer camps for kids. For those interested in a broader range of activities, the summer camp ideas page offers a plethora of fun and educational options.
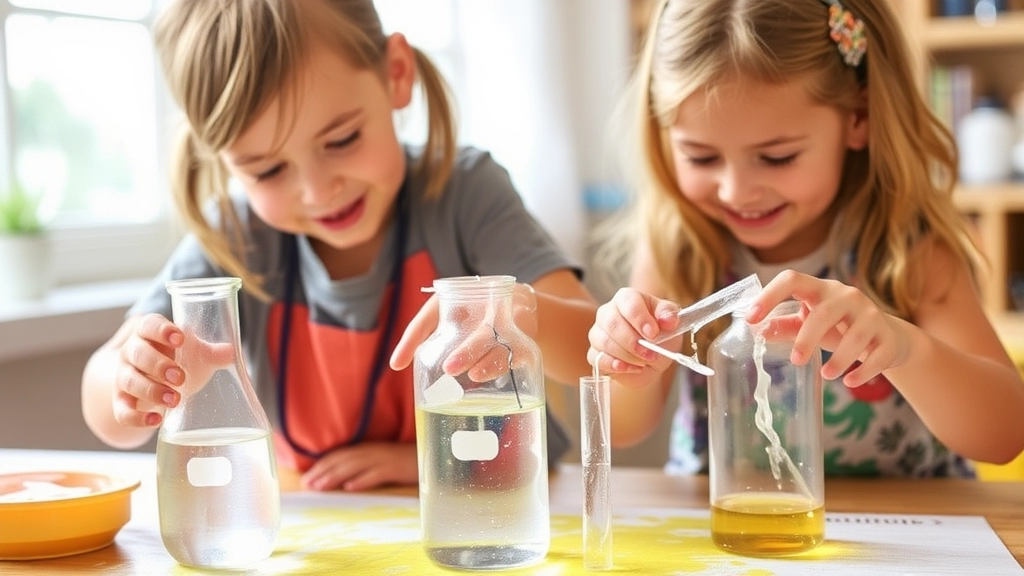
Creative Chemistry Projects for Kids
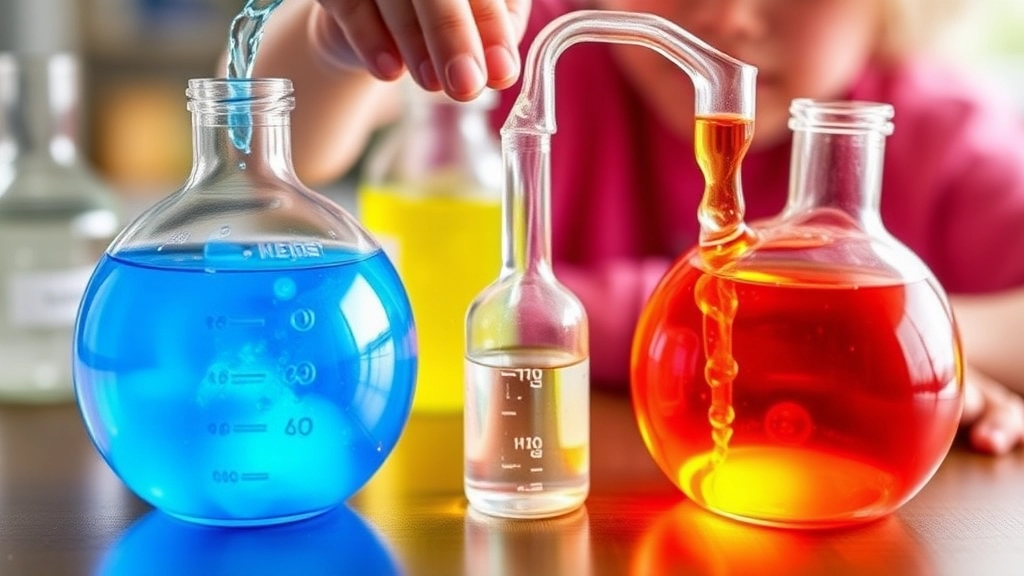
Ever wondered how to get your kids excited about chemistry?
Are you tired of the same old boring science lessons?
Let’s dive into some creative chemistry projects that will make your kids go, “Wow!”
Why Chemistry?
Chemistry can seem daunting.
But it doesn’t have to be.
These projects are simple, fun, and educational.
Plus, they use everyday materials you probably already have at home.
Project 1: Magic Milk
Materials:
- Milk
- Food colouring
- Dish soap
- Cotton swabs
Steps:
- Pour milk into a shallow dish.
- Add drops of food colouring in different spots.
- Dip a cotton swab in dish soap and touch the milk’s surface.
What Happens:
The colours will swirl and dance.
It’s like magic!
But it’s actually science.
The soap breaks down the fat in the milk, causing the colours to move.
Project 2: Baking Soda Volcano
Materials:
- Baking soda
- Vinegar
- Food colouring
- A small container
Steps:
- Place the container in a tray.
- Fill it with baking soda.
- Add a few drops of food colouring.
- Pour vinegar over the baking soda.
What Happens:
You’ll get a fizzy, colourful eruption.
Kids love it.
It’s a classic for a reason.
Project 3: Slime Time
Materials:
- PVA glue
- Baking soda
- Contact lens solution
- Food colouring (optional)
Steps:
- Mix glue and baking soda in a bowl.
- Add food colouring if you want.
- Slowly add contact lens solution while stirring.
What Happens:
You’ll get stretchy, gooey slime.
Perfect for sensory play.
Project 4: Invisible Ink
Materials:
- Lemon juice
- Cotton swabs
- White paper
- A heat source (like a lamp)
Steps:
- Dip a cotton swab in lemon juice.
- Write a message on the paper.
- Let it dry.
- Hold the paper near a heat source to reveal the message.
What Happens:
The heat oxidises the lemon juice, making it visible.
A great way to teach kids about chemical reactions.
Real Stories
I remember doing the baking soda volcano with my niece.
Her eyes lit up.
She asked, “Can we do it again?”
That’s the magic of chemistry.
It turns curiosity into learning.
Easy Physics Experiments with Simple Materials
Ever wondered how to make physics fun and engaging for kids without needing a lab full of expensive equipment? You’re not alone. Many parents and teachers are looking for simple, budget-friendly ways to bring science to life. Let’s dive into some easy physics experiments using materials you probably already have lying around the house.
Why Physics Experiments?
Physics can seem daunting, but it’s all around us. From the way a ball bounces to how a paper plane glides, physics is just the study of how things move and interact. By using everyday items, we can make these concepts easy to grasp and, more importantly, fun!
Balloon Rocket
Materials:
- Balloon
- String
- Straw
- Tape
Steps:
- Tie one end of the string to a chair or doorknob.
- Thread the straw onto the string.
- Blow up the balloon but don’t tie it.
- Tape the balloon to the straw.
- Let go and watch your balloon rocket zoom along the string!
What’s Happening?
The balloon rocket demonstrates Newton’s Third Law: For every action, there is an equal and opposite reaction. The air rushing out of the balloon pushes it forward along the string.
Gravity-Defying Water
Materials:
- Glass of water
- Index card or stiff paper
Steps:
- Fill the glass with water.
- Place the index card over the top of the glass.
- Hold the card in place and flip the glass upside down.
- Slowly let go of the card. The water should stay in the glass!
What’s Happening?
This experiment shows the role of air pressure. The air pressure outside the glass is greater than the pressure inside, keeping the card in place and the water from spilling.
Homemade Parachute
Materials:
- Plastic bag
- String
- Small toy or weight
Steps:
- Cut the plastic bag into a large square.
- Attach a piece of string to each corner of the square.
- Tie the other ends of the strings to the small toy or weight.
- Drop the parachute from a height and watch it float down slowly.
What’s Happening?
This experiment is all about air resistance. The parachute increases the surface area, creating more air resistance and slowing the descent of the toy.
For more fun and educational activities, you might want to check out some fun summer camp crafts for kids or explore STEAM summer camps that offer a variety of science and technology projects.
Magnetic Maze
Materials:
- Magnet
- Paperclip
- Paper
- Pen
Steps:
- Draw a maze on the paper.
- Place the paperclip at the start of the maze.
- Use the magnet underneath the paper to guide the paperclip through the maze.
What’s Happening?
Here, we’re exploring magnetism. The magnet attracts the paperclip, allowing you to move it through the maze without touching it.
Bouncing Egg
Materials:
- Egg
- Vinegar
- Jar
Steps:
- Place the egg in the jar.
- Cover the egg with vinegar.
- Leave it for 24-48 hours.
- Carefully remove the egg and observe its bounciness.
What’s Happening?
The vinegar dissolves the eggshell, leaving behind the rubbery membrane. This is a great way to show chemical reactions and the properties of materials.
Messy and Exciting Summer Science Projects
Ever wondered how to keep the kids entertained and educated during the summer without spending a fortune?
I’ve got you covered.
Messy and exciting summer science projects are the way to go.
These activities are fun, engaging, and perfect for those long summer days.
Why Messy Science?
Kids love getting messy.
It’s part of the fun.
And when you mix it with science, it becomes a learning experience they’ll never forget.
Some Projects to Try
1. Homemade Volcano
- Baking soda
- Vinegar
- Food colouring
- A plastic bottle
Build your volcano using the bottle as the core.
Mix baking soda and food colouring inside.
Pour vinegar and watch the eruption.
2. Slime Time
- PVA glue
- Borax solution
- Food colouring
Mix the glue and food colouring.
Slowly add borax until it turns into slime.
Kids can stretch, squish, and play with it for hours.
3. Fizzy Paint
- Baking soda
- Vinegar
- Food colouring
- Paintbrushes
Mix baking soda and food colouring to create your paint.
Kids can paint on paper and then spray vinegar to see it fizz.
Benefits of Messy Science
- Hands-on Learning: Kids understand better when they do things themselves.
- Creativity Boost: They get to experiment and come up with their own ideas.
- Teamwork: Great for group activities and learning to work together.
- Problem-Solving: They learn to think critically and solve problems.
Tips for Parents
- Outdoor Setup: Keep it outside to avoid indoor mess.
- Old Clothes: Make sure kids wear something you don’t mind getting dirty.
- Safety First: Always supervise and make sure materials are safe.
Real Stories
I remember doing the homemade volcano with my nephew.
His eyes lit up when the “lava” started flowing.
It was messy, yes, but the excitement and learning were worth every bit.
DIY Engineering Challenges for Young Inventors
Ever wondered how to keep your kids engaged while also sparking their creativity and problem-solving skills? DIY engineering challenges for young inventors are the perfect solution. Trust me, I’ve been there, scratching my head, trying to find something that’s both fun and educational. So, let’s dive into some real, hands-on activities that will get those young minds buzzing.
Why DIY Engineering Challenges?
First off, why should you even consider DIY engineering challenges? Well, here’s the deal:
- Critical Thinking: These activities push kids to think outside the box.
- Problem Solving: They learn to tackle problems head-on.
- Creativity: It encourages them to come up with unique solutions.
- Teamwork: Great for group activities, promoting collaboration.
Simple and Fun Engineering Projects
Alright, let’s get practical. Here are some straightforward yet engaging projects you can set up with materials you probably already have at home.
Build a Bridge Challenge
Materials Needed:
- Popsicle sticks
- Glue
- Weights (like small books or cans)
Instructions:
- Design: Have the kids sketch out their bridge design first.
- Construction: Use popsicle sticks and glue to bring their designs to life.
- Testing: Place weights on the bridge to see how much it can hold before collapsing.
Why It’s Great: This project teaches about structural integrity and balance, plus it’s super fun to see whose bridge holds the most weight!
Balloon-Powered Car
Materials Needed:
- Balloons
- Straws
- Bottle caps
- Cardboard
- Tape
Instructions:
- Design: Sketch out the car design.
- Build: Use cardboard for the body, straws for axles, and bottle caps for wheels.
- Power: Attach a balloon to the car and blow it up. Let go and watch it zoom!
Why It’s Great: This challenge introduces basic principles of propulsion and aerodynamics.
Real Stories, Real Success
I remember setting up these challenges for my own kids. One weekend, we had a bridge-building contest in the living room. My youngest, who’s usually more into video games, got so into it that he spent hours tweaking his design. The look on his face when his bridge held up the most weight? Priceless.
Tips for Success
To make these challenges even more effective:
- Set Clear Goals: Make sure the kids know what they’re aiming for.
- Encourage Teamwork: Let them work in pairs or small groups.
- Celebrate Efforts: Focus on the process, not just the end result.
If you’re looking for more ideas to keep your kids engaged, check out our summer camp craft ideas for all ages or explore the fun games to play at summer camp. These resources are packed with activities that are both fun and educational, ensuring your kids have a blast while learning new skills.
Backyard Kitchen Science Using Everyday Ingredients
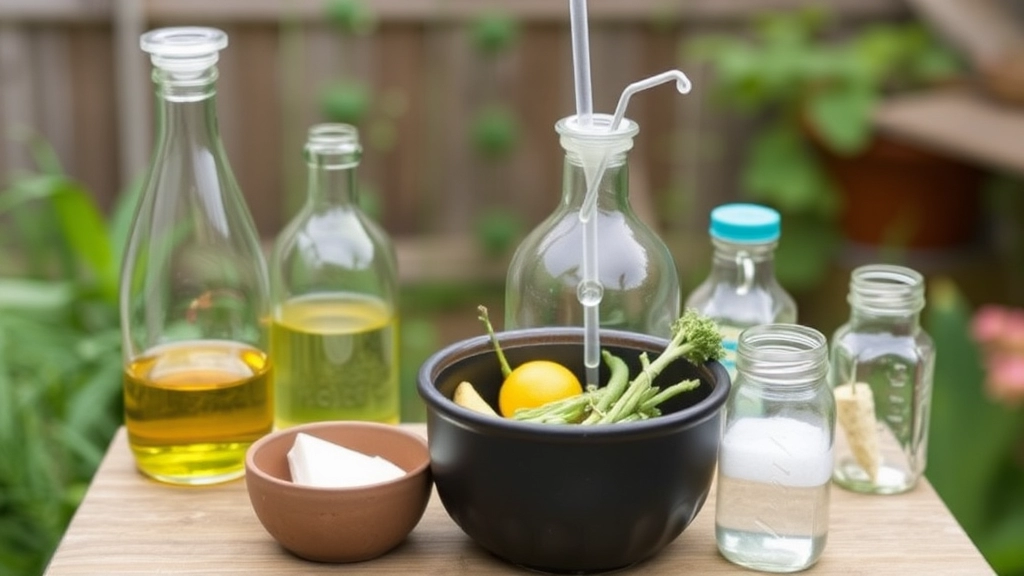
Ever wondered how to keep the kids entertained and learning at the same time?
Backyard kitchen science using everyday ingredients is your answer.
Forget the fancy lab equipment.
You can whip up some mind-blowing experiments right in your own backyard.
Why Backyard Kitchen Science?
- It’s easy: No need for special trips to the store.
- It’s fun: Kids love getting hands-on.
- It’s educational: They learn without even realising it.
Simple Experiments to Try
1. Baking Soda and Vinegar Volcano
This classic never gets old.
- Ingredients: Baking soda, vinegar, dish soap, food colouring (optional)
- Steps:
- Mix baking soda and a few drops of dish soap in a bottle.
- Add food colouring for a dramatic effect.
- Pour in the vinegar and watch the eruption.
2. Invisible Ink
Ever wanted to send secret messages?
- Ingredients: Lemon juice, cotton swab, white paper, heat source (like a lamp)
- Steps:
- Dip the cotton swab in lemon juice and write a message on the paper.
- Let it dry completely.
- Hold the paper close to a heat source and watch your message appear.
3. Milk and Food Colouring Magic
Turn milk into a swirling masterpiece.
- Ingredients: Milk, food colouring, dish soap, shallow dish
- Steps:
- Pour milk into the dish.
- Add a few drops of different food colouring.
- Dip a cotton swab in dish soap and touch the milk.
- Watch the colours dance.
Why It Works
Kids love these experiments because they’re interactive and visual.
They get to see science in action.
Plus, they’re using stuff they see every day in the kitchen.
Tips for Success
- Set up a dedicated space: A small table in the backyard works wonders.
- Supervise: Safety first, always.
- Encourage questions: Get them thinking about why things happen.
Real-Life Example
Last summer, my nephew was bored out of his mind.
We tried the baking soda volcano, and he was hooked.
He spent the rest of the afternoon mixing different ingredients, trying to make the biggest eruption.
Now, he’s always asking about the science behind things.
Final Thoughts
Backyard kitchen science using everyday ingredients is a game-changer.
It’s simple, fun, and incredibly educational.
Give it a go, and you’ll see the magic unfold.
Trust me, your kids will thank you.
Hands-On Animal and Plant Life Cycle Explorations
Ever wondered how to make learning about life cycles fun and engaging for kids? Let’s dive into some hands-on animal and plant life cycle explorations that will keep them curious and excited. Trust me, it’s easier than you think!
Why Life Cycles Matter
Kids are naturally curious about the world around them. They see a butterfly and ask, “Where did it come from?” or they plant a seed and wonder, “How does it grow?” Understanding life cycles isn’t just about answering these questionsâit’s about sparking a lifelong interest in science and nature.
Getting Started: Simple and Fun Activities
You don’t need a fancy lab to explore life cycles. Here are some simple activities you can do right in your backyard or even inside your home:
1. Butterfly Garden:
- Materials Needed: Caterpillar kit (easily available online), butterfly-friendly plants like milkweed.
- Steps:
- Order a caterpillar kit and set it up in a safe place.
- Plant some milkweed in your garden.
- Watch as the caterpillars grow, form chrysalises, and emerge as butterflies.
- Why It’s Cool: Kids get to see the entire metamorphosis process up close. Plus, releasing the butterflies is a magical moment!
2. Seed to Plant:
- Materials Needed: Seeds (sunflower, bean, or any fast-growing plant), soil, pots.
- Steps:
- Plant the seeds in small pots.
- Water them regularly and place them in a sunny spot.
- Keep a growth journal with photos and notes.
- Why It’s Cool: Watching a tiny seed sprout and grow into a plant is a lesson in patience and care. Plus, you get to enjoy the fruits (or flowers) of your labour!
3. Tadpole to Frog:
- Materials Needed: A small aquarium, tadpoles (available at pet stores or online), water plants.
- Steps:
- Set up the aquarium with clean water and water plants.
- Add the tadpoles and feed them regularly.
- Observe as they grow legs, lose their tails, and become frogs.
- Why It’s Cool: This activity is a hit because it shows a dramatic transformation. Kids learn about amphibians and the importance of clean water habitats.
Pro Tips for Successful Life Cycle Explorations
To make these activities even more engaging, here are some pro tips:
- Create a Life Cycle Chart: Use a large poster board to draw and label the stages of the life cycle you’re observing. This visual aid helps kids understand and remember the process.
- Daily Observations: Encourage kids to make daily observations and notes. This can be in the form of drawings, photos, or written descriptions.
- Ask Questions: Keep the curiosity alive by asking questions like, “What do you think will happen next?” or “Why do you think this stage is important?”
Real Stories: Why These Activities Work
I remember setting up a butterfly garden with my niece. She was fascinated by the caterpillars and couldn’t wait to see them turn into butterflies. Every day, she would rush to check on them and update her growth journal. The day the butterflies emerged, she was over the moon. It was a hands-on lesson in biology that she still talks about.
Wrapping Up: The Joy of Discovery
Exploring animal and plant life cycles isn’t just educationalâit’s a way to connect with nature and nurture a sense of wonder. Whether it’s watching a seed sprout or a tadpole transform, these experiences are unforgettable. So, grab some seeds, caterpillars, or tadpoles and get started. Trust me, you’ll enjoy it as much as the kids do!
Exploring Forces and Motion with Outdoor Games
Ever wondered how to make learning about forces and motion fun for kids?
Let’s dive into some outdoor games that do just that.
Why Forces and Motion Matter
Kids ask, “Why do things move the way they do?”
It’s a big question with simple answers.
Forces and motion are everywhere.
They shape how we play, move, and interact with the world.
Simple Games to Understand Forces
Tug of War
- Objective: Understand tension and pulling forces
- Materials: A sturdy rope
- How to Play: Two teams pull on opposite ends of the rope. The team that pulls the other across a line wins.
Frisbee Throwing
- Objective: Explore projectile motion
- Materials: A frisbee
- How to Play: Throw the frisbee and observe its flight path. Discuss why it curves and lands where it does.
Sack Races
- Objective: Learn about gravity and friction
- Materials: Burlap sacks
- How to Play: Kids hop in sacks from start to finish line. Talk about how gravity pulls them down and friction slows them.
Real-Life Examples
Remember when you played on a swing set?
That’s forces and motion in action.
The push and pull, the rise and fall â all thanks to gravity and inertia.
Tips for Parents and Teachers
- Keep it simple: Use everyday language.
- Be hands-on: Kids learn best by doing.
- Ask questions: “Why did the frisbee go that way?” “What made you fall in the sack race?”
Why This Matters
Understanding forces and motion isn’t just for science class.
It’s for life.
It helps kids see the world differently.
They start to ask questions, to wonder, to explore.
And that’s where real learning begins.
So, next time you’re outside, try these games.
You’ll be amazed at how much fun learning can be.
For more engaging activities, check out our Top Summer Camp Games and Activities Guide. If you’re looking for the best camps for younger children, visit our Best Summer Camps for 4-Year-Olds page.
FAQs on Summer Camp Science Experiments
What are some simple weather science experiments I can do with kids?
You can try making a rain gauge, a wind sock, or a cloud observation chart. These activities use everyday materials and help kids learn about precipitation, wind direction, and cloud types.
Why should I choose weather science activities for kids?
Weather is a part of our daily lives, and kids are naturally curious about it. These activities turn that curiosity into a fun learning adventure, helping them understand why it rains, how the wind blows, and what makes a rainbow.
How can chemistry be made fun for kids?
Creative chemistry projects like Magic Milk, Baking Soda Volcano, Slime Time, and Invisible Ink can make chemistry exciting. These projects use everyday materials and provide hands-on learning experiences.
What materials do I need for a baking soda volcano experiment?
You’ll need baking soda, vinegar, food colouring, and a small container. This classic experiment creates a fizzy, colourful eruption that kids love.
Why are messy science projects beneficial for kids?
Messy science projects offer hands-on learning, boost creativity, encourage teamwork, and improve problem-solving skills. They also make learning fun and memorable.
What precautions should I take when doing messy science experiments?
Set up the experiments outdoors, have kids wear old clothes, and always supervise to ensure safety. Make sure the materials used are safe for children.
How can I use everyday kitchen ingredients for science experiments?
You can perform experiments like the baking soda and vinegar volcano, invisible ink with lemon juice, and milk and food colouring magic. These experiments are simple, fun, and educational, using materials you likely already have at home.
Why do kids enjoy backyard kitchen science experiments?
These experiments are interactive and visual, allowing kids to see science in action. They use familiar kitchen ingredients, making the experience relatable and exciting.
What are some tips for successful backyard kitchen science experiments?
Set up a dedicated space, supervise the activities, and encourage kids to ask questions. This helps ensure safety and promotes a deeper understanding of the science behind the experiments.
References
-
Weather Education Resources – National Weather Service
-
Measure Rainfall with a Homemade Rain Gauge – Science Buddies
-
Magic Milk Experiment – Steve Spangler Science