Summer Camp Craft Ideas
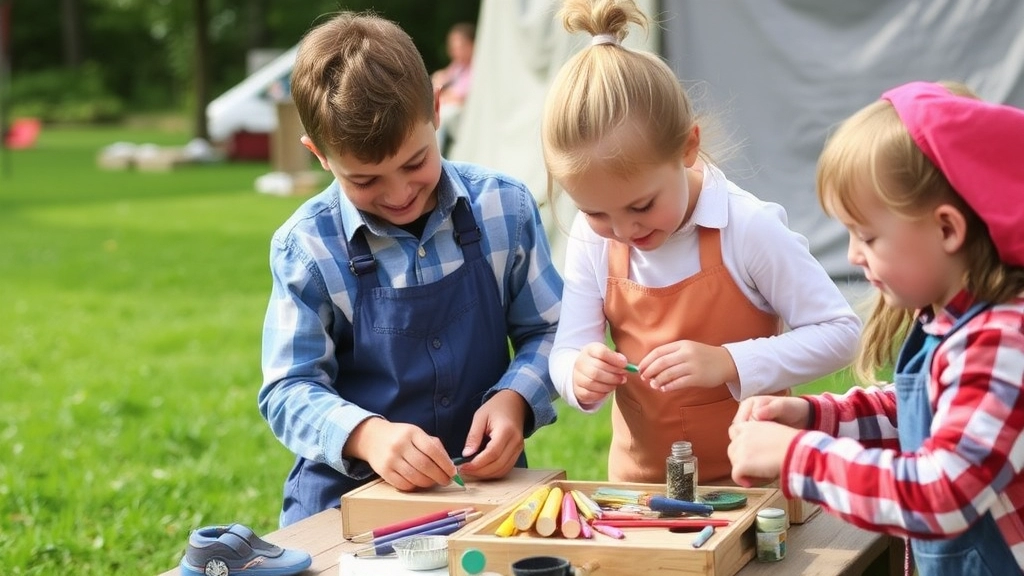
Summer Camp Craft Ideas are a fantastic way to engage kids, spark creativity, and foster teamwork. This article dives into a variety of craft projects, from nature-inspired creations to recycled materials, ensuring fun and learning go hand in hand. Whether you’re looking for easy DIY art activities or themed sessions, we’ve got you covered with ideas that are both budget-friendly and safe.
We’ll explore outdoor crafts that get kids moving, group projects that encourage collaboration, and tips for camp leaders to ensure a smooth crafting experience. Plus, discover how to display and share completed crafts to boost confidence and share the joy with parents. Let’s make this summer unforgettable with creative, hands-on experiences!
Creative Nature Crafts for Kids
Alright, let’s get real here. Kids are glued to screens more than ever, and we all know it’s not doing them any favours. So, how do we get them outside and engaged? Creative Nature Crafts for Kids. Yep, you heard me. Let’s dive into some hands-on, nature-inspired projects that are not only fun but also educational.
Why Nature Crafts?
First off, why should we even bother with nature crafts? Well, kids need to connect with the outdoors. It’s good for their brains, bodies, and souls. Plus, it’s a fantastic way to keep them entertained without breaking the bank.
Simple and Fun Nature Crafts
Now, let’s get into the nitty-gritty. Here are some straightforward, engaging nature crafts that will have kids begging to go outside:
- Leaf Rubbings
- Materials Needed: Paper, crayons, leaves.
- Instructions: Place a leaf under a piece of paper and rub a crayon over the top to reveal the leaf’s texture and veins.
- Rock Painting
- Materials Needed: Smooth rocks, acrylic paint, paintbrushes.
- Instructions: Let the kids’ imaginations run wild as they paint faces, animals, or abstract designs on the rocks.
- Pinecone Bird Feeders
- Materials Needed: Pinecones, peanut butter, birdseed, string.
- Instructions: Spread peanut butter on the pinecone, roll it in birdseed, and hang it up with a string.
- Nature Collage
- Materials Needed: Cardboard, glue, various natural items (leaves, flowers, twigs).
- Instructions: Glue the natural items onto the cardboard to create a unique collage.
Benefits of Nature Crafts
You might be wondering, “What’s the big deal with these nature crafts?” Well, let me break it down for you:
- Educational: Kids learn about different plants, animals, and ecosystems.
- Physical Activity: Collecting materials gets them moving.
- Creativity Boost: Encourages imaginative thinking and problem-solving.
- Mindfulness: Promotes relaxation and reduces stress.
Real-Life Example
I remember when I first introduced these crafts to a group of kids at a summer camp. They were hesitant at first, but once they got their hands dirty, they couldn’t get enough. One kid, Sarah, even started a nature club at her school after the camp ended. Now, that’s what I call impact.
Pro Tips for Camp Leaders
- Preparation is Key: Make sure you have all materials ready before starting.
- Safety First: Always supervise and ensure the materials are safe for kids to handle.
- Encourage Exploration: Let kids explore and find their own materials in nature. It makes the craft more personal and exciting.
Internal Linking Opportunities
- Recycled Materials Projects: Once they’ve mastered nature crafts, why not introduce them to creative arts and crafts ideas? It’s a great way to teach sustainability.
- Outdoor Craft Activities: Many of these nature crafts can be easily transitioned into outdoor activities, making them perfect for those sunny days. Check out our guide to summer camp games and activities for more ideas.
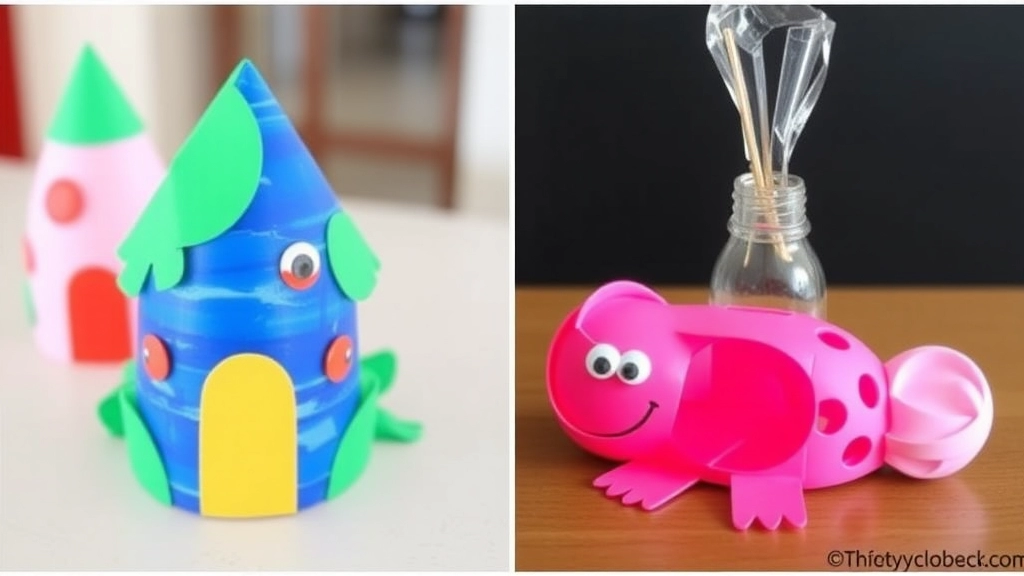
Recycled Materials Projects
Ever looked at a pile of junk and thought, “What can I do with this?”
We’ve all been there.
Kids love creating, but buying new materials every time isn’t always practical.
So, why not turn trash into treasure?
Why Recycled Crafts?
Recycled materials projects are a win-win.
They teach kids about sustainability and get their creative juices flowing.
Plus, they’re budget-friendly.
Getting Started
First, gather your materials.
Look around your house or ask parents to bring in items.
Here’s a list to get you started:
- Cardboard boxes
- Plastic bottles
- Old magazines
- Bottle caps
- Toilet paper rolls
Simple Project Ideas
1. Bottle Cap Magnets
- Collect colourful bottle caps.
- Glue small magnets on the back.
- Let the kids decorate the front with markers or stickers.
2. Cardboard Box Forts
- Use large boxes from appliances.
- Cut out windows and doors.
- Let the kids paint or draw on the walls.
3. Magazine Collages
- Rip out colourful pages.
- Cut out interesting shapes or images.
- Glue them onto a larger sheet to create a masterpiece.
Tips for Success
- Keep it Safe: Ensure materials are clean and safe to handle.
- Encourage Creativity: There’s no right or wrong way to do these projects.
- Supervise: Some tools, like scissors, need adult supervision.
Sharing and Displaying
Once the crafts are done, show them off.
Create a gallery wall or have a mini exhibition.
It’s a great way to boost kids’ confidence.
Ready to dive into more creative ideas? Check out our section on Easy DIY Art Activities for more inspiration.
Easy DIY Art Activities
Alright, let’s talk about something every camp leader and parent can relate to: keeping kids entertained without losing your mind or emptying your wallet. We’ve all been there, right? You want to give the kids something fun and creative to do, but you don’t have time for a massive setup or the budget for fancy supplies. That’s where easy DIY art activities come in. Trust me, you don’t need to be Picasso to make this work.
Why Easy DIY Art Activities?
First off, let’s tackle why easy DIY art activities are a game-changer. Kids love to create, and when they do, it’s like watching their little brains light up. But the real magic happens when the activities are simple enough to set up and clean up. No one wants to spend more time prepping and cleaning than the kids do creating. Plus, easy DIY projects can be done with stuff you already have lying around the house.
The Basics: What You Need
Before we dive into specific projects, let’s cover the basics. Here’s a quick list of must-have supplies that’ll get you through most easy DIY art activities:
- Paper: Any kind will do. Scrap paper, old notebooks, even the backs of envelopes.
- Markers, Crayons, and Coloured Pencils: The more colours, the better.
- Glue and Tape: Essential for sticking things together.
- Scissors: Safety scissors if you’re working with younger kids.
- Paints and Brushes: Watercolours are less messy, but any paint will do.
- Recycled Materials: Think toilet paper rolls, egg cartons, and bottle caps.
Quick and Fun Projects
Now, let’s get into the fun part. Here are a few easy DIY art activities that kids will love and you’ll appreciate for their simplicity.
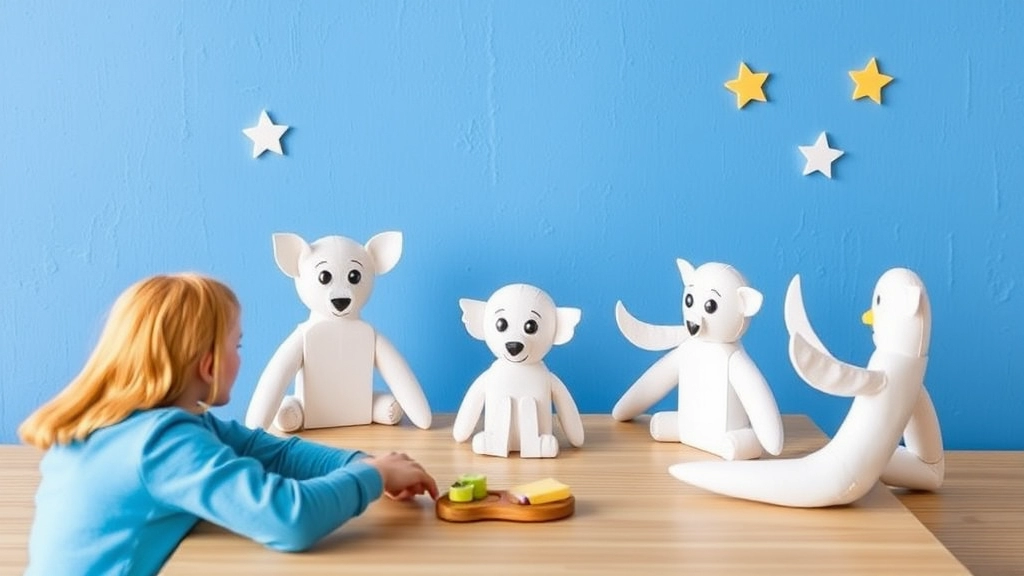
1. Paper Plate Animals
- Supplies Needed: Paper plates, markers, glue, construction paper, and googly eyes.
- Steps:
- Let the kids pick an animal.
- Use markers to draw the animal’s face on the paper plate.
- Cut out ears, noses, and other features from construction paper and glue them on.
- Add googly eyes for extra fun.
2. Rock Painting
- Supplies Needed: Smooth rocks, paints, brushes, and a bit of imagination.
- Steps:
- Collect some smooth rocks from outside.
- Let the kids paint whatever they like on the rocks.
- Once dry, these painted rocks can be used as paperweights or garden decorations.
3. DIY Stamps
- Supplies Needed: Potatoes, cookie cutters, paint, and paper.
- Steps:
- Cut a potato in half.
- Press a cookie cutter into the potato to create a stamp shape.
- Dip the potato stamp into paint and press onto paper.
- Create patterns or pictures using different stamps and colours.
Pro Tips for Making DIY Art Activities Even Easier
- Prep Ahead: Have all your supplies ready before the kids sit down. This cuts down on chaos.
- Set Boundaries: Use old newspapers or a plastic tablecloth to protect surfaces.
- Encourage Creativity: There’s no right or wrong way to create art. Let the kids’ imaginations run wild.
Why It Works
These easy DIY art activities are perfect for keeping kids engaged and happy. They’re simple, cost-effective, and can be done with minimal supervision. Plus, there’s nothing like seeing a kid’s face light up when they realise they’ve created something all on their own.
For more ideas on keeping kids entertained, check out our indoor summer camp games and our guide on creative summer camp themes.
Group Craft Ideas for Teamwork
Ever wondered how to get kids working together without the chaos?
Group crafts are the answer.
They’re fun, engaging, and teach teamwork like nothing else.
Plus, they’re perfect for camps, classrooms, or even a big family gathering.
Let’s dive in.
Why Group Crafts?
Kids love to create.
But when they do it together, magic happens.
They learn to share, communicate, and problem-solve.
It’s like a mini team-building exercise for the little ones.
Top Group Craft Ideas
1. Giant Mural Painting
- Grab a big roll of paper.
- Lay it out on the floor or tape it to a wall.
- Let the kids paint a scene together.
- It could be anything – a jungle, a city, or even their dream playground.
2. Collaborative Collage
- Collect old magazines, newspapers, and colourful paper.
- Give each child a theme or section to work on.
- Stick it all together on a big board.
- Watch as their individual pieces create a stunning whole.
3. Friendship Bracelets
- Each child makes a bracelet.
- They swap them with their friends.
- It’s a simple way to build bonds and create memories.
4. Group Sculpture
- Use clay, recycled materials, or even LEGO.
- Set a theme, like “build a castle” or “create an animal.”
- Everyone adds their piece to the sculpture.
- The result? A unique masterpiece.
Tips for Success
- Clear Instructions: Make sure everyone knows what to do.
- Roles: Assign roles if needed. One kid can be the “leader,” another the “artist,” and so on.
- Encouragement: Praise their efforts. It boosts confidence and keeps them motivated.
- Flexibility: Be ready to adapt. Kids are unpredictable, and that’s okay.
Real Stories
Remember that time at camp when the kids created a mural of the forest?
They argued at first, but soon enough, they were laughing and working together.
By the end, they were so proud of their creation.
It’s not just about the craft; it’s about the experience.
Themed Craft Sessions for Summer
Wondering how to keep kids entertained and engaged during those long summer days? Themed craft sessions can be a lifesaver. Not only do they channel creativity, but they also provide structure and fun. Let’s dive into some practical and exciting summer-themed craft ideas that you can easily implement.
Why Themed Craft Sessions Work
First off, themed crafts give kids something to look forward to. The anticipation of creating something unique and seasonal can be a huge motivator. Plus, it makes planning easier for you as a camp leader or parent. Instead of scrambling for random ideas, you’ve got a clear roadmap.
Benefits:
- Keeps kids engaged: They’re more likely to stick around and participate.
- Adds structure: Easier for you to plan and execute.
- Seasonal relevance: Crafts that tie into summer activities and holidays.
Popular Summer Themes
Beach Day Crafts
- Seashell Art: Collect shells and create picture frames or wind chimes.
- Sand Art: Use coloured sand to make layered bottles or sand paintings.
Nature Exploration
- Leaf Rubbings: Gather different leaves and use crayons to create rubbings on paper.
- Rock Painting: Find smooth stones and decorate them with paint and markers.
Under the Sea
- Paper Plate Fish: Use paper plates, paint, and glitter to make colourful fish.
- Jellyfish in a Bottle: Use plastic bottles, string, and some paint to create jellyfish.
Camping Adventures
- DIY Lanterns: Use jars, tissue paper, and LED candles to make safe, glowing lanterns.
- Nature Bracelets: Collect small flowers and leaves to stick onto double-sided tape wrapped around the wrist.
How to Organise a Themed Craft Session
1. Plan Ahead
- Materials: Make a list of all the supplies you’ll need.
- Space: Ensure you have enough room for everyone to work comfortably.
- Time: Allocate enough time for setup, crafting, and cleanup.
2. Set the Scene
- Decorations: Use themed decorations to set the mood.
- Music: Play background music that fits the theme, like ocean sounds for beach day crafts.
3. Step-by-Step Instructions
- Demonstrate: Show an example of the finished product.
- Guide: Walk through the steps one by one, offering help as needed.
4. Encourage Creativity
- Flexibility: Let kids add their own twist to the crafts.
- Praise: Give positive feedback to boost their confidence.
Real-Life Example
Last summer at our camp, we had a “Beach Day” themed craft session. We started with a scavenger hunt to collect seashells, which the kids then used to make beautiful picture frames. We played some beach tunes, and the kids were so engaged they didn’t want to leave! It was a hit, and the parents loved the keepsakes.
Pro Tips for Success
- Prep Kits: Prepare individual kits with all the materials needed for each craft.
- Buddy System: Pair up kids to foster teamwork and help those who might need extra assistance.
- Photo Booth: Set up a themed photo booth for kids to take pictures with their crafts. It adds an extra layer of fun and gives them something to show off.
Outdoor Craft Activities
Ever tried to keep kids entertained outside without resorting to screens?
Yeah, it’s a challenge.
But, outdoor craft activities can be a game-changer.
Why Outdoor Crafts?
First off, kids love being outside. Fresh air, sunshine, and space to move around. Plus, it’s a break from the usual indoor routine.
Nature Scavenger Hunt Crafts
Start with a scavenger hunt. Kids collect leaves, sticks, rocks, and flowers. Then, they use these to create art.
- Leaf Rubbings: Place leaves under paper and rub crayons over them.
- Rock Painting: Grab some smooth stones and paint fun designs.
- Stick Frames: Use sticks to make picture frames and decorate them with found objects.
Water-Based Fun
On hot days, water-based crafts are a hit.
- Watercolour Splash: Use water guns filled with diluted paint to create splatter art.
- Bubble Painting: Blow bubbles with a mix of paint and water, then catch them on paper to make colourful prints.
Outdoor Murals
Got a fence or a big wall? Turn it into a canvas.
- Chalk Art: Simple and washable, perfect for any age.
- Mud Painting: Mix mud with water and let kids paint on large sheets of paper.
Story Stones
Collect stones and paint different characters or symbols on them. Use these stones to tell stories. It’s a fantastic way to boost creativity and language skills.
Crafting with Natural Dyes
Teach kids about natural dyes.
- Use beetroot for red.
- Spinach for green.
- Turmeric for yellow.
Dye some fabric or paper and create unique art pieces.
Safety First
Outdoor crafting is fun but keep safety in mind.
- Supervise kids when using tools or paints.
- Ensure they wear old clothes or aprons.
- Keep a first aid kit handy.
Why It Works
Outdoor crafts are engaging. They combine creativity with physical activity. Kids learn about nature and art simultaneously.
Budget-Friendly Craft Supplies
Ever wondered how to keep kids entertained with crafts without burning a hole in your pocket? Trust me, I’ve been there. You want to provide engaging, creative activities for the little ones, but the cost of supplies can add up fast. So, how do you keep it budget-friendly? Let’s dive in.
Start with What You Have
Before you rush out to buy new supplies, take a good look around your home or camp. You’d be surprised at how many everyday items can be turned into craft materials.
- Old Newspapers and Magazines: Perfect for collages or papier-mâché.
- Cardboard Boxes: Great for building models or creating DIY puzzles.
- Plastic Bottles and Caps: Ideal for making quirky decorations or even mini planters.
Shop Smart
When you do need to buy supplies, be strategic about it. Here are some tips:
- Bulk Buying: Stores often offer discounts on bulk purchases. Stock up on essentials like glue, scissors, and markers.
- Discount Stores: Places like Poundland or B&M often have a range of craft supplies at a fraction of the cost.
- Seasonal Sales: Keep an eye out for sales after holidays. You can snag items like coloured paper, stickers, and ribbons for next to nothing.
Embrace Nature
Nature offers a treasure trove of free craft supplies. Plus, it gets the kids outside and engaged with their environment.
- Leaves and Flowers: Perfect for pressing and creating nature-themed art.
- Rocks and Pebbles: Can be painted and turned into paperweights or garden decorations.
- Twigs and Pinecones: Great for making rustic ornaments or even small sculptures.
Reuse and Recycle
Teaching kids about sustainability while crafting? That’s a win-win. Here are some recyclable items you can use:
- Toilet Paper Rolls: Can be transformed into anything from binoculars to mini rockets.
- Glass Jars: Perfect for making lanterns or storage containers.
- Egg Cartons: Excellent for sorting beads, seeds, or even as the base for a caterpillar craft.
Share and Swap
Got a crafting buddy? Share and swap supplies. It’s a fantastic way to get a variety of materials without spending extra cash.
- Craft Parties: Host a craft swap party where each person brings materials they no longer need.
- Online Communities: Join local Facebook groups or online forums where you can exchange supplies.
Budget-Friendly Stores
Here are some go-to places for affordable craft supplies:
- The Works: Offers a wide range of craft materials at low prices.
- Wilko: Great for basic supplies and often has seasonal discounts.
- Hobbycraft: While it can be pricier, their clearance section is a goldmine.
DIY Tools
Sometimes, you can even make your own tools:
- Homemade Stamps: Use potatoes or sponges.
- Natural Dyes: Boil fruits or vegetables to create natural colours.
Real-Life Example
I once ran a summer camp where we had a tight budget but wanted to keep the kids engaged with daily crafts. We collected recyclable materials for weeks and asked parents to donate any unused craft supplies. By the end of the camp, not only had we saved money, but the kids had also learned about the importance of recycling and creativity. For more inspiration on activities, check out our summer camp classic activities and if you’re interested in broader themes, our guide on creative summer camp themes.
Craft Safety Tips for Camp Leaders
Alright, camp leaders, let’s talk safety.
Crafts are fun, but we don’t want any trips to the first aid tent, right?
Here’s how we keep it safe and sound.
Why is Craft Safety Important?
Ever had a kid glue their fingers together?
Or worse, cut themselves with scissors?
Safety isn’t just a buzzword; it’s crucial.
No one wants a camp memory to be a scar.
Basic Craft Safety Tips
- Supervise, Supervise, Supervise
- Keep an eye on the kids.
- Even the older ones need a watchful eye.
- Age-Appropriate Materials
- No sharp scissors for the little ones.
- Use non-toxic glue and paints.
- Clear Instructions
- Explain each step.
- Demonstrate if needed.
- First Aid Kit
- Always have one nearby.
- Know how to use it.
- Allergy Awareness
- Check for latex or other allergies.
- Choose hypoallergenic materials.
Tool Safety
Scissors, needles, glue guns—tools can be tricky.
Here’s how to handle them:
- Scissors
- Round-tipped for younger kids.
- Teach proper cutting techniques.
- Glue Guns
- Low-temp for kids.
- Supervise closely.
- Needles
- Only for older kids.
- Use blunt-tipped needles if possible.
Workspace Safety
A clutter-free workspace is a safe workspace.
- Organise Materials
- Keep tools and materials tidy.
- Use containers to avoid spills.
- Proper Lighting
- Ensure the area is well-lit.
- Kids should see what they’re doing.
- Ventilation
- If using paints or glues, ensure good airflow.
- Avoid fumes.
Real Stories, Real Lessons
Once, a camper tried to use a hot glue gun without supervision.
Burned fingers, tears, and a lesson learned.
Now, glue guns are always supervised.
Emergency Protocols
Know what to do if something goes wrong.
- Emergency Contacts
- Have parents’ numbers handy.
- Know the nearest medical facility.
- First Aid Training
- Basic training for all leaders.
- Quick response can prevent bigger issues.
Crafting is a blast, but safety comes first.
Follow these tips, and you’ll have a smooth, fun, and safe crafting session.
Remember, a safe camp is a happy camp.
Displaying and Sharing Completed Crafts
Ever wondered what to do with all those amazing crafts the kids create?
You’re not alone.
Displaying and sharing completed crafts can be a game-changer.
Here’s how to make it happen.
Why Display Crafts?
First off, why bother displaying crafts?
Simple. It makes kids feel proud.
When they see their work showcased, it boosts their confidence.
Plus, it gives parents a peek into what their kids have been up to.
Easy Display Ideas
No need for fancy setups.
Here are some quick and easy ways to show off those masterpieces:
- Craft Wall: Dedicate a wall for displaying crafts. Use string and clothespins for a casual look.
- Bulletin Boards: Pin up the crafts on bulletin boards. Easy to switch out and arrange.
- Shelves and Tables: Use shelves or tables to display 3D crafts. Make sure it’s at kids’ eye level.
- Digital Gallery: Take photos of the crafts and create a digital slideshow. Share it with parents via email or social media.
Sharing Crafts with Parents
Parents love to see what their kids have made.
Here’s how to keep them in the loop:
- Craft Night: Host a craft night where parents can come and see the displays.
- Newsletters: Include pictures of the crafts in your camp newsletter.
- Social Media: Share photos on your camp’s social media pages. Tag the parents if possible.
- Take-Home Packs: Send the crafts home in a special folder or bag. Add a note telling parents what the project was about.
Keeping it Fresh
Don’t let the display get stale.
Rotate the crafts regularly.
This keeps things interesting and gives everyone a chance to shine.
Real Stories, Real Success
Last summer, we had a âCraft of the Weekâ display.
Kids were so excited to see whose craft would make it up there.
Parents loved it too. We got tons of positive feedback.
For more creative ideas, check out our summer camp craft ideas.
FAQs: Summer Camp Craft Ideas
What are some easy recycled material craft ideas for kids?
Recycled materials projects are a great way to teach kids about sustainability while letting their creativity shine. Some easy ideas include:
- Bottle Cap Magnets: Collect colorful bottle caps, glue small magnets on the back, and let kids decorate the front with markers or stickers.
- Cardboard Box Forts: Use large boxes from appliances, cut out windows and doors, and let kids paint or draw on the walls.
- Magazine Collages: Rip out colorful pages, cut out interesting shapes or images, and glue them onto a larger sheet to create a masterpiece.
Why should we use recycled materials for crafts?
Using recycled materials for crafts is beneficial because it teaches kids about sustainability, encourages creativity, and is budget-friendly.
How can I ensure the safety of children during craft activities?
Safety is paramount in any craft activity. Here are some tips:
- Supervise: Always keep an eye on the kids, even the older ones.
- Use Age-Appropriate Materials: Avoid sharp scissors for younger kids and use non-toxic glue and paints.
- Provide Clear Instructions: Explain each step and demonstrate if needed.
- Keep a First Aid Kit Handy: Always have one nearby and know how to use it.
What are some group craft ideas that promote teamwork?
Group crafts are excellent for teaching teamwork and problem-solving skills. Some top ideas include:
- Giant Mural Painting: Lay out a big roll of paper and let kids paint a scene together.
- Collaborative Collage: Each child works on a section of a collage, which is then assembled into a larger piece.
- Friendship Bracelets: Kids make bracelets and swap them with friends to build bonds.
- Group Sculpture: Use clay, recycled materials, or LEGO to create a themed sculpture together.
How can I incorporate outdoor craft activities into summer camp?
Outdoor craft activities are a great way to keep kids engaged and active. Here are some ideas:
- Nature Scavenger Hunt Crafts: Kids collect leaves, sticks, rocks, and flowers to create art.
- Water-Based Fun: Use water guns filled with diluted paint for splatter art or blow bubbles with a mix of paint and water for bubble painting.
- Outdoor Murals: Use chalk or mud to create murals on fences or walls.
What are some safety tips for using tools in craft activities?
Tools can be tricky, but here’s how to handle them safely:
- Scissors: Use round-tipped scissors for younger kids and teach proper cutting techniques.
- Glue Guns: Use low-temp glue guns and supervise closely.
- Needles: Only for older kids, and use blunt-tipped needles if possible.
How can I organize a craft workspace to ensure safety?
A clutter-free workspace is a safe workspace. Here are some tips:
- Organize Materials: Keep tools and materials tidy and use containers to avoid spills.
- Proper Lighting: Ensure the area is well-lit so kids can see what they’re doing.
- Ventilation: Ensure good airflow when using paints or glues to avoid fumes.
What should I do in case of a craft-related emergency?
Knowing what to do in an emergency is crucial. Here are some protocols:
- Emergency Contacts: Have parents’ numbers handy and know the nearest medical facility.
- First Aid Training: Ensure all leaders have basic first aid training for quick responses.
How can I display the crafts made by kids?
Once the crafts are done, create a gallery wall or have a mini exhibition to show them off. This boosts kids’ confidence and gives them a sense of accomplishment.
References
-
Recycled Crafts for Kids
-
Recycled Crafts for Kids – Parents
-
50 Fun DIY Projects for Kids