Planning a Summer Camp
Planning a summer camp that stands out visually while staying within budget can be a challenge, but it’s entirely possible with the right strategies. In this article, I’ll share creative theme ideas for summer camp decorations, budget-friendly DIY projects, and outdoor decoration tips for campsites. We’ll also explore eco-friendly options, engaging activity stations with themed decor, and how to incorporate nature into your camp decor. Safety considerations and inspirational color schemes will also be covered to ensure your camp is both beautiful and secure.
From transforming recycled materials into stunning decorations to creating immersive themed activity stations, you’ll find practical tips and real-life examples to inspire your summer camp setup. Whether you’re looking to make your camp eco-friendly or simply want to add a splash of color, this guide has something for everyone. Let’s dive in and make your summer camp the talk of the town with these decoration ideas!
Creative Theme Ideas for Summer Camp Decorations
Alright, let’s dive right in. You’re planning a summer camp and you want it to be unforgettable. But how do you make it visually stunning without breaking the bank? I’ve got you covered with some creative theme ideas for summer camp decorations.
Why Themes Matter
Ever felt lost in a sea of generic decorations? Yeah, me too. Themes give your camp a cohesive look and feel, making it memorable for everyone. Plus, it’s easier to plan activities and games around a theme.
Popular Summer Camp Themes
- Nature Adventure: Think leaves, trees, and wildlife. Use eco-friendly materials like recycled paper and natural fibres.
- Pirate’s Cove: Arrr matey! Pirate flags, treasure chests, and maps. You can even have a treasure hunt.
- Space Odyssey: Stars, planets, and rockets. Use glow-in-the-dark paint for a night-time wow factor.
- Medieval Times: Castles, knights, and dragons. Perfect for storytelling and role-playing activities.
- Under the Sea: Fish, mermaids, and underwater plants. Blue and green colour schemes work wonders here.
Step-by-Step: Bringing Themes to Life
So, how do you make these themes pop? Here’s a quick guide:
- Start with a Vision Board: Gather images, colours, and materials that fit your theme.
- Budget Wisely: Allocate funds for major items first, like banners and large props.
- DIY Projects: Get the kids involved in making decorations. It’s fun and cost-effective.
- Reuse and Recycle: Use what you have and repurpose old decorations.
Real-Life Example
Last summer, I helped set up a “Nature Adventure” themed camp. We used old newspapers to create papier-mâché trees and leaves. The kids painted them, and we hung them around the campsite. It was a hit, and it cost next to nothing.
Quick Tips
- Mix and Match: Don’t be afraid to combine themes. A “Pirate’s Cove” could have elements of “Under the Sea”.
- Interactive Decor: Create decorations that double as activity stations. For example, a “Space Odyssey” theme could have a DIY rocket-building station.
- Safety First: Always use non-toxic materials and ensure decorations are secure. More on this later in the safety section.
For more creative ideas and essential tips, check out our guide on summer camp sign ideas.
Budget-Friendly DIY Decoration Projects

Are you worried about breaking the bank on summer camp decorations?
I’ve got you covered.
Let’s dive into some budget-friendly DIY decoration projects that are not only easy on the wallet but also super fun to make.
Why DIY Decorations?
First off, why even bother with DIY?
- Cost-Effective: You save money.
- Customizable: Tailor it to your camp’s theme.
- Engaging: Kids love getting involved.
Simple and Cheap Decoration Ideas
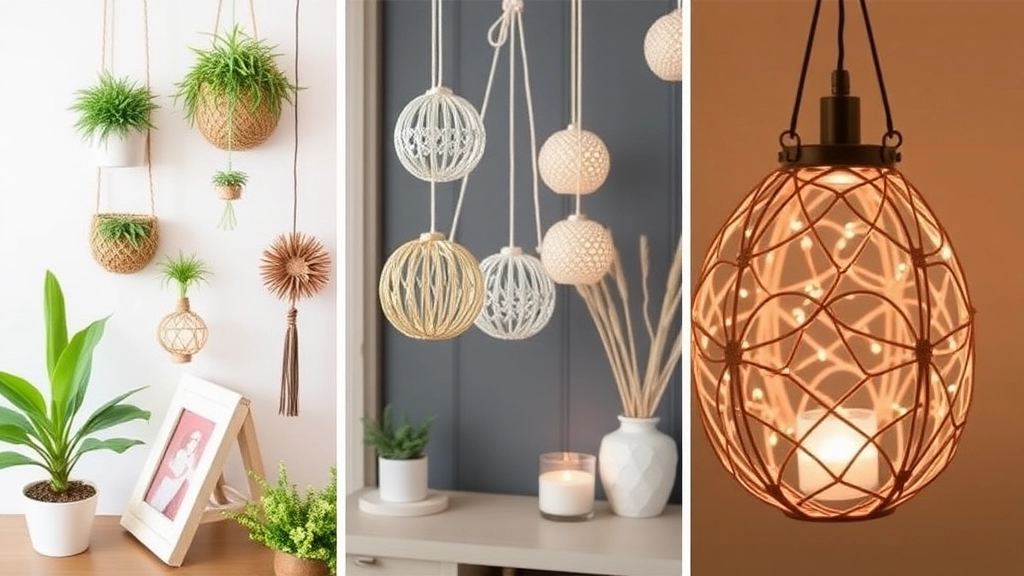
1. Paper Lanterns
You can’t go wrong with paper lanterns.
They’re cheap, easy to make, and add a whimsical touch.
- Materials: Coloured paper, glue, scissors, and string.
- Steps:
- Cut the paper into strips.
- Glue the ends together to form a loop.
- String them together and hang them up.
2. Nature-Inspired Centrepieces
Why not use what’s around you?
- Materials: Pinecones, leaves, twigs, and flowers.
- Steps:
- Collect items during a nature walk.
- Arrange them in jars or vases.
- Add a ribbon or some paint for extra flair.
3. Recycled Bottle Vases
Turn trash into treasure.
- Materials: Empty bottles, paint, and brushes.
- Steps:
- Clean out the bottles.
- Paint them in your camp’s colours.
- Use them as vases or candle holders.
Quick Tips for DIY Success
- Get the Kids Involved: Make it a fun activity.
- Plan Ahead: Gather all materials before starting.
- Keep It Simple: No need for complicated designs.
Stories from the Campsite
Last summer, we tried making paper lanterns, and guess what?
The kids loved it.
They were so proud of their creations, and it brought a unique charm to our campsite.
Pro Tip: Use LED lights inside the lanterns for a magical evening glow.
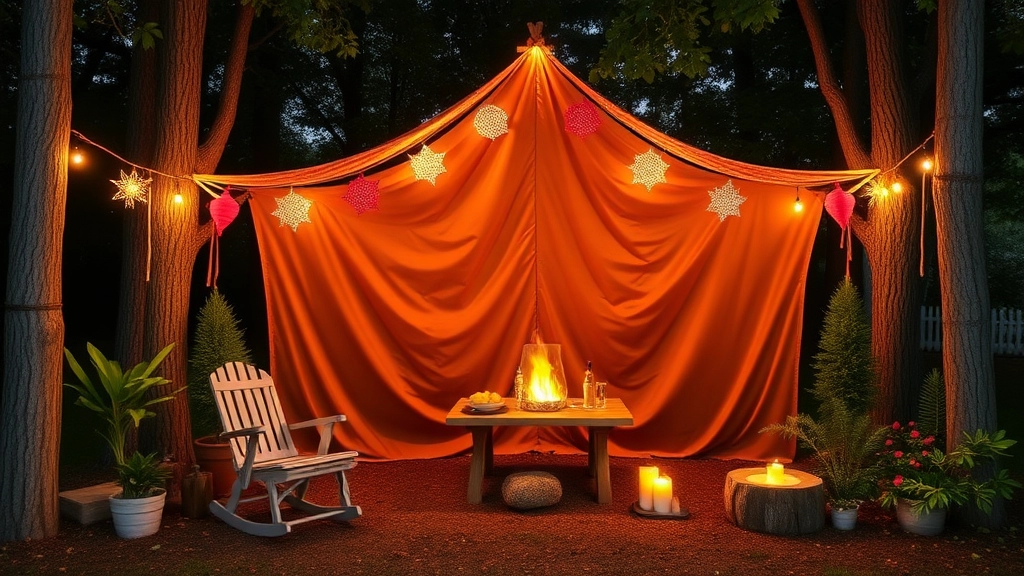
Outdoor Decoration Tips for Campsites
Alright, let’s get real. When it comes to decorating your campsite, you want it to look amazing without turning into a logistical nightmare. So, how do you jazz up your outdoor space without going overboard? Here are some outdoor decoration tips for campsites that will make your summer camp the talk of the town.
What’s the Big Deal with Campsite Decorations?
You might be thinking, “Why bother with campsite decorations?” Well, a well-decorated campsite can set the mood, create a welcoming atmosphere, and even boost camp morale. Plus, it makes for some killer Instagram photos.
Quick Wins for Campsite Decor
Let’s dive into some quick, easy wins that won’t break the bank or your back:
- String Lights: These are a must. They’re easy to hang, create a magical vibe, and are pretty cheap. Opt for solar-powered ones to save on batteries.
- Banners and Flags: Personalise your campsite with colourful banners and flags. You can even get the kids involved in making them.
- Themed Tablecloths: A simple but effective way to add some flair. Choose tablecloths that match your camp’s theme.
- DIY Lanterns: Use mason jars and LED candles to create cosy lanterns. Hang them around the campsite for a warm glow.
Nature-Inspired Decor
Why not let nature do some of the heavy lifting? Here’s how to incorporate natural elements:
- Rock Paintings: Collect some flat stones and let the campers paint them. Scatter these around the site for a personalised touch.
- Twig Crafts: Use twigs and branches to create frames, dreamcatchers, or even small shelters. It’s eco-friendly and adds a rustic charm.
- Flower Arrangements: Wildflowers are your best friend. Pick some and place them in jars or bottles for instant table decor.
Safety First, Always
When it comes to outdoor decoration tips for campsites, safety should be your number one priority. Here are some key points to keep in mind:
- Fire Safety: Keep decorations away from open flames. This includes lanterns, candles, and campfires.
- Trip Hazards: Ensure that any hanging decorations are well above head height and that nothing is lying on the ground that could trip someone up.
- Weather-Proofing: Make sure your decorations can withstand the elements. Waterproof and wind-resistant materials are a good bet.
Real Talk: What Works and What Doesn’t
I’ve seen campsites where the decorations were more of a hassle than a help. Here’s what usually works:
Eco-Friendly Decoration Options

Ever wonder how to make your summer camp decorations eco-friendly without sacrificing style?
You’re not alone.
Many camp organisers are looking for ways to jazz up their spaces while keeping Mother Earth happy.
Let’s dive into some killer ideas to make your camp both fabulous and sustainable.
Why Go Eco-Friendly?
First off, why should you even care about eco-friendly decorations?
Simple.
- Reduce Waste: Less rubbish means less landfill.
- Save Money: Often, sustainable options are cheaper.
- Teach Kids: Show the next generation how to care for the planet.
Recycled Materials
One man’s trash is another man’s treasure.
Here’s how you can turn waste into wow:
- Cardboard Creations: Use old boxes to make signs, banners, and even 3D art.
- Bottle Beauties: Turn plastic bottles into plant holders or fairy lights.
- Fabric Scraps: Use leftover fabric to create bunting or tablecloths.
Natural Elements
Nature is the best decorator.
Why not use what’s around you?
- Rocks and Stones: Paint them or use them as table centrepieces.
- Leaves and Branches: Create garlands, wreaths, or even name tags.
- Flowers: Fresh or dried, flowers add a splash of colour and a lovely scent.
Upcycling Projects
Got old stuff lying around?
Give it a new lease on life.
- Tin Can Lanterns: Punch holes in old cans to make rustic lanterns.
- Pallet Furniture: Turn wooden pallets into seating or tables.
- Jar Vases: Use glass jars for flowers, candles, or even storage.
DIY with a Twist
Sometimes, the best ideas are the simplest.
- Paper Decorations: Use recycled paper for origami, garlands, or paper mache.
- Nature Crafts: Collect pinecones, acorns, or shells for various crafts.
- Eco-Friendly Paints: Opt for non-toxic, water-based paints for any project.
Real-Life Example
Last summer, we transformed our camp using these eco-friendly ideas.
Kids collected rocks and painted them during craft time.
We used old sheets to make colourful banners.
And guess what?
The camp looked stunning, and we saved a ton of money.
Engaging Activity Stations with Themed Decor
Ever wondered how to make your summer camp activity stations not just fun but also visually captivating? Let’s face it, kids are drawn to vibrant, engaging environments. So, how do we create activity stations that not only keep them entertained but also stimulate their imagination? Here’s the scoop.
Why Themed Decor Matters
First off, themed decor isn’t just about looking good. It’s about creating an immersive experience. Imagine a treasure hunt station decked out like a pirate’s cove or a science station transformed into a mini-laboratory. These visual cues make activities more exciting and memorable.
Simple Ideas for Themed Stations
You don’t need to break the bank to create engaging themed stations. Here are some easy-to-implement ideas:
- Pirate’s Cove: Use old sheets to create sails, scatter some sand, and add a treasure chest filled with goodies.
- Mini-Laboratory: Think white tablecloths, plastic beakers, and some “scientific” posters.
- Jungle Safari: Green crepe paper for vines, stuffed animals, and binoculars for spotting ‘wildlife.’
- Space Station: Aluminium foil for a metallic look, star stickers, and a few astronaut helmets.
Making It Interactive
Themed decor is just the start. Interactive elements are what make activity stations truly engaging. Here are some ideas to amp up the interactivity:
- Scavenger Hunts: Incorporate hidden items that match the theme. For example, in a pirate’s cove, hide “gold coins” around the area.
- DIY Craft Stations: Provide materials that fit the theme. For a jungle safari, kids could make their own crafts.
Want more ideas? Check out our comprehensive guide to summer camp activities and themes for inspiration.
Incorporating Nature into Your Camp Decor

Ever wondered how to make your summer camp feel more connected to the great outdoors?
I get it.
You want your camp to feel like a true escape into nature.
But how do you do that without breaking the bank or spending weeks on setup?
Let’s dive in.
Why Incorporate Nature?
Nature is the essence of summer camp.
It sets the scene and creates an immersive experience.
Plus, it’s budget-friendly and eco-friendly.
Win-win, right?
Easy Ways to Bring Nature into Your Decor
Here are some simple ideas to get you started:
- Use Natural Materials: Think wood, stones, and leaves. Easy to find and super effective.
- Create Nature-Themed Signage: Use wooden planks or stones to make signs. Paint them with natural colours.
- Leaf Garlands: Collect leaves and string them together. Hang them around the camp for a rustic touch.
- Rock Art: Paint rocks with fun designs or inspirational quotes. Scatter them around the campsite.
Nature-Inspired Activity Stations
Why stop at just decorations?
Make your activity stations nature-themed too.
- Craft Station: Use pinecones, sticks, and leaves for crafts. Kids can make their own natural souvenirs.
- Nature Scavenger Hunt: Create a list of natural items for kids to find. Keeps them engaged and appreciating their surroundings.
Real-Life Example
Last summer, I helped set up a camp where we used tree stumps as seating around the campfire.
Simple, right?
But it made a huge difference.
The kids loved it, and it felt like we were sitting in the heart of the forest.
Safety First
Always remember to keep safety in mind.
- Avoid Hazardous Plants: Make sure the plants you use aren’t toxic.
- Secure Decorations: Ensure all decorations are firmly attached to avoid accidents.
Safety Considerations for Camp Decorations
Alright, let’s dive into the nitty-gritty of keeping your camp decorations safe. We all want our summer camps to look amazing, but safety can’t take a backseat. Trust me, nobody wants to deal with accidents or injuries when they should be having fun. So, let’s tackle some real questions and worries you might have about making your camp both stunning and secure.
Why Bother with Safety?
First off, why should you care about safety when it comes to decorations? Imagine this: a beautifully decorated campsite, but someone trips over a poorly placed prop and gets hurt. Not cool, right? Safety isn’t just a box to tick; it’s about ensuring everyone has a blast without any hiccups.
Fire Hazards: A Real Threat
Fire safety is a biggie. Campsites often have open flames, whether it’s from campfires, lanterns, or BBQs. Here’s how to keep things fire-safe:
- Use Flame-Retardant Materials: Opt for materials that won’t easily catch fire. Think flame-retardant fabrics and decorations.
- Keep Flammable Items Away from Fire Sources: This might sound obvious, but you’d be surprised how often it’s overlooked. Ensure no decorations are near campfires or lanterns.
- Fire Extinguishers and Buckets of Water: Always have these on hand. Better safe than sorry.
Trip and Fall Hazards
Trips and falls can turn a fun day into a nightmare. Here’s how to avoid them:
- Secure Loose Items: Make sure all decorations are securely fastened. No one should be tripping over a rogue banner.
- Clear Pathways: Keep walkways and common areas free of decorations. People need space to move around safely.
- Use Bright Colours: Brightly coloured decorations are easier to see, reducing the risk of someone accidentally running into them.
Weather-Proofing Your Decorations
Mother Nature can be unpredictable. Rain, wind, and even intense sun can wreak havoc on your decorations. Here’s how to stay ahead:
- Waterproof Materials: Use waterproof or water-resistant materials to keep your decorations intact.
- Wind-Resistant Fastening: Make sure everything is securely tied down. Use stakes, weights, or heavy-duty tape to keep decorations from blowing away.
- Sun Protection: Some materials can fade or become brittle in the sun. Choose UV-resistant materials to keep everything looking fresh.
Eco-Friendly and Safe Materials
Using eco-friendly materials isn’t just good for the planet; it’s also safer for everyone. Here’s why:
- Non-Toxic Materials: Choose decorations made from non-toxic materials. This is especially important if kids are involved.
- Biodegradable Options: These are safer for the environment and often safer for campers too. No sharp edges or harmful chemicals.
Real-Life Example
Let’s bring this home with a real-life example. Last summer, we had a camp where we used solar-powered fairy lights. They were eco-friendly and eliminated the risk of electrical fires. Plus, they looked magical! We also made sure all walkways were clear and used brightly coloured tape to mark any potential trip hazards. The result? A stunning, safe, and worry-free camp.
Final Thoughts
Safety considerations for camp decorations aren’t just about ticking boxes; they’re about ensuring everyone has a fantastic, injury-free time. By using flame-retardant materials, securing loose items, weather-proofing your decorations, and opting for eco-friendly options, you can create a safe and stunning camp environment. Remember, a safe camp is a happy camp. For more tips on creating a fun and safe camp, check out our ultimate guide to summer camping essentials. And if you’re looking for some creative decoration ideas, don’t miss our custom summer camp backgrounds for inspiration. Let’s keep it real, keep it fresh, and keep it safe!
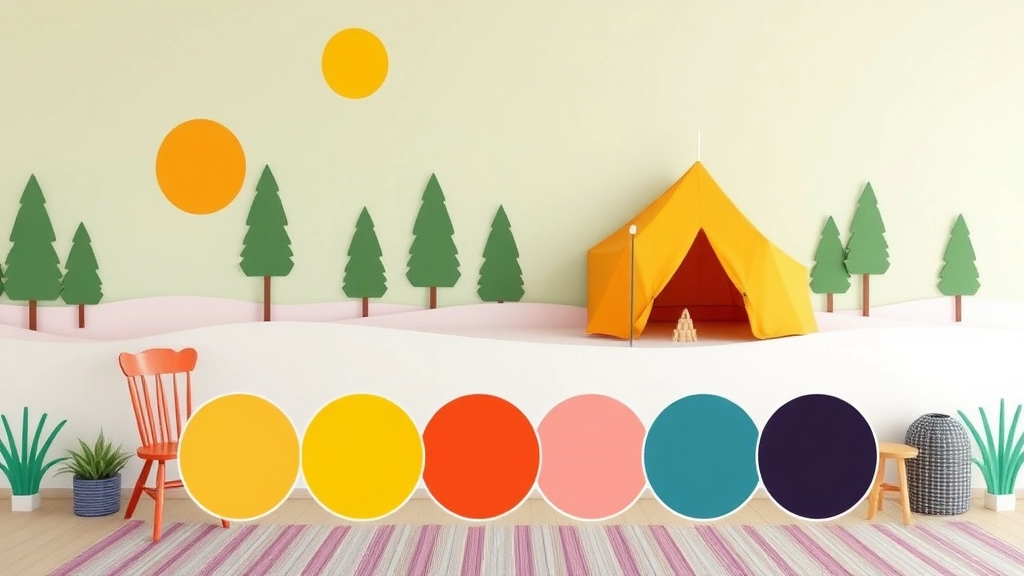
Inspirational Colour Schemes for Summer Camps

Ever wondered how to make your summer camp burst with life and energy?
Choosing the right colour scheme can do wonders.
Let’s dive into some fresh and vibrant ideas that will transform your camp into a visual delight.
Why Colours Matter
Colours set the mood.
They can energise, calm, or inspire.
So, picking the right palette is crucial.
Classic Summer Vibes
Think bright and bold.
- Sunshine Yellow: Instant happiness.
- Ocean Blue: Brings a calming effect.
- Grass Green: Connects with nature.
Mix these up for a classic summer feel.
Nature-Inspired Hues
Bring the outdoors in.
- Forest Green: Earthy and grounding.
- Sky Blue: Open and airy.
- Sunset Orange: Warm and inviting.
These colours make your camp feel one with nature.
Beach Theme
Who doesn’t love the beach?
- Sandy Beige: Neutral and relaxing.
- Coral Pink: Fun and vibrant.
- Seafoam Green: Fresh and cool.
Perfect for a coastal vibe.
Adventure Theme
For the thrill-seekers.
- Camo Green: Rugged and adventurous.
- Rustic Brown: Earthy and warm.
- Fiery Red: Adds excitement and energy.
Great for an action-packed camp.
Eco-Friendly Options
Want to go green?
- Recycled Paper Brown: Eco-conscious.
- Natural White: Clean and simple.
- Leaf Green: Fresh and sustainable.
These colours say you care about the planet.
Tips for Combining Colours
- Contrast: Use light and dark shades for balance.
- Harmony: Stick to three main colours to avoid chaos.
- Accent: Use bold colours sparingly to make them pop.
Real Stories
Last summer, we went with a beach theme.
The kids loved the coral pink and seafoam green combo.
It felt like a mini-vacation every day.
FAQs About Decoration For Summer Camp
What are some budget-friendly DIY decoration ideas for summer camps?
There are several cost-effective DIY decoration projects you can try, such as making paper lanterns, creating nature-inspired centrepieces, and upcycling old bottles into vases. These projects are easy on the wallet and fun to make.
Why should I consider DIY decorations for my summer camp?
DIY decorations are cost-effective, customizable, and engaging. They allow you to save money, tailor the decor to your camp’s theme, and involve the kids in the creative process.
How can I incorporate nature into my camp decor?
Using natural materials like wood, stones, and leaves can make your camp feel more connected to the outdoors. You can also create nature-themed signage, leaf garlands, and rock art to enhance the natural vibe.
What are some eco-friendly decoration options for summer camps?
Eco-friendly decoration options include using recycled materials like cardboard and plastic bottles, natural elements like rocks and flowers, and upcycling old items into new decor pieces. These options help reduce waste and often save money.
What are some inspirational colour schemes for summer camps?
Inspirational colour schemes include classic summer vibes with bright yellows, blues, and greens, nature-inspired hues like forest green and sky blue, and themed palettes such as beach or adventure themes. Choosing the right colours can set the mood and enhance the camp’s atmosphere.
How can I make my summer camp decorations eco-friendly?
To make your decorations eco-friendly, use recycled materials, natural elements, and upcycled items. Opt for non-toxic, water-based paints and involve kids in eco-friendly craft projects to teach them about sustainability.
What are some simple and cheap decoration ideas for summer camps?
Simple and cheap decoration ideas include making paper lanterns from coloured paper, creating nature-inspired centrepieces using pinecones and leaves, and turning empty bottles into painted vases or candle holders.
How can I ensure the safety of my summer camp decorations?
To ensure safety, avoid using hazardous plants, secure all decorations firmly to prevent accidents, and use non-toxic materials. Always supervise kids during DIY projects to ensure they follow safety guidelines.
Why is it important to choose the right colour scheme for a summer camp?
Choosing the right colour scheme is important because colours set the mood and atmosphere of the camp. They can energize, calm, or inspire campers, making the environment more enjoyable and engaging.
Can you share a real-life example of successful summer camp decorations?
Last summer, we used a beach theme with coral pink and seafoam green colours. The kids loved it, and it felt like a mini-vacation every day. We also used tree stumps as seating around the campfire, which made the camp feel more connected to nature.
References
- Budget-Friendly DIY Decoration Projects
- Eco-Friendly Decoration Options
- Incorporating Nature into Your Camp Decor

