Welcome to the Ultimate Guide on Summer Camp Decoration Ideas!
Whether you’re a camp organizer or a counselor looking to add a touch of magic to your camp, this article is your go-to resource. We’ll explore a variety of creative and eco-friendly decoration ideas to make your summer camp unforgettable. From creating a welcoming entrance and nature-inspired cabins to DIY campfire-themed decorations and personalized bunk areas, we’ve got you covered.
Imagine transforming your camp’s outdoor spaces with whimsical lights and lanterns, crafting unique wall art projects, and using recycled materials for eco-friendly decor. We’ll also dive into the importance of themed banners and signs for different activities and how to incorporate natural elements like flowers, leaves, and wood into your decor. So, let’s embark on this journey to make your summer camp a cozy, inviting, and memorable place for all campers!
Creating a Welcoming Entrance to the Camp
Ever wondered why some camp entrances feel like a warm hug, while others are just… meh? It’s all about creating a welcoming entrance that sets the tone for the entire camp experience. Let’s dive in and tackle this head-on.
Why Does the Entrance Matter?
First impressions count. When campers arrive, they’re buzzing with excitement and maybe a little nervous. A welcoming entrance can:
- Ease anxiety: A friendly vibe helps everyone feel at home.
- Spark curiosity: An intriguing setup makes folks eager to explore.
- Set the mood: The entrance is your first chance to convey the camp’s theme and energy.
Key Elements of a Welcoming Entrance
Signage That Pops
Your camp sign is the first thing people see. Make it count:
- Bold and Clear: Use large fonts and bright colours.
- Personal Touch: Add the camp’s name and maybe a fun motto.
- Materials Matter: Use wood or recycled materials for an eco-friendly touch.
Pathway to Adventure
A well-designed pathway guides campers in:
- Natural Materials: Stone or wood paths blend with the environment.
- Decorative Elements: Line the path with flowers or lanterns.
- Interactive Features: Add signs with fun facts or riddles along the way.
Welcome Station
Set up a spot where campers can gather info and meet staff:
- Info Board: Display maps, schedules, and welcome messages.
- Friendly Faces: Have staff greet campers and answer questions.
- Goodie Bags: Hand out small welcome packs with essentials or camp swag.
Real-Life Example
Remember that time you walked into a camp and there was a giant wooden archway with vines and fairy lights? That’s the magic we’re talking about. It wasn’t just an entrance; it was an invitation to adventure.
Quick Tips for a Memorable Entrance
- Theme Consistency: Match the entrance decor with the camp’s overall theme.
- Lighting: Use solar lights for an eco-friendly glow at night.
- Incorporate Nature: Use local plants and materials for authenticity.
For more tips on creating an inviting camp atmosphere, check out our guide on creative summer camp sign ideas and tips. Additionally, make sure your camp’s entrance aligns with the fun and learning activities planned for the campers.
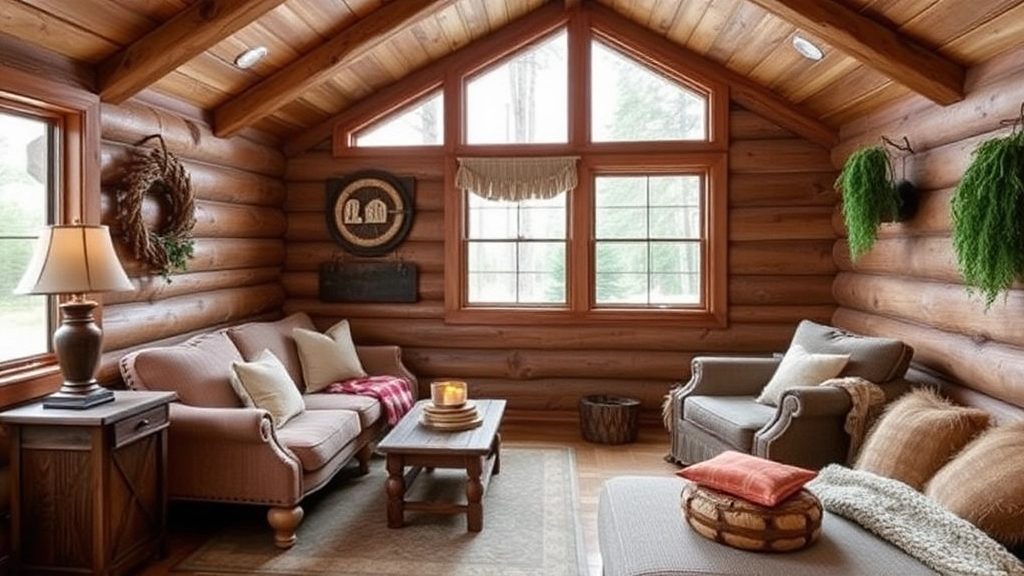
Nature-Inspired Cabin Decoration Ideas
Ever walked into a cabin and thought, “This place could use some nature vibes”?
You’re not alone.
A lot of us want to bring the outdoors in, especially at summer camp.
So, how do we do it?
Let’s dive into some nature-inspired cabin decoration ideas that are simple, fun, and totally doable.
Bring the Outside In
First things first, use what’s around you.
Nature is the best decorator.
Here are some quick ideas:
- Pinecones and Rocks: Collect them during a hike. Place them in clear jars or bowls.
- Leaves and Branches: Arrange them in vases or hang them as wall art.
- Flowers: Fresh or dried, they add a pop of colour and life.
Nature-Themed Bedding and Curtains
Swap out those plain sheets and curtains.
Go for patterns that scream nature:
- Leaf prints
- Floral designs
- Animal motifs
These small changes make a big impact.
DIY Nature Crafts
Get the campers involved.
It’s fun and adds a personal touch.
Here’s what you can do:
- Pressed Flower Frames: Collect flowers, press them, and frame them.
- Twig Picture Frames: Use twigs to create rustic frames.
- Rock Painting: Paint inspirational messages or cute designs on rocks.
Use Earthy Colours
Think greens, browns, and blues.
These colours mimic nature and create a calming atmosphere.
Natural Light
Maximise natural light.
Open those curtains wide.
Natural light makes everything look better.
Eco-Friendly Materials
Go green.
Use recycled or sustainable materials for your decorations.
- Bamboo
- Recycled wood
- Organic fabrics
Stories and Examples
Remember that time we used pinecones for Christmas decorations?
Same idea.
Kids loved collecting them, and it made the cabin feel festive and cosy.
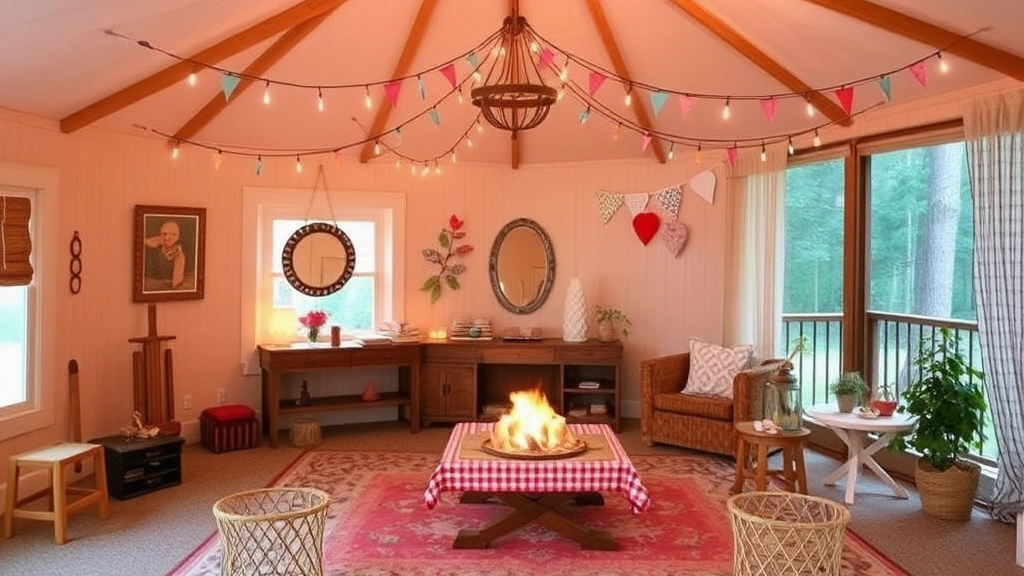
DIY Campfire-Themed Decorations
Alright, let’s get real here. When you think of summer camp, what’s the first thing that comes to mind? For a lot of us, it’s the campfire. The warmth, the stories, the marshmallows. So, why not bring that vibe into your camp decor? Let’s dive into some DIY campfire-themed decorations that are easy to make and will give your camp that cozy, welcoming feel.
Why Campfire-Themed Decorations?
Here’s the thing: campfire-themed decorations aren’t just about looking good. They set the mood. They make people feel at home, relaxed, and ready to connect. And honestly, isn’t that what camp is all about? So, let’s get into some practical ideas.
DIY Campfire Centerpieces
First off, we’ve got to talk about centerpieces. These are perfect for picnic tables or activity areas. Here’s how you can create your own:
- Materials Needed:
- Small logs or sticks
- Battery-operated tea lights
- Red, orange, and yellow tissue paper
- Glue and scissors
- Steps:
- Arrange the Logs: Start by arranging your small logs or sticks in a circle, just like you would a real campfire.
- Create the Flames: Cut the tissue paper into flame shapes. Layer the red, orange, and yellow pieces to give it a realistic look.
- Attach the Flames: Glue the tissue paper flames to the tops of the logs.
- Add the Lights: Place the battery-operated tea lights in the center to give it that glowing effect.
Bam! You’ve got yourself a mini campfire centerpiece that’s safe and looks fantastic.
Campfire-Themed Wall Art
Now, let’s talk about wall decorations. You want something that screams âcampfireâ but is also easy to put up and take down.
- Materials Needed:
- Large sheets of craft paper
- Paint (red, orange, yellow)
- Markers
- String lights
- Steps:
- Draw and Paint: On the craft paper, draw a big campfire scene. Get creative with the flames and logs.
- Cut It Out: Once your masterpiece is dry, cut out the campfire shape.
- Hang It Up: Use some tape or tacks to hang it on the wall.
- Add Some Glow: Drape string lights around the edges to give it a warm, flickering effect.
This not only brightens up the space but also adds a touch of magic.
Campfire-Themed Crafts for Kids
Kids love getting their hands dirty, so why not let them create their own campfire-themed crafts? Here are a couple of ideas:
- Toilet Paper Roll Campfires:
- Materials Needed: Toilet paper rolls, paint, tissue paper, glue.
- Steps: Paint the rolls to look like logs and glue tissue paper flames on top.
- Campfire Handprint Art:
- Materials Needed: Construction paper, paint, markers.
- Steps: Use handprints to create the flames and draw logs at the bottom.
These crafts are not just fun but also a great way to get the kids involved in decorating.
Bringing It All Together
So, there you have it. DIY campfire-themed decorations that are easy to make, look fantastic, and set the perfect mood for your summer camp. From centerpieces to wall art to kids’ crafts, you’ve got all the bases covered. Remember, the keyword here is âcampfire-themed decorations,â and you’ll want to sprinkle that throughout your planning and execution.
When it comes to creating a welcoming and engaging camp environment, these decorations can make all the difference. They’re simple, effective, and most importantly, they bring people togetherâjust like a real campfire would. So, get out there and start decorating!
For more inspiration on creating a lively camp atmosphere, check out our Summer Camp Bulletin Board Ideas for 2024 and get some fantastic ideas. Additionally, if you’re looking for engaging activities, don’t miss our guide on Summer Camp Creative Arts and Crafts Ideas.
Outdoor Spaces: Decorating Picnic and Activity Areas

Ever wondered how to make your camp’s outdoor spaces feel more inviting?
Let’s dive into some no-nonsense ways to jazz up those picnic and activity areas.
Why Bother Decorating Outdoor Spaces?
Because first impressions matter.
When campers step into a beautifully decorated area, it sets the tone for their entire experience.
Think about it—who wouldn’t love to picnic under fairy lights or play games surrounded by colourful bunting?
Quick Wins for Decorating Picnic Areas
First things first, let’s talk about the basics.
Here are some easy ideas to get you started:
- Tablecloths and Placemats: Use vibrant, washable tablecloths. They add a pop of colour and are super easy to clean.
- Centrepieces: Think small potted plants or jars filled with wildflowers. Simple, yet effective.
- Seating: Comfortable seating is a must. Throw in some cushions or even hay bales for a rustic touch.
Activity Areas: Make Them Fun and Functional
Activity areas should be more than just functional.
They should be fun.
Here’s how to make that happen:
- Banners and Signs: Use themed banners to mark different activity zones. It’s not only decorative but also helps in navigation.
- Games and Props: Incorporate large outdoor games like giant Jenga or Connect Four. They double as decor and entertainment.
- Shade: Install canopies or umbrellas. Not only do they provide relief from the sun, but they also add a splash of colour.
Lighting: The Game Changer
Lighting can transform any space.
Here’s how to do it right:
- Fairy Lights: String them around trees, picnic tables, or even along pathways. They create a magical atmosphere as the sun sets.
- Lanterns: Place battery-operated lanterns on tables or hang them from branches. They’re safe and add a cosy vibe.
- Solar Lights: Line walkways with solar lights. They’re eco-friendly and help with visibility at night.
Real Talk: What If It Rains?
Don’t let a bit of rain ruin your plans.
Here’s what you can do:
- Pop-Up Tents: Have a few ready to go. They’re perfect for quick cover.
- Waterproof Decor: Opt for waterproof tablecloths and cushions. No one wants soggy seating.
- Storage: Keep a storage box nearby for quick clean-up if the weather turns.
Personal Touches: Make It Memorable
Adding personal touches can make your camp stand out.
Here’s how:
- Custom Signs: Use chalkboards or wooden signs with fun messages or camp rules.
- Photo Booth: Set up a simple photo booth with props. It’s a hit with campers and provides great memories.
- Nature Elements: Incorporate natural elements like stones, leaves, and wood. They blend seamlessly with the outdoor setting.
Crafty Wall Art Projects for Summer Camp
Ever wondered how to jazz up those bland camp walls without spending a fortune? Crafty wall art projects for summer camp are your answer. They’re fun, engaging, and can turn any dull space into a vibrant, welcoming area. Plus, they’re a fantastic way to get campers involved and let their creativity shine.
Why Wall Art Projects?
First off, let’s address the elephant in the room. Why should we even bother with wall art projects for summer camp? Well, here are a few reasons:
- Engagement: Kids love to create, and wall art projects give them a chance to express themselves.
- Decor: Transform boring walls into eye-catching displays.
- Memories: These projects can be a keepsake that campers will remember for years.
Easy and Fun Wall Art Ideas
Here are some simple yet impactful wall art projects you can try:
- Nature Collages:
- Collect leaves, flowers, and twigs from around the camp.
- Use glue and large sheets of paper to create beautiful nature collages.
- Handprint Murals:
- Get some non-toxic paint and let campers dip their hands in.
- Create a mural of handprints, each camper leaving their mark.
- Photo Walls:
- Take photos of campers during various activities.
- Print them out and create a photo wall that tells the story of the camp.
- Campfire Stories:
- Have campers write short stories or draw pictures about their camp experiences.
- Pin these up on a designated wall for everyone to enjoy.
Tips for Successful Wall Art Projects
To make these projects a hit, keep these tips in mind:
- Materials: Make sure you have all the necessary materials beforehand.
- Guidance: Provide clear instructions but let the kids’ creativity flow.
- Safety: Ensure all materials are safe and non-toxic.
- Display: Choose a prominent wall where everyone can admire the artwork.
Real-Life Example
Last summer, we tried a handprint mural, and let me tell you, it was a massive hit. Not only did it brighten up the dining hall, but it also became a talking point for campers and staff alike. Kids would often stop by to find their handprint and show it off to their friends. It was a simple project, but the impact was huge.
Why It Matters
Crafty wall art projects for summer camp aren’t just about decoration. They’re about creating a sense of community, boosting morale, and giving campers something to be proud of. Plus, they’re a great way to make the camp feel more like a home away from home.
For more engaging activities, check out our summer camp craft ideas that cater to all age groups. And if you’re looking for ways to keep the fun going, explore these indoor summer camp games that are perfect for any weather.
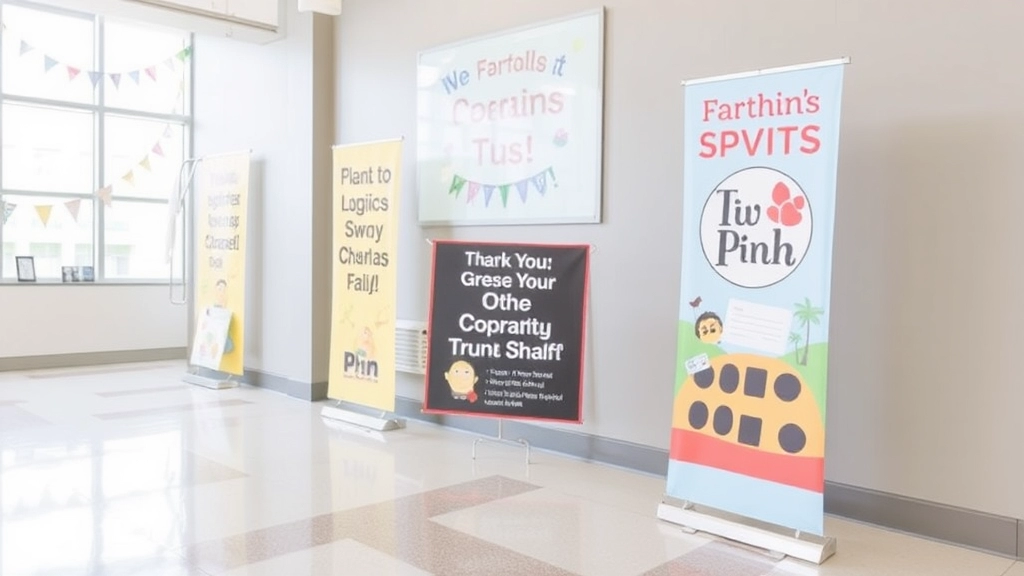
Themed Banners and Signs for Different Activities
Ever walked into a summer camp and got lost because you couldn’t find the archery range or the arts and crafts cabin?
Yeah, me too.
That’s where themed banners and signs come in. They’re not just practical—they add a burst of personality to the camp.
Why Banners and Signs Matter
Think about it. Kids are running around, parents are visiting, and staff need to keep things organised.
Here’s why themed banners and signs are a game-changer:
- Navigation: Clear signs help everyone find their way.
- Atmosphere: They set the vibe for each activity.
- Safety: Knowing where everything is can prevent accidents.
Creating Themed Banners and Signs
You don’t need a degree in design to make these. Here’s how you can pull it off:
- Pick a Theme
- For each activity, choose a fun theme. Think pirates for the boating area or wizards for the arts and crafts cabin.
- Materials
- Use sturdy materials like canvas or thick cardboard. These need to withstand the elements.
- Design
- Keep it simple. Big, bold letters and bright colours.
- Add some illustrations to make it pop.
- DIY or Buy
- If you’re crafty, DIY your signs.
- If not, there are loads of affordable options online.
Examples of Themed Banners and Signs
Let’s break it down with some examples:
- Archery Range: A banner with a bullseye and arrows.
- Swimming Area: Blue waves and a big, friendly fish.
- Campfire Circle: Flames and marshmallows on sticks.
Placement Matters
Where you put these signs is just as important as how they look.
- Entrance: A big welcome banner.
- Pathways: Smaller signs pointing to key areas.
- Activity Zones: Clear, themed signs at each spot.
Real-Life Story
Last summer, we had a pirate-themed treasure hunt.
We made a huge map banner at the entrance, complete with “X marks the spot.”
Kids were hooked the moment they walked in.
Parents loved it, staff found it easier to manage, and the whole camp felt like one big adventure.
Recycled and Eco-Friendly Decor for Summer Camps
Ever wondered how you can make your summer camp both fun and eco-friendly? Let’s face it, the idea of decorating a camp with recycled materials might sound a bit daunting at first. But trust me, it’s a game-changer. Not only does it save money, but it also teaches campers the importance of sustainability. Plus, it’s a fantastic way to get creative!
Why Choose Recycled Decor?
First things first, why should we even bother with recycled decor? Here are a few real concerns that might be on your mind:
- Budget Constraints: Camps can be expensive, and cutting costs without cutting corners is always a win.
- Environmental Impact: We all want to reduce waste and teach the next generation to do the same.
- Creativity Boost: Working with recycled materials can spark creativity in ways you never imagined.
Getting Started with Recycled Decor
Alright, let’s dive into some practical, easy-to-implement ideas for recycled and eco-friendly decor.
Bottle Cap Art
Turn those bottle caps into colourful mosaics. Here’s how:
- Collect caps: Ask campers to bring in bottle caps from home.
- Design: Sketch out simple designs like flowers, animals, or even camp logos.
- Glue: Use eco-friendly glue to stick the caps onto a wooden board or cardboard.
Tin Can Lanterns
Lighting up the night has never been this fun or eco-friendly:
- Gather cans: Clean out old tin cans.
- Punch holes: Create patterns by punching holes in the cans.
- Add lights: Place a small LED candle inside for a magical glow.
Pallet Furniture
Who knew old pallets could be so versatile?
- Source pallets: Ask local businesses if they have any old pallets to give away.
- Sand and paint: Smooth out rough edges and add a splash of colour.
- Assemble: Use nails or screws to create benches, tables, or even planter boxes.
Engaging Campers in Eco-Friendly Projects
One of the best parts about using recycled materials is involving the campers in the process. Here’s how you can make it a team effort:
- Workshops: Host DIY workshops where campers can create their own recycled decor.
- Competitions: Organise friendly competitions for the best-recycled art piece.
- Storytelling: Share stories about the impact of recycling and how their projects contribute to a healthier planet.
Real-Life Example: The Bottle Cap Mural
A few summers ago, we decided to create a massive mural using nothing but bottle caps. Each camper brought in caps from home, and we spent an afternoon designing and assembling the mural. Not only did it turn out to be a stunning piece of art, but it also sparked countless conversations about recycling and creativity. The mural still stands today, a testament to what can be achieved with a bit of imagination and a lot of teamwork.
If you’re looking for more creative ideas for your camp, check out our summer camp themes and packing essentials to ensure a fun and organized experience.
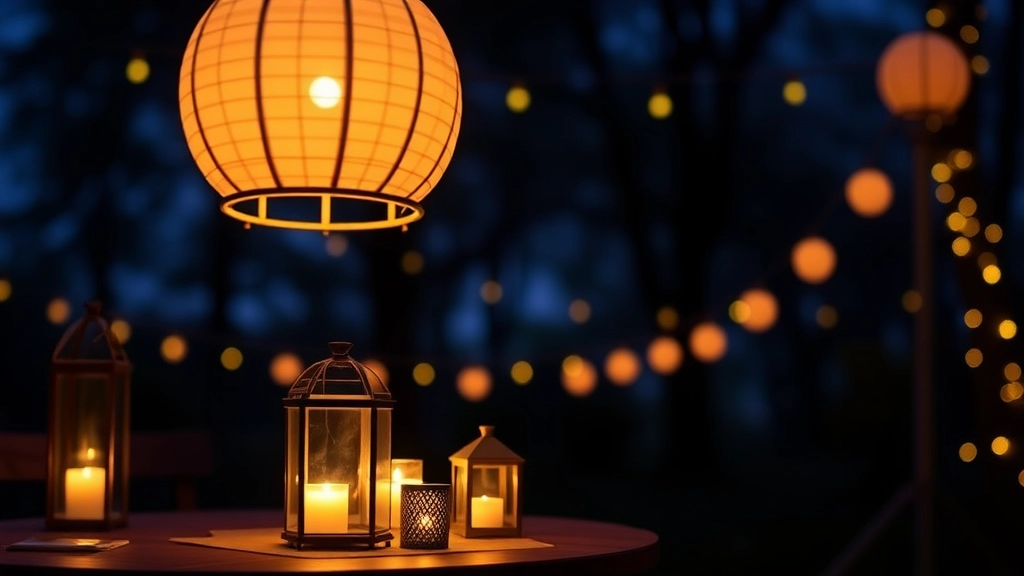
Using Lights and Lanterns to Create a Cozy Ambiance
Ever wondered how to make your summer camp feel like a magical retreat?
Let’s talk about using lights and lanterns to create a cozy ambiance.
Why Lights and Lanterns?
We all know the power of good lighting.
It sets the mood.
It creates atmosphere.
And it can turn a simple campsite into a warm, inviting haven.
But how do we do it?
Types of Lights and Lanterns
Here are some easy options to consider:
- Fairy Lights: These are versatile and can be draped around trees, cabins, or picnic areas.
- Solar Lanterns: Eco-friendly and hassle-free. They charge during the day and light up the night.
- LED Candles: Safe and realistic. Perfect for a calm, flickering effect without the fire hazard.
Placement Tips
Where you place your lights matters.
Think about these spots:
- Pathways: Line them with solar lanterns for safety and charm.
- Cabin Entrances: Make each cabin welcoming with a few strategically placed fairy lights.
- Picnic Areas: Hang lanterns above tables to create a dining experience under the stars.
DIY Lantern Ideas
Want to get crafty?
Here are some simple DIY ideas:
- Mason Jar Lanterns: Fill mason jars with battery-operated fairy lights. Hang them from trees or place them on tables.
- Tin Can Lanterns: Poke holes in old tin cans and place a tea light inside. The light will shine through the holes, creating beautiful patterns.
Real Stories
I remember last summer, we hung fairy lights around the main activity area.
The kids were mesmerised.
It made the whole place feel like a fairytale.
Safety First
Always keep safety in mind.
- Use battery-operated lights to avoid fire hazards.
- Ensure solar lanterns are placed where they can get enough sunlight.
- Check all lights for any damage before use.
Personalized Bunk Area Decorations for Campers
Alright, let’s dive straight into it. You’re at summer camp, and let’s face it, the bunk area is where kids spend a good chunk of their time. So, how do we make these spaces not just functional, but also a reflection of each camper’s personality? Here’s the lowdown.
Why Personalised Bunk Areas Matter
First off, why bother with personalised bunk area decorations? Simple. Kids want to feel at home, even when they’re miles away. A personalised bunk area:
- Boosts Comfort: Makes the space feel more like their own.
- Encourages Creativity: Gives them a chance to express themselves.
- Fosters Community: Helps campers bond over shared interests.
Quick and Easy Personalisation Ideas
Now, let’s break down some easy ways to personalise bunk areas. Trust me, none of this is rocket science.
1. Name Tags
- DIY Name Plates: Use materials like cardboard, markers, and stickers. Let campers design their own.
- Pre-made Options: If you’re short on time, pre-made name tags work too. Just ensure they’re customisable.
2. Photo Displays
- Photo Collages: Encourage campers to bring photos from home. Provide a corkboard or string and clothespins for display.
- Instant Cameras: Have a few instant cameras around. Kids love snapping and displaying memories.
3. Personal Message Boards
- Chalkboards or Whiteboards: Small boards where campers can write messages, doodles, or reminders.
- Bulletin Boards: Pin up notes, drawings, or camp schedules.
4. Themed Bedding
- Bedding Sets: Allow campers to bring their own themed bedding. Think superheroes, animals, or favourite colours.
- DIY Pillowcases: Provide plain pillowcases and fabric markers for custom designs.
5. Storage Solutions
- Personal Bins: Small bins or boxes for personal items. Labelled with their names, of course.
- Hanging Organisers: Over-the-bed organisers for books, snacks, and gadgets.
Stories from the Field
Let me share a quick story. Last summer, we had a camper named Tim. Tim was shy and found it hard to make friends. But once he decorated his bunk with his favourite football team’s posters and colours, it became a magnet for other football fans. By the end of the week, Tim had a group of buddies who shared his passion. Personalised spaces can really make a difference.
Pro Tips for Camp Leaders
- Encourage Creativity: Give campers the freedom to decorate within certain guidelines.
- Provide Supplies: Have a stash of basic supplies like markers, tape, and stickers.
- Set Up a Decoration Station: A designated area where kids can work on their decorations.
If you’re looking for more ways to enhance the camp experience, check out our comprehensive guide on summer camp maps and learn about transportation safety and convenience tips to ensure a smooth camp journey.
Incorporating Nature: Flowers, Leaves, and Wood in Decoration
Ever felt like your camp decor is missing that natural touch?
Wondering how to bring the outdoors in without it looking like a forest explosion?
Let’s dive into using flowers, leaves, and wood to create something truly special.
Why Nature?
Nature’s got this magical way of making spaces feel alive.
It’s not just about aesthetics; it’s about creating a vibe.
Flowers, leaves, and wood can transform any space into a cosy haven.
Easy Ways to Incorporate Nature
Here’s how you can do it without breaking a sweat:
- Flower Arrangements:
- Use wildflowers for a rustic touch.
- Mix and match colours for a vibrant feel.
- Leaf Garlands:
- String them up for instant charm.
- Perfect for doorways or around windows.
- Wood Elements:
- Use logs as seating or tables.
- Hang wooden plaques with inspiring quotes.
Real-Life Example
Last summer, we had a camp that looked like it was straight out of a nature magazine.
We used simple flower arrangements and leaf garlands.
Campers loved it.
They said it felt like they were in a fairy tale.
Quick Tips for Success
- Keep it Simple: Don’t overdo it. A little goes a long way.
- Mix and Match: Combine different elements for a unique look.
- Stay Eco-Friendly: Use fallen branches or leaves. Mother Nature will thank you.
For more tips on creating a memorable camp experience, check out our essential packing guide and explore the activities and traditions that make summer camps so special.
FAQs on Summer Camp Decoration Ideas
What are some simple nature-inspired cabin decoration ideas?
Bringing the outdoors in is a great way to decorate cabins. You can use pinecones, rocks, leaves, branches, and flowers. Arrange them in jars, vases, or hang them as wall art. Nature-themed bedding and curtains with leaf prints, floral designs, or animal motifs can also make a big impact.
How can we involve campers in cabin decoration?
Engaging campers in DIY nature crafts is a fun way to decorate. They can create pressed flower frames, twig picture frames, and painted rocks with inspirational messages or cute designs. These activities add a personal touch to the cabin decor.
What are the best colors to use for a nature-inspired theme?
Earthy colors like greens, browns, and blues mimic nature and create a calming atmosphere in the cabin. These colors can be used in various elements like bedding, curtains, and other decor items.
How can we make outdoor picnic areas more inviting?
Decorate picnic areas with vibrant, washable tablecloths, small potted plants or jars filled with wildflowers as centerpieces, and comfortable seating like cushions or hay bales. These simple touches can make outdoor spaces feel more welcoming.
What are some decoration ideas for activity areas?
Activity areas should be both fun and functional. Use themed banners and signs to mark different zones, incorporate large outdoor games like giant Jenga or Connect Four, and provide shade with canopies or umbrellas. These elements enhance the experience and help with navigation.
How can lighting enhance the camp’s ambiance?
Lighting can transform any space. Use fairy lights, lanterns, and solar lights to create a magical atmosphere. String fairy lights around trees, place lanterns on tables, and line pathways with solar lights for a cozy and inviting environment.
What should we do if it rains during outdoor activities?
Prepare for rain by having pop-up tents ready for quick cover, using waterproof tablecloths and cushions, and keeping a storage box nearby for quick clean-up. These measures ensure that the fun continues despite the weather.
Why are themed banners and signs important at camp?
Themed banners and signs help with navigation, set the atmosphere for each activity, and enhance safety by clearly marking different areas. They also add a burst of personality to the camp, making it more enjoyable for everyone.
How can we create themed banners and signs?
Choose a fun theme for each activity, use sturdy materials like canvas or thick cardboard, and design with big, bold letters and bright colors. You can DIY these signs or find affordable options online. Placement is key—ensure they are visible at entrances, pathways, and activity zones.
What are some DIY lantern ideas for creating a cozy ambiance?
Mason jar lanterns filled with battery-operated fairy lights and tin can lanterns with tea lights inside are simple DIY projects. These lanterns can be hung from trees or placed on tables to create beautiful, ambient lighting.
How can we ensure safety when using lights and lanterns?
Always use battery-operated lights to avoid fire hazards, ensure solar lanterns get enough sunlight, and check all lights for damage before use. Safety should always be a priority when decorating with lights and lanterns.
References
-
Nature-Inspired Home Decor Ideas
-
Outdoor Decorating Ideas
-
Nature-Inspired Decorating Style