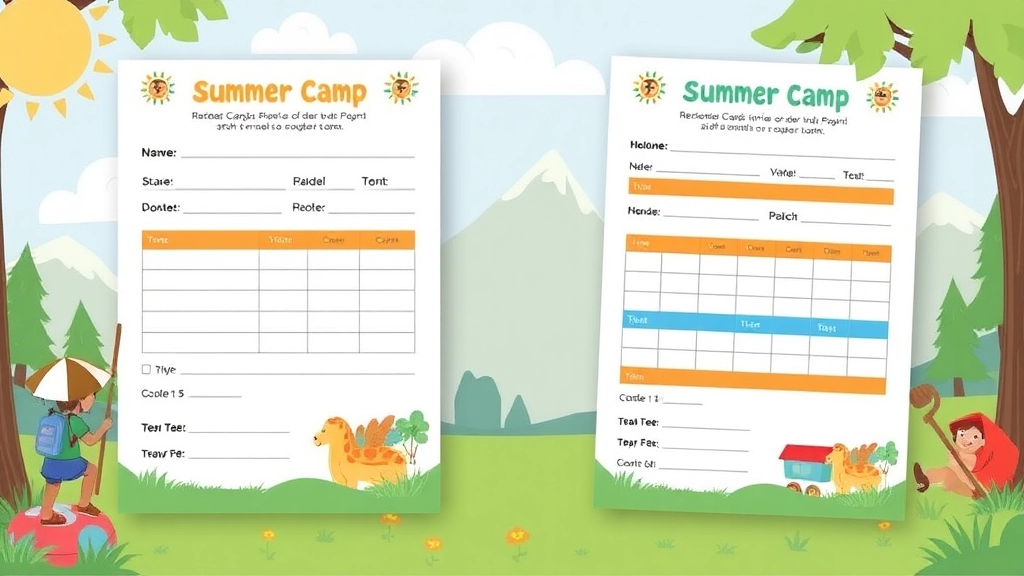
Creating the Perfect Summer Camp Registration Form
Creating the perfect summer camp registration form can be a daunting task, but it’s essential for a seamless onboarding experience. This article dives into the key elements of a summer camp registration form template, ensuring it meets the needs of various camp types while prioritizing medical information, online payments, and mobile responsiveness. By understanding these components, you’ll create a form that’s both efficient and engaging.
Key Components of a Summer Camp Registration Form
We’ll explore how to customize your form with conditional logic, integrate it with external tools, and enhance security to comply with GDPR and HIPAA standards. Additionally, we’ll discuss optimizing your form for social media and website embedding, streamlining data collection, and reporting. With these insights, you’re set to boost registrations and ensure a smooth camp management process.
Key Elements of a Summer Camp Registration Form
Alright, let’s dive in. When it comes to setting up a summer camp, the registration form is your first handshake with parents and campers. You want it to be smooth, straightforward, and packed with all the essentials. So, what are the key elements of a summer camp registration form? Let’s break it down.
Basic Information
First things first, you need the basics. This includes:
- Camper’s Full Name
- Date of Birth
- Gender
- Parent/Guardian Contact Information (phone number, email, address)
Why? Because you need to know who’s coming and how to reach the parents in case of any updates or emergencies.
Camp Session Details
Parents need to know what they’re signing up for. Make sure you include:
- Session Dates
- Camp Type (day camp, overnight camp, specialty camp)
- Age Group/Grade Level
This helps parents choose the right camp for their kids and ensures you can manage the different sessions effectively.
Emergency Contacts
No one likes to think about worst-case scenarios, but you need to be prepared:
- Primary Emergency Contact (name, relationship, phone number)
- Secondary Emergency Contact (name, relationship, phone number)
Medical Information
Health comes first, right? You’ll need:
- Medical Conditions/Allergies
- Medications
- Doctor’s Contact Information
- Insurance Details
This ensures you’re ready to handle any medical needs that may arise during camp.
Waivers and Consents
Cover your bases legally:
- Liability Waiver
- Photo/Video Consent
- Medical Treatment Consent
This protects you and ensures parents are aware of and agree to your policies.
Payment Information
Money talk. Make it clear and straightforward:
- Camp Fees
- Payment Methods
- Payment Schedule
Parents should know exactly what they’re paying for and when.
Additional Information
Every camp has its unique quirks. Don’t forget:
- Special Requests (dietary restrictions, bunkmate requests)
- T-Shirt Size
These small details can make a big difference in the camper’s experience.
Real Questions and Worries
Parents often worry about their child’s safety, the camp’s credibility, and the ease of the registration process. They want to know:
- Is my child going to be safe?
- How can I contact the camp in an emergency?
- What if my child has special dietary needs or medical conditions?
Address these concerns clearly in your form to build trust and ease any anxieties.
Keeping It Real and Engaging
Think of your registration form as a conversation. You’re not just collecting data; you’re starting a relationship. Make it easy to read, straightforward, and engaging. Use bullet points, lists, and bold highlights to make it skimmable. And remember, this isn’t just about filling out a form; it’s about setting the stage for an unforgettable summer camp experience.
For more tips on creating an engaging and effective registration form, check out our guide to summer camp building key elements and trends and learn about the benefits and costs of summer camp insurance coverage.
Customising Your Registration Form for Different Camp Types

Ever been stuck wondering how to customise your summer camp registration form?
You’re not alone.
Different camps have different needs.
Let’s break it down.
Why Customisation Matters
First off, not all camps are the same.
You’ve got sports camps, art camps, science camps—the list goes on.
Each type has unique requirements.
So, a one-size-fits-all form? Not gonna cut it.
Key Customisation Points
1. Camp Type-Specific Questions
- Sports Camps: Ask about skill levels, preferred sports, and equipment needs.
- Art Camps: Include queries on favourite art forms, materials required, and previous experience.
- Science Camps: Find out about interests in specific subjects, any prior projects, and safety concerns.
2. Session Options and Dates
- Offer multiple session dates.
- Let parents choose their preferred sessions.
- Include options for half-day, full-day, or overnight stays.
3. Age Groups and Skill Levels
- Segment your questions based on age groups.
- Tailor questions to match skill levels—beginners, intermediate, advanced.
Real-Life Example
Imagine you’re running a robotics camp.
You’d want to know:
- Has the child built robots before?
- What programming languages do they know?
- Do they have any allergies to materials used in robotics kits?
Practical Tips
- Use Drop-Down Menus: Makes it easy for parents to select options.
- Conditional Logic: Show or hide questions based on previous answers.
- Pre-Filled Fields: Save time by pre-filling fields with known information.
How to Include Medical Information and Waivers
Alright, let’s get real for a second. When it comes to sending your kid off to summer camp, the last thing you want is to worry about their safety and health. So, how do you make sure everything’s covered in your summer camp registration form? Let’s break it down.
Why Medical Information and Waivers Matter
First off, let’s address the elephant in the room: medical information and waivers. These are crucial for any summer camp. Not only do they ensure the safety of your campers, but they also protect you legally. Imagine this: a kid has an allergic reaction, and you have no clue what they’re allergic to. Nightmare, right? That’s why this info is non-negotiable.
Key Medical Information to Include
You need to collect comprehensive medical details, but let’s not make it a chore for parents. Here’s what you should definitely ask for:
- Emergency Contact Information: Names, phone numbers, and relationship to the camper.
- Allergies: Food, medication, and environmental allergies.
- Medications: Current medications, dosage, and administration times.
- Medical Conditions: Chronic illnesses, past surgeries, or any condition that might require attention.
- Doctor’s Information: Name and contact details of the child’s primary care physician.
- Insurance Details: Health insurance provider and policy number.
By collecting these details, you’re not just covering your bases; you’re also showing parents you care about their child’s well-being.
Crafting Effective Waivers
Next up, the waivers. No one likes legal mumbo-jumbo, but it’s essential. Here’s how to make them straightforward and effective:
- General Liability Waiver: Clearly state the risks involved in camp activities and have parents acknowledge them.
- Medical Treatment Authorization: Get permission to seek medical treatment if needed.
- Photo/Video Release: If you plan to take photos or videos of the kids, get consent for that too.
Making It Easy for Parents
Alright, so you’ve got all this info you need. How do you make it easy for parents to fill out? Here are some tips:
- Use Clear Headers: Break down sections with clear headers like âEmergency Contactsâ and âMedical Conditionsâ.
- Bullet Points and Lists: Use bullet points to make it easy to read and fill out.
- Pre-Fill Options: If they’ve registered before, allow pre-fill options to save time.
Real-Life Example
Let me tell you about a camp we worked with last summer. They had a kid with severe peanut allergies. Thanks to their comprehensive medical form, the camp staff knew exactly what to do when the kid had a reaction. They administered the EpiPen and called emergency services immediately. The kid was fine, and the parents were beyond grateful. That’s the power of having detailed medical information right at your fingertips.
For more tips on keeping your child safe and engaged, check out our Parent’s Guide to Sleepaway Camps and our Ultimate Guide to Summer Camp Bonfire Fun.
Adding Online Payment Options to Your Registration Form
Ever tried to sign up for a summer camp and got stuck because there’s no online payment option?
Frustrating, right?
Let’s cut through the noise and make sure your camp doesn’t lose out on campers because of outdated payment methods.
Why Online Payments?
First off, why should you care about online payments?
- Convenience: No one wants to mail a cheque.
- Speed: Payments are instant.
- Security: Online transactions are generally secure.
- Record Keeping: Easier to track and manage.
How to Set It Up
Adding online payment options isn’t rocket science.
Here’s a step-by-step guide:
- Choose a Payment Processor:
- PayPal
- Stripe
- Square
- Integrate with Your Form:
- Most form builders like JotForm, Google Forms, or Wufoo offer easy integration.
- Look for the “Payments” section in your form builder.
- Set Up Payment Fields:
- Add fields for credit card info, billing address, etc.
- Make sure it’s secure (look for SSL encryption).
- Test It Out:
- Run a few test transactions.
- Make sure everything flows smoothly.
Common Issues and Fixes
Worried about potential hiccups?
Here’s what you might run into and how to fix it:
- Payment Declines: Ensure you have clear error messages.
- Security Concerns: Use a reputable payment processor.
- Integration Issues: Double-check your settings and API keys.
Real-Life Example
Let me tell you about a camp we worked with last summer.
They were losing sign-ups because parents didn’t want to deal with cheques.
We added Stripe to their registration form.
Boom. Registrations increased by 30%.
Final Thoughts
Adding online payment options to your summer camp registration form isn’t just a nice-to-have.
It’s a must-have.
It’s convenient, secure, and keeps everything organised.
So, don’t wait.
Get those online payments set up today and watch your registrations soar.
Remember, the easier you make it for people to sign up, the more likely they are to actually do it.
And that’s what we all want, right?
Happy camping!
Managing Multiple Registrations in One Form
Alright, let’s talk about a common headache: managing multiple registrations in one form. Ever tried to juggle multiple registrations and ended up feeling like you’re herding cats? Yeah, it’s a mess. But it doesn’t have to be. Let’s dive in.
Why You Need to Manage Multiple Registrations
First off, why bother with a single form for multiple registrations? Here’s the deal:
- Efficiency: One form means less hassle for parents signing up multiple kids.
- Consistency: Keeps all your data in one place, making it easier to track.
- User Experience: A seamless registration process keeps everyone happy.
Key Features to Include
So, what should you include in your form to handle multiple registrations like a pro?
- Dynamic Fields: Use fields that can expand based on the number of participants. Think of it like a Swiss Army knifeâcompact but versatile.
- Conditional Logic: Only show fields that are relevant to the number of registrations. No one likes to fill out unnecessary info.
- Grouped Data Entries: Keep each participant’s details grouped together. This helps in avoiding mix-ups.
Step-by-Step Guide
Here’s how you can set it up:
- Start Simple: Begin with basic infoâparent/guardian name, contact details, and email.
- Add Participant Sections: Create a section for each participant. Use a âAdd another participantâ button to keep it clean.
- Use Conditional Logic: Show or hide sections based on the number of participants. For example, if someone clicks âAdd another participant,â a new section appears.
- Review and Confirm: Include a summary page before submission. This lets users double-check details and make corrections.
Real-Life Example
Imagine this: Sarah wants to sign up her three kids for summer camp. She’s got limited time and patience. She hits your form, fills out her info, and adds her first kid’s details. A quick click on âAdd another participant,â and she’s onto the next one. Smooth, right? By the time she’s done, she feels like a registration ninja.
Pro Tips
- Auto-Fill Options: Use auto-fill for common fields (like parent info) to save time.
- Error Validation: Implement real-time error checking to avoid mistakes.
- Save and Resume: Allow users to save their progress and come back later. Life’s busy, and interruptions happen.
For more tips on creating an engaging and efficient registration process, check out our Summer Camp Starter Pack. If you’re looking for specific camps, our guide on the Top Summer Camps in Rochester, NY might be helpful.
Ensuring Mobile-Friendly and Responsive Registration Forms
Worried your summer camp registration form isn’t mobile-friendly?
You’re not alone.
Many camp organizers struggle with this.
In today’s world, everyone uses their phones for everything.
If your form isn’t mobile-friendly, you’re missing out. Big time.
Here’s how to fix that.
Why Mobile-Friendly Matters
- Convenience: Parents are busy. They need to register their kids on the go.
- Accessibility: Not everyone has a computer at hand.
- First Impressions: A clunky form can turn people off.
Steps to Make Your Form Mobile-Friendly
- Use a Mobile-Responsive Design
- Choose a form builder that offers mobile-responsive templates.
- Test your form on different devices and screen sizes.
- Simplify the Layout
- Break up long forms into multiple pages.
- Use collapsible sections for optional information.
- Keep the design clean and clutter-free.
- Optimize for Touch Inputs
- Make buttons large enough to tap easily.
- Ensure dropdown menus and checkboxes work well on touch screens.
- Fast Load Times
- Compress images and files.
- Avoid heavy scripts that slow down the page.
- Use a reliable hosting service.
Real-Life Example
Imagine Sarah, a mum of two, trying to register her kids while waiting at the doctor’s office.
She pulls out her phone, but your form is a nightmare to navigate.
She gives up.
You’ve just lost two potential campers.
Tools to Help
- Google Mobile-Friendly Test: See how your form performs on mobile.
- Form Builders: Tools like JotForm, Google Forms, and Typeform offer mobile-responsive templates.
Key Takeaways
- Test, Test, Test: Always test your form on multiple devices.
- Keep It Simple: Less is more when it comes to mobile forms.
- Think Like a User: What would make the process easier for them?
Don’t let a non-responsive form ruin your registrations.
Make it mobile-friendly and watch your sign-ups soar.
Got questions? Drop them in the comments.
Let’s make your summer camp registration a breeze for everyone.
Using Conditional Logic for Specialized Camp Needs
Ever tried to fill out a form and felt like you were drowning in irrelevant questions? Yeah, not fun. Now, imagine parents trying to register their kids for a summer camp and facing the same ordeal. That’s where conditional logic comes in. It’s a game-changer for creating a seamless registration experience, especially for camps with specific requirements.
Why Conditional Logic Matters
Parents are busy. They don’t have time to wade through a one-size-fits-all form. Conditional logic tailors the form based on their responses, making it quicker and less frustrating. Here’s why it’s essential:
- Personalized Experience: Only show questions relevant to the camper.
- Time Efficiency: Skip unnecessary fields, speeding up the process.
- Accuracy: Reduces errors and incomplete submissions.
How to Implement Conditional Logic
Let’s break it down into actionable steps. Implementing conditional logic isn’t rocket science, but it does need a bit of planning.
- Identify Key Variables: Determine which questions depend on previous answers. For example, if a parent selects “Yes” for dietary restrictions, only then show the relevant fields.
- Flowchart Your Form: Sketch out the flow of questions. This visual aid helps ensure you cover all scenarios.
- Use Form Builders: Platforms like JotForm, Typeform, or Google Forms offer built-in conditional logic features. Utilize these to simplify the process.
Examples of Conditional Logic in Action
Let’s say you run a sports camp. Here’s how you could use conditional logic:
- Sport Selection: If a parent selects “Basketball,” show questions about skill level, preferred position, and jersey size. If they choose “Swimming,” display fields for swim level, stroke preference, and goggle size.
- Medical Information: Only display fields for medical conditions if the parent indicates that their child has one.
- Special Needs: If a child requires special accommodations, reveal questions related to their specific needs.
Real Questions Parents Worry About
Parents have real concerns when it comes to camp registration. They worry about:
- Time Consumption: “How long will this registration take?”
- Relevance: “Why am I filling out irrelevant fields?”
- Accuracy: “Will my child’s specific needs be met?”
By using conditional logic, we address these worries head-on. We make the process quick, relevant, and accurate.
Tools and Platforms for Conditional Logic
Incorporating conditional logic doesn’t mean you need to start from scratch. Here are some tools that can help:
- JotForm: Offers a drag-and-drop interface with robust conditional logic options.
- Typeform: Known for its user-friendly design, it makes setting up conditional logic a breeze.
- Google Forms: While a bit more basic, it still allows for simple conditional logic setups.
For more information on creating a seamless camp experience, check out our nutritious and fun food ideas and explore the ultimate guide to English summer camps.
Integrating Registration Forms with External Tools
Ever thought, “How do I make my summer camp registration process seamless?”
You’re not alone.
Many camp organisers struggle with this.
But here’s the deal: integrating your registration forms with external tools can make your life a whole lot easier.
Why Integrate?
Imagine this: a parent fills out your registration form, and boom, all the data instantly syncs with your CRM, email marketing tool, and payment gateway.
No manual data entry.
No errors.
Just smooth sailing.
Top Tools to Consider
- CRM Systems: Tools like Salesforce or HubSpot can keep all your camper data organised.
- Email Marketing: Mailchimp and Constant Contact can help you send out those important camp updates.
- Payment Gateways: Stripe and PayPal make collecting fees straightforward and secure.
- Calendar Apps: Sync with Google Calendar or iCal to keep track of camp dates and deadlines.
How to Integrate
Integration sounds techy, right?
But it doesn’t have to be.
Here’s a simple roadmap:
- Choose Your Tools: Identify which CRM, email marketing, and payment systems you want to use.
- API Connections: Most platforms offer easy-to-use APIs. No need to be a tech wizard. Just follow the steps.
- Use Integration Platforms: Tools like Zapier or Integromat can act as the glue, connecting your registration form to multiple apps.
- Test Everything: Always run a few test registrations to make sure data flows smoothly from one tool to another.
Real-World Example
Let’s say you’re running a sports camp.
You use a tool like JotForm for registrations.
You integrate it with Mailchimp to send out newsletters and Stripe for payments.
A parent registers their child, pays the fee, and instantly gets a confirmation email.
All without you lifting a finger.
Benefits of Integration
- Time-Saving: Automate repetitive tasks.
- Accuracy: Reduce human error.
- Efficiency: Focus on what matters—running an awesome camp.
Enhancing Security and Compliance with GDPR and HIPAA Standards
Ever worried about how to keep your summer camp registration forms secure and compliant with GDPR and HIPAA standards? You’re not alone. Many camp organizers are in the same boat, trying to navigate the complexities of data protection laws. So, let’s break it down.
Why GDPR and HIPAA Matter
First off, why should you care about GDPR and HIPAA? Well, GDPR (General Data Protection Regulation) is all about protecting the personal data of EU citizens. If your camp attracts participants from Europe, you need to comply. On the flip side, HIPAA (Health Insurance Portability and Accountability Act) is crucial if you’re handling medical information in the U.S. Ignoring these can lead to hefty fines and a loss of trust from your customers.
Key Steps to Ensure Compliance
So, how do we make sure our registration forms tick all the right boxes? Here are some straightforward steps:
- Data Encryption: Always encrypt personal and medical data. This means converting it into a secure code to prevent unauthorized access.
- Consent Forms: Clearly outline what data you’re collecting and why. Make sure participants or their guardians give explicit consent.
- Access Controls: Limit who can access the data. Only authorized personnel should have this privilege.
- Regular Audits: Conduct regular checks to ensure compliance. This helps you catch any lapses before they become big issues.
Real-Life Example
Imagine you’re running a summer camp that attracts kids from both the U.S. and Europe. You collect medical information to ensure the safety of your participants. By encrypting this data and obtaining explicit consent, you’re not just ticking a legal boxâyou’re also building trust with parents who are entrusting you with their child’s safety.
Internal Linking Opportunities
For more on how to include medical information and waivers, check out our section on Summer Camp Registration Form Template. And if you’re looking to integrate your forms with external tools, we’ve got you covered in Summer Camp Checklist.
Keeping It Real
Let’s be honest, no one wants to deal with legal jargon. But keeping your registration forms secure and compliant with GDPR and HIPAA doesn’t have to be a headache. Think of it as setting up a robust security system for your camp, one that protects not just your participants but also your reputation.
Optimizing Your Form for Social Media and Website Embedding

Ever wondered why your summer camp registration form isn’t getting the traction it deserves?
Let’s dive in.
Why Embed Your Form?
Visibility is key.
When your form is front and centre on social media and your website, it’s like having a billboard in Times Square.
More eyes, more sign-ups.
Steps to Embed Like a Pro
1. Choose the Right Platform
- Social Media: Facebook, Instagram, Twitter – each has its own quirks.
- Website: Make sure your site supports easy embedding.
2. Use Simple Tools
- Plugins and Widgets: These can make embedding a breeze.
- HTML Snippets: Sometimes, a little code goes a long way.
3. Design for Engagement
- Bold Headlines: Grab attention.
- Clear Call-to-Action: “Sign Up Now” should be impossible to miss.
4. Keep It Mobile-Friendly
- Most people scroll on their phones.
- Ensure your form looks sharp on any device.
Real Talk: Common Pitfalls
- Clunky Design: If it looks like a tax form, no one’s filling it out.
- Slow Load Times: Test it. No one waits for a slow page.
Pro Tips for Social Media
- Share Stories: Highlight past campers’ experiences.
- Use Videos: A quick clip showing camp fun can boost interest.
Website Embedding Done Right
- Above the Fold: Keep your form visible without scrolling.
- SEO Optimisation: Use keywords like “summer camp registration” to attract organic traffic.
Embedding your form isn’t rocket science.
But it requires a little strategy.
Get it right, and you’ll see those registrations soar.
Remember, visibility is key.
Make it easy, make it engaging, and watch your camp fill up.
Got questions or need more tips?
Let’s chat.
Streamlining Data Collection and Reporting for Camp Management
Ever feel like you’re drowning in a sea of data when managing your camp registrations?
Yeah, me too.
But here’s the deal: **streamlining data collection and reporting** can be a game-changer.
Let’s break it down.
Why Bother with Streamlining?
**Efficiency**. You want things to run smoothly, right?
**Accuracy**. No one likes mistakes, especially when it comes to kids’ info.
**Insights**. Make better decisions with clear, actionable data.
How to Make It Happen
**1. Use Smart Forms**
Smart forms are your best mate.
They auto-fill, validate data, and reduce errors.
**2. Centralise Your Data**
All data in one place.
No more hunting through emails or spreadsheets.
**3. Automate Reports**
Set up automatic reports.
Daily, weekly, whatever works for you.
Tools to Consider
– **Google Forms + Google Sheets**: Simple, free, and effective.
– **JotForm**: Customisable and integrates with many platforms.
– **CampMinder**: Built specifically for camps.
Real-Life Example
Imagine you’re running a summer camp with 100 kids.
Each kid has a registration form.
If you’re using paper or basic forms, you’re in for a world of pain.
Switch to a smart form system, and you can:
– Automatically sort kids into activity groups.
– Instantly pull up medical info if needed.
– Generate attendance sheets without lifting a finger.
Key Tips
– **Keep It Simple**: Only collect data you actually need.
– **Regular Updates**: Keep your data fresh and up-to-date.
– **Secure Storage**: Use encrypted systems to protect sensitive info.
Quick Wins
– **Conditional Logic**: Ask relevant questions based on previous answers.
– **Mobile-Friendly**: Make sure forms work on all devices.
– **Real-Time Sync**: Sync data across platforms in real-time.
Streamlining data collection and reporting isn’t just a nice-to-have.
It’s a necessity.
It saves time, reduces errors, and makes your life easier.
And who doesn’t want that?
So, take the plunge and streamline your camp management today.
You’ll thank yourself later.
Got any tips or stories about managing camp data?
Drop them in the comments.
Let’s chat!
For more insights on camp management, check out our [comprehensive guide on summer camp costs](https://summercamp.blog/how-much-is-summer-camp-a-comprehensive-guide/) and learn about the [importance of having fun at summer camp](https://summercamp.blog/the-purpose-of-having-fun-at-summer-camp/).
FAQs: Summer Camp Registration Form Template
Why should I customize my summer camp registration form?
Customizing your registration form is essential because different camps have unique requirements. Whether it’s sports, art, or science camps, each type has specific needs that a one-size-fits-all form can’t address.
What are some key customization points for registration forms?
Consider adding camp type-specific questions, offering session options and dates, and segmenting questions based on age groups and skill levels to tailor your form effectively.
How can I add online payment options to my registration form?
Choose a payment processor like PayPal, Stripe, or Square, integrate it with your form using platforms like JotForm or Google Forms, and set up secure payment fields to streamline the payment process.
Why is making the registration form mobile-friendly important?
In today’s mobile-centric world, a mobile-friendly form ensures convenience and accessibility for busy parents, providing a smoother user experience and improving first impressions.
What are the steps to integrate registration forms with external tools?
Choose your tools (CRM, email marketing, payment gateways), use API connections, utilize integration platforms like Zapier, and always test to ensure smooth data flow.
How can I optimize my registration form for social media and website embedding?
Embed your form on social media and websites to increase visibility. Use plugins, widgets, and HTML snippets, and ensure the design is engaging and mobile-friendly to attract more sign-ups.
What are common pitfalls to avoid when embedding registration forms?
Avoid clunky designs and slow load times, as these can deter potential sign-ups. Ensure your form is visually appealing and loads quickly to keep users engaged.
How can I enhance engagement with my registration form on social media?
Share stories of past campers, use engaging videos, and ensure your call-to-action is clear and compelling to boost interest and participation.