Summer Camp Clipart: Enhance Your Visuals
Are you gearing up for a summer camp and need some eye-catching visuals to make your flyers, posters, and social media posts stand out? Look no further! In this article, we’ll explore the best websites to download summer camp clipart images, how to use them effectively, and tips for customizing them to fit your event perfectly. Whether you’re on a tight budget or ready to invest in premium options, we’ve got you covered.
From understanding the differences between free and premium clipart to choosing the right style and format, we’ll guide you through every step of the process. You’ll also discover how to optimize your clipart for social media, enhance activity sheets, and even create your own custom designs. Let’s dive in and make your summer camp materials not only look professional but also irresistibly engaging!
Best Websites to Download Summer Camp Clipart
Alright, so you’re gearing up for a summer camp, and you need some killer clipart to make your flyers, posters, and social media posts pop. But where do you even start? Let’s dive into the best websites to download summer camp clipart. Trust me; this will make your life a whole lot easier.
The Real Questions You Have:
- Where can I find high-quality summer camp clipart without breaking the bank?
- Are there any free options that don’t look like they were made in the ’90s?
- How can I make sure the clipart I download is easy to use and customise?
Top Websites to Get You Started:
Freepik
- Why It’s Great: Tons of free options, but the premium stuff is where it really shines.
- What You Get: Vectors, icons, and illustrations. Perfect for any summer camp theme.
- Pro Tip: If you find yourself downloading a lot, consider the premium plan. It’s worth it.
Canva
- Why It’s Great: User-friendly and loaded with templates.
- What You Get: Clipart, templates, and even a design tool to put it all together.
- Pro Tip: Use their free version first to get a feel. The paid version unlocks a treasure trove of assets.
Vecteezy
- Why It’s Great: A massive library of free and premium vectors.
- What You Get: High-quality vector graphics that are easy to customise.
- Pro Tip: Check out their licensing terms. Some free downloads require attribution.
Pixabay
- Why It’s Great: Completely free and no attribution required.
- What You Get: Clipart, photos, and illustrations.
- Pro Tip: Use the search filters to narrow down exactly what you need. Saves a ton of time.
Creative Market
- Why It’s Great: Premium, high-quality designs from independent creators.
- What You Get: Unique and professional clipart that stands out.
- Pro Tip: Sign up for their newsletter. They often have free goodies and discounts.
Internal Linking Opportunity:
Once you’ve got your clipart, check out our Ultimate Guide to Summer Camp Icons and Themes to make the most of your new assets.
Real Talk: Why These Sites Rock
I’ve been in your shoes, scrambling to find decent clipart that doesn’t look like it was made by a toddler. These sites have saved me countless hours and headaches. Whether you’re running a small local camp or a massive summer extravaganza, having the right visuals can make all the difference. And hey, if you’re on a tight budget, there are still plenty of free options that look professional and engaging. For more tips on making your camp a success, don’t miss our Summer Camp Guide: Find the Perfect Fit.
How to Use Summer Camp Clipart in Flyers and Posters
Ever wondered how to make your summer camp flyers and posters pop? Let’s dive in.
You want your flyer to grab attention, right?
Summer camp clipart is your secret weapon.
Why Use Clipart?
Clipart can transform a plain flyer into something eye-catching and fun.
Kids and parents will notice it.
And that’s what you want.
Key Steps to Use Clipart Effectively
1. Choose the Right Clipart
Pick images that scream “summer camp.”
Think tents, campfires, and happy kids.
2. Placement is Everything
Don’t just slap clipart anywhere.
Place it where it can highlight important info.
Like next to the camp dates or the contact number.
3. Keep It Balanced
Too much clipart can be overwhelming.
Use it to complement your text, not overshadow it.
4. Consistent Style
Stick to one style of clipart.
Mixing too many styles can make your flyer look messy.
Practical Tips for Clipart Use
- Highlight Activities: Use clipart to showcase the activities your camp offers. Got canoeing? Add a canoe icon.
- Create Sections: Break up text-heavy areas with relevant clipart. It makes your flyer easier to read.
- Borders and Backgrounds: Use subtle clipart as borders or backgrounds to add flair without clutter.
Real-Life Examples
I once helped a friend with her summer camp poster.
We used a cheerful sun clipart near the camp dates.
Parents loved it.
It made the info stand out and added a fun vibe.
Final Thoughts
Using summer camp clipart effectively can make your flyers and posters shine.
Remember, balance is key.
Choose the right clipart, place it wisely, and keep it consistent.
Your summer camp flyer will not only look great but also attract the right attention.
Ready to make your flyer pop? Let’s get started!
Summer Camp Icons: Free vs Premium Options
Alright, let’s get real. You’re planning a summer camp and you need some killer clipart to make your flyers, posters, and social media posts pop. But you’re stuck wondering: should you go for free icons or splurge on premium ones? Let’s break it down.
The Free Icons: What’s the Deal?
Free summer camp icons are a godsend when you’re on a budget. But, let’s face it, they come with their own set of challenges. Here’s what you need to know:
- Quality: Free icons can be hit or miss. Some look great, while others are just… meh. You might have to sift through a lot of junk to find the gems.
- Variety: The selection is often limited. You might not find exactly what you’re looking for, especially if you need something specific.
- Usage Rights: Always, and I mean always, check the licensing. Some free icons require attribution, which means you have to give credit to the creator. Not a big deal, but something to keep in mind.
Pro Tip: Websites like Freepik, Flaticon, and Vecteezy offer a decent range of free icons. Just make sure to filter by “free” and double-check those usage rights.
The Premium Icons: Are They Worth It?
Now, let’s talk about premium icons. They come with a price tag, but they also bring a lot to the table:
- High Quality: Premium icons are usually top-notch. They’re designed by professionals, so you can expect crisp, clean, and visually appealing graphics.
- Variety and Customisation: You’ll find a wider range of styles and themes. Plus, many premium icons come with editable files, so you can tweak colours, shapes, and sizes to fit your needs.
- No Attribution: Most premium icons don’t require you to give credit. You pay for the convenience and peace of mind.
Pro Tip: Check out sites like Creative Market, Envato Elements, and Shutterstock for premium options. They offer bundles, which can save you money if you need a lot of icons.
Real Talk: What’s Right for You?
So, what’s the bottom line? If you’re running a small camp with a tight budget, free icons can get the job done. Just be prepared to spend some time searching and maybe compromising on quality.
If you’ve got a bit more to spend and you want your materials to look polished and professional, investing in premium icons is a no-brainer. The time you save and the quality you get make it worth every penny.
Quick Recap in a Table
| Feature | Free Icons | Premium Icons |
|---|---|---|
| Quality | Varies, can be inconsistent | High-quality, professional |
| Variety | Limited selection | Wide range, more options |
| Customisation | Often limited | Highly customisable |
| Usage Rights | May require attribution | No attribution needed |
| Cost | Free (usually) | Paid, but worth it |
Whether you go free or premium, the key is to make sure your summer camp materials look engaging and professional. Your choice depends on your budget, your needs, and how much time you’re willing to invest. Either way, with the right icons, you’ll be well on your way to creating standout content for your summer camp.
If you’re looking for more tips on creating standout materials, check out our guide on summer camp brochure design. Additionally, for those who want to dive deeper into camp culture, our article on exploring summer camp culture is a must-read.
Tips for Customising Summer Camp Clipart for Your Event

Alright, let’s talk about customising summer camp clipart.
You want your event to stand out, right?
But how do you make generic clipart feel unique?
Here are some quick tips to help you out.
Start with Quality Clipart
First things first, choose high-quality clipart.
No one likes pixelated images.
Trust me, it makes a difference.
Use Your Camp’s Colour Scheme
Match the clipart to your camp’s colours.
It creates a cohesive look.
And it makes everything feel more professional.
Add Your Camp’s Logo
Slap your logo on the clipart.
It personalises the design and boosts brand recognition.
Play with Sizes and Layers
Don’t be afraid to resize and layer your clipart.
Make it fit your design.
Add Text Overlays
Throw in some text.
Whether it’s the camp name, dates, or fun slogans.
Just make sure it’s readable.
Mix and Match
Combine different clipart elements.
A tent here, a campfire there.
It keeps things interesting.
Use Filters and Effects
Add some filters or effects.
A little shadow or glow can make your clipart pop.
Keep It Simple
Don’t go overboard.
Too much clipart can clutter your design.
Less is often more.
Test It Out
Mock up your design and get feedback.
See what works and what doesn’t.
Stay Consistent
Whatever you do, keep it consistent.
Your clipart should all feel like it belongs together.
So, there you have it.
Customising summer camp clipart doesn’t have to be hard.
Just follow these tips, and you’ll create something that stands out.
And hey, if you need some quality clipart to start with, check out our list of the best websites to download summer camp clipart.
Happy designing!
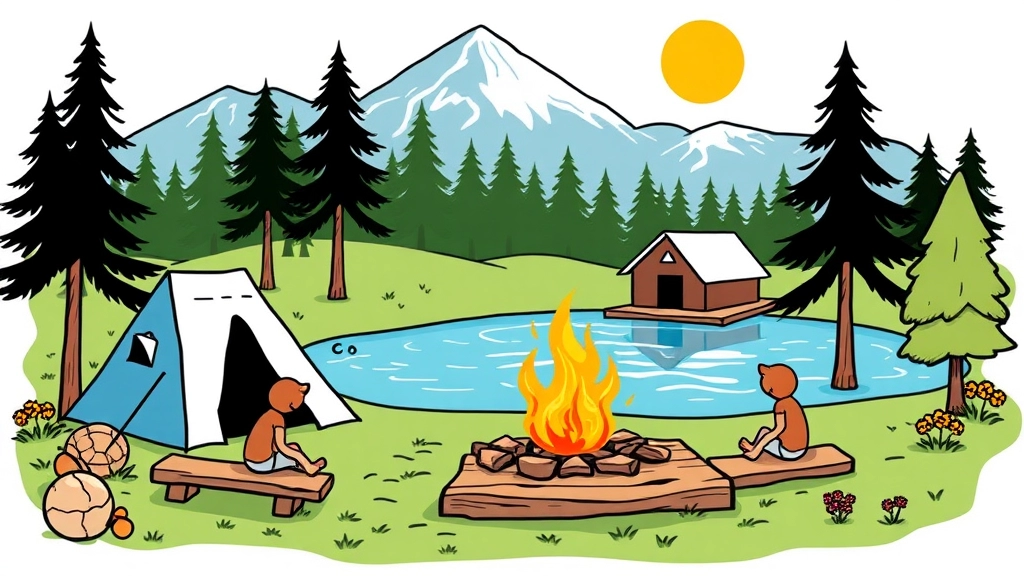
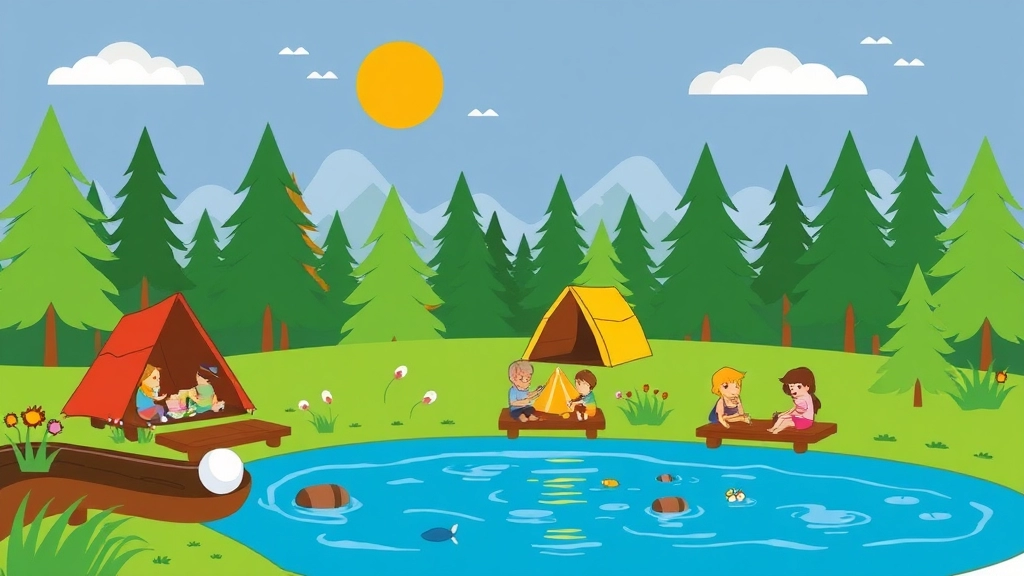
Popular Themes in Summer Camp Clipart
Ever wondered what makes summer camp flyers pop? It’s all about the clipart themes! Let’s break it down.
Classic Campfire Fun
When you think of summer camp, what’s the first thing that comes to mind? Probably a campfire with marshmallows, right? This classic theme never gets old:
- Campfires: Flames and logs, perfect for that warm, nostalgic feel.
- Marshmallows on sticks: Let’s be real, nothing says ‘camp’ like s’mores.
- Tents: Classic A-frame tents or modern pop-ups, tents scream adventure.
Outdoor Adventures
Kids go to camp for the thrill of the outdoors. Capture that excitement with these themes:
- Hiking Boots and Trails: Symbolize exploration and the great outdoors.
- Backpacks: Packed and ready for adventure.
- Maps and Compasses: Perfect for treasure hunts and orienteering.
Water Activities
Summer camps often feature some epic water fun. These themes are a splash:
- Canoes and Kayaks: For the paddling enthusiasts.
- Swimming Pools and Lakes: Blue waters always look inviting.
- Fish and Fishing Rods: For the budding anglers.
Team Sports
Camps are also about teamwork and sportsmanship. Highlight these with:
- Soccer Balls and Goals: A universal symbol of team sports.
- Baseball Bats and Gloves: Classic summer sports gear.
- Basketballs and Hoops: For those slam-dunk moments.
Arts and Crafts
Let’s not forget the creative side of camp:
- Paintbrushes and Palettes: For the budding artists.
- Beads and Strings: Perfect for friendship bracelets.
- Clay and Sculpting Tools: For the hands-on crafters.
Nature and Wildlife
Nature is a big part of the camp experience. Bring it to life with:
- Trees and Leaves: Evergreen or deciduous, trees set the scene.
- Wildlife: Think deer, rabbits, and birds.
- Flowers and Plants: Add a touch of nature’s beauty.
Adventure and Exploration
For the little explorers and adventurers:
- Binoculars: For spotting wildlife or distant landmarks.
- Treasure Chests: Perfect for pirate-themed camps.
- Ropes and Climbing Gear: For the thrill-seekers.
Science and Discovery
For camps with an educational twist:
- Microscopes and Test Tubes: For the budding scientists.
- Stars and Planets: Ideal for astronomy nights.
- Insects and Magnifying Glasses: Perfect for budding entomologists.
For more ideas on how to make your camp stand out, check out our Top Summer Camp Clipart Sources and Tips and discover creative Fun Summer Camp Crafts for Kids to add more excitement to your camp activities.
How to Choose the Right Clipart Style for Kids’ Camps

Picking the right clipart style for a kids’ camp can be a game-changer.
You want something that grabs attention but also feels fun and approachable.
So, how do you nail it?
What Are You Aiming For?
First off, what’s the vibe of your camp?
Is it adventurous, artsy, or educational?
The clipart should reflect this.
Age Matters
Think about the age group.
Younger kids?
Go for bright colours and simple shapes.
Older kids?
Maybe something a bit more detailed but still fun.
Consistency is Key
Mixing too many styles can look messy.
Stick to one style throughout your flyers, posters, and social media.
Examples to Consider
Cartoonish and Fun:
Perfect for younger kids.
Think of big eyes, exaggerated expressions, and lots of colours.
Realistic and Detailed:
Better for older kids.
More lifelike images that still keep it light and engaging.
Minimalist:
Simple lines and shapes.
Works well if you want a clean, modern look.
Where to Find These Styles
There are tons of resources out there.
Free options like Pixabay and Vecteezy.
Or premium ones like Shutterstock and Adobe Stock.
Why It Matters
The right clipart can make your camp look professional and well-organised.
It sets the tone and gets kids excited.
Quick Tips
- Match the Theme: Align clipart with your camp’s activities.
- Stay Age-Appropriate: Younger kids love bright and simple, older kids can handle more detail.
- Consistency: Keep the style uniform across all materials.
- Quality Over Quantity: Better to have a few high-quality images than a bunch of low-res ones.
Top Summer Camp Clipart Formats: PNG, SVG, EPS
Ever wondered which clipart format is the best for your summer camp flyers and posters? Let’s break it down. Here’s the lowdown on PNG, SVG, and EPS formats, and why each one could be your best friend depending on what you’re aiming to achieve.
What’s the Deal with PNG?
PNG is like the Swiss Army knife of clipart formats. It’s versatile, easy to use, and perfect for most basic needs.
- High-Quality Images: PNGs maintain high resolution, which means your summer camp clipart looks crisp and clear.
- Transparency: Need to layer images? PNGs support transparent backgrounds, making it easy to overlay your clipart on any background.
- Web-Friendly: PNGs are great for websites and social media. They load quickly and look good on screens of all sizes.
Example: Imagine you’re creating a summer camp flyer. You want a fun campfire graphic to overlay on a colourful background. A PNG file will keep that campfire looking sharp without any ugly white boxes around it.
Why SVG is a Game-Changer
SVGs are your go-to if you’re all about scalability and flexibility.
- Scalability: SVGs are vector-based, meaning they can be scaled up or down without losing quality. Perfect for everything from a tiny icon on a flyer to a massive banner at the camp entrance.
- Editability: Easily tweak colours, shapes, and sizes in design software like Adobe Illustrator.
- Lightweight: SVG files are generally smaller in size, which means faster load times on websites.
Example: You’re designing a summer camp T-shirt and need a logo that will look good whether it’s on a kid’s small shirt or an adult’s large. SVG is the format that will keep your design looking sharp at any size.
EPS: The Pro’s Choice
If you’re working on a professional project, EPS might be your best bet.
- High-Resolution Printing: EPS files are ideal for high-quality print jobs. Think brochures, posters, and banners.
- Compatibility: EPS files are widely supported by professional design software, making them a favourite for graphic designers.
- Detail-Oriented: They handle complex graphics and detailed illustrations exceptionally well.
Example: You’re printing a large banner for the camp entrance. An EPS file ensures that every detail of your clipart, from the intricate tree leaves to the tiny campers, remains sharp and vibrant.
Choosing the Right Format
So, which format should you pick? It all boils down to your specific needs:
- PNG for web use and simple designs.
- SVG for scalable, editable graphics.
- EPS for high-quality print materials.
Real-Life Application
When I was designing materials for a summer camp last year, I found myself juggling between these formats. For social media posts, PNG was my go-to. For the camp’s logo and T-shirt designs, SVG was unbeatable. And for the big entrance banner, EPS was the clear winner. Each format played its part perfectly, making the whole project come together seamlessly.
If you’re still unsure which format to use, check out our top summer camp clipart sources and tips for more guidance.
How to Optimize Summer Camp Clipart for Social Media
Struggling to make your summer camp clipart pop on social media?
You’re not alone.
Let’s dive into some straightforward tips to make your clipart stand out.
Why Optimise Clipart for Social Media?
First off, why bother?
Simple.
Eye-catching visuals get more engagement.
More engagement means more sign-ups.
Quick Tips to Make Your Clipart Shine
- Choose the Right Format:
- PNG: Great for high-quality images with transparent backgrounds.
- SVG: Perfect for scalable graphics. No loss of quality.
- JPEG: Best for photos but not ideal for clipart.
- Size Matters:
- Keep it under 1200 x 630 pixels for Facebook.
- Instagram prefers 1080 x 1080 pixels.
- Twitter loves 1024 x 512 pixels.
- Smaller sizes load faster and look crisp.
- Colour Contrast:
- Use bright, contrasting colours.
- Make sure your clipart stands out against the background.
- Avoid colours that blend in too much.
- Add Text Overlays:
- Use bold fonts.
- Keep it short and sweet.
- Highlight key details like dates and activities.
- Consistency is Key:
- Use the same style across all platforms.
- Consistent branding builds recognition.
- Stick to your camp’s colour scheme.
Examples to Get You Going
Imagine this:
You’ve got an awesome clipart of a campfire.
But it’s plain.
Add a bold text overlay: “Join Us for Campfire Stories!”
Boom.
Instant engagement.
Tools to Use
- Canva: Super user-friendly for adding text and effects.
- Adobe Spark: Great for quick edits and animations.
- PicMonkey: Perfect for more detailed edits.
Keep It Real
Remember, folks want authenticity.
Share real moments.
Use clipart to highlight them.
For more tips on using clipart, check out our guide on Customising Summer Camp Clipart for Your Event.
Keep it fresh, keep it engaging, and keep those sign-ups rolling in.
Using Clipart to Enhance Summer Camp Activity Sheets
Alright, let’s talk about how to use clipart to jazz up those summer camp activity sheets. First off, why should you even care about clipart? Simple. Kids love visuals, and a well-placed image can turn a boring worksheet into something they’ll actually want to do. So, if you’re looking to keep those young campers engaged, clipart is your secret weapon.
Why Clipart Matters for Activity Sheets
Ever handed a kid a plain worksheet and watched their eyes glaze over? Yeah, we’ve all been there. Clipart can change that. Here’s why:
- Visual Appeal: Kids are naturally drawn to colourful and fun images.
- Engagement: Clipart can make instructions clearer and more engaging.
- Thematic Consistency: Using summer camp-themed clipart ties everything together, making your activity sheets feel like part of the larger camp experience.
How to Choose the Right Clipart
Not all clipart is created equal. Here’s what you need to consider:
- Relevance: Make sure the clipart matches the activity. If it’s a nature scavenger hunt, use images of trees, animals, and leaves.
- Quality: High-resolution images make a big difference. Blurry clipart? Hard pass.
- Style: Keep it consistent. If you’re using cartoonish images, stick to that style throughout the sheet.
Step-by-Step Guide to Adding Clipart
Alright, let’s get practical. Here’s how you can add clipart to your activity sheets without losing your mind:
- Select Your Clipart: Choose images that fit your theme and activities. Websites like Freepik and Canva are gold mines for this.
- Placement: Don’t just slap the images anywhere. Place them strategically to complement the text and activities.
- Resize and Align: Make sure your clipart fits well with the text. Too big, and it overshadows the content; too small, and it’s pointless.
- Test Print: Always do a test print. What looks good on screen might not look as great on paper.
Examples and Stories
Let me share a quick story. Last summer, I helped run a camp and we had this treasure hunt activity sheet. Initially, it was just plain text, and the kids were less than thrilled. We revamped it with pirate-themed clipartâthink treasure chests, maps, and pirate hats. The difference was night and day. The kids were not only more excited but also more engaged in the activity. It was a win-win.
Pro Tips for Maximum Impact
Here are some quick tips to make your clipart-enhanced activity sheets a hit:
- Interactive Elements: Use clipart to create interactive elements like cut-outs or stickers.
- Colour Coding: Use different colours to signify different sections or difficulty levels.
- Consistency: Stick to a colour palette that matches your camp’s branding.
Internal Linking Opportunities
If you’re looking for more ways to make your summer camp materials stand out, check out our guide on Summer Camp Themes: Creative Ideas for 2024. Also, don’t miss our section on Summer Camp Craft Activities: Fun for All Ages for tips on making your camp’s activities more engaging.
How to Create Your Own Summer Camp Clipart
Ever wondered how to create your own summer camp clipart?
It’s easier than you think.
And let’s face it, custom clipart can make your event stand out.
Here’s how to get started:
Why Create Your Own Clipart?
You might be asking, âWhy not just use free clipart?â
Good question.
Creating your own clipart gives you:
- Uniqueness: Your designs, your style.
- Flexibility: Tailor it exactly to your event’s theme.
- Branding: Consistent look and feel.
Tools You’ll Need
First things first, you need the right tools.
Here’s a quick list:
- Graphic Design Software: Adobe Illustrator, CorelDRAW, or even Canva for beginners.
- Tablet and Stylus: Wacom or iPad if you prefer drawing by hand.
- Stock Images: For inspiration and base elements.
Steps to Create Clipart
Alright, let’s dive in.
- Brainstorm Ideas:
- Think about what makes summer camp fun.
- Campfires, tents, marshmallows â you get the idea.
- Sketch Your Designs:
- Start with rough sketches.
- Don’t worry about perfection, just get your ideas down.
- Digitise Your Sketches:
- Scan your sketches or draw directly on your tablet.
- Use vector software to create clean lines and shapes.
- Add Colour:
- Choose a colour palette that matches your event’s theme.
- Keep it vibrant and fun.
- Refine and Finalise:
- Clean up any rough edges.
- Make sure your clipart looks good in different sizes.
Tips for Beginners
If you’re new to this, don’t sweat it.
Here are some pro tips:
- Start Simple: Basic shapes and lines.
- Use Tutorials: Tons of free resources online.
- Practice: The more you create, the better you get.
Real-Life Example
I remember creating clipart for a local summer camp.
We wanted something unique.
So, I sketched out a friendly campfire character.
Digitised it, added some fun colours, and voila!
The kids loved it, and it became the camp’s mascot.
Optimising Your Clipart
Once you’ve got your clipart, make sure it’s ready for use.
- File Formats: Save in PNG, SVG, and EPS.
- Resolution: High enough for print, but also web-friendly.
- Consistency: Keep a similar style across all your designs.
If you need more ideas for your summer camp, check out our creative summer camp themes and make your event unforgettable. For those interested in the visual side of things, our guide on summer camp cabin clipart styles might be just what you need.
FAQs on Using Summer Camp Clipart Images
Why should I use clipart in my summer camp flyers and posters?
Clipart can transform a plain flyer into something eye-catching and fun. It helps grab the attention of both kids and parents, making your flyer stand out.
How do I choose the right clipart for my summer camp materials?
Pick images that scream “summer camp,” such as tents, campfires, and happy kids. Ensure the clipart is high-quality and matches the theme and vibe of your camp.
What are some key steps to use clipart effectively?
Choose the right clipart, place it wisely, keep it balanced, and stick to a consistent style. Avoid overwhelming your design with too much clipart and ensure it complements your text.
Can I customize clipart to fit my camp’s branding?
Yes, you can customize clipart by matching it to your camp’s color scheme, adding your camp’s logo, resizing, layering, and adding text overlays. This personalizes the design and boosts brand recognition.
What clipart styles are suitable for kids’ camps?
Choose a style that reflects the vibe of your camp. For younger kids, use bright colors and simple shapes. For older kids, consider more detailed but still fun images. Keeping the style consistent across all materials is crucial.
How can I optimize clipart for social media?
Use the right format (PNG, SVG), ensure the size fits the platform requirements, use bright, contrasting colors, add text overlays, and maintain consistency in style and branding.
What tools can I use to edit and enhance clipart?
Tools like Canva, Adobe Spark, and PicMonkey are great for adding text, effects, and making quick edits to your clipart.
What are some practical tips for using clipart in flyers and posters?
- Highlight Activities: Use clipart to showcase camp activities like canoeing or hiking.
- Create Sections: Break up text-heavy areas with relevant clipart to make your flyer easier to read.
- Borders and Backgrounds: Use subtle clipart as borders or backgrounds to add flair without cluttering the design.
Where can I find high-quality summer camp clipart?
There are free options like Pixabay and Vecteezy, as well as premium options like Shutterstock and Adobe Stock. Always choose high-quality images to ensure your materials look professional.
Why is consistency important when using clipart?
Consistency in style and branding across all materials makes your camp look professional and well-organized. It helps in building recognition and trust among parents and kids.
References
-
Canva: Super user-friendly for adding text and effects.
-
Adobe Spark: Great for quick edits and animations.
-
PicMonkey: Perfect for more detailed edits.